
Have you tried to create smooth and pro level shots with your phone but ended up with a shaky mess? If so, you're not alone.
Creating cinematic camera moves with your phone can be challenging, especially if you don't have a gimbal or stabilizer to help you out.
But no worries.
In this blog post, I'm going to show you how to create amazing camera moves with your phone, for free, thanks to an app called Luma AI.
So if you're ready to take your video production to a whole new level, let's dive in.
What is Luma AI and why you should use it for cinematic camera moves
Luma AI is an app that uses a technology called NERFs, or Neural Radiance Fields, to turn your phone into a 3D scanner. It allows you to capture any object or scene with your phone and use their online editor to create your camera moves. You can choose from different capture modes, presets, and settings to create stunning videos that would be impossible to do otherwise.
You can use Luma AI to show your products, environments or just have fun, making it perfect whether you're a content creator or a marketer looking to stand out. You can download it from the app store and start creating right away.
How to use Luma AI
- Guided is the best one to capture an object. It gives you a step by step instructions and a guide that you can follow on screen
- Freeform is better for scenes. It is more of like an open world way of capturing.
- Upload works if you already have a video or multiple photos of the object that you want to capture. This is especially useful if you use professional cameras or drones, and you would like to import that footage into Luma.

- Open the app and tap on the plus icon.
- Choose the appropriate mode.
- Follow the instructions on the screen to position your phone and move it around the object. If you're using guided mode, you'll see a bounding box on screen that you can modify to place around the object. Then, follow the instructions and move around the object 3 times. Try to keep your phone steady and avoid shaking or tilting it.
- If you're using freeform or upload mode, you won't see the instructions, but try to fully cover the scene 3 times, from different heights.
- When you're done capturing the object, tap Finish. You can name your footage.
- Tap on the upload icon. Your capture will start processing automatically and you'll get a notification when it's ready.
Best practices for capturing with Luma AI
- Use good lighting conditions. Avoid any harsh lighting that can create glare or shadows in your capture.
- Keep your phone steady and smooth when moving it around the object or the scene. Avoid any movements or shakes that can cause motion, blur or distortion.
- Keep a consistent distance and angle from the object or scene while moving your phone around.
- avoid capturing reflective or transparent surfaces that can confuse the app.
- Don't capture moving backgrounds or people that interfere with the object or the scene that you want to scan. Luma will try to erase any people from your scene. But it will really decrease the quality of the capture.
How to edit your camera animation with the field editor in Luma AI
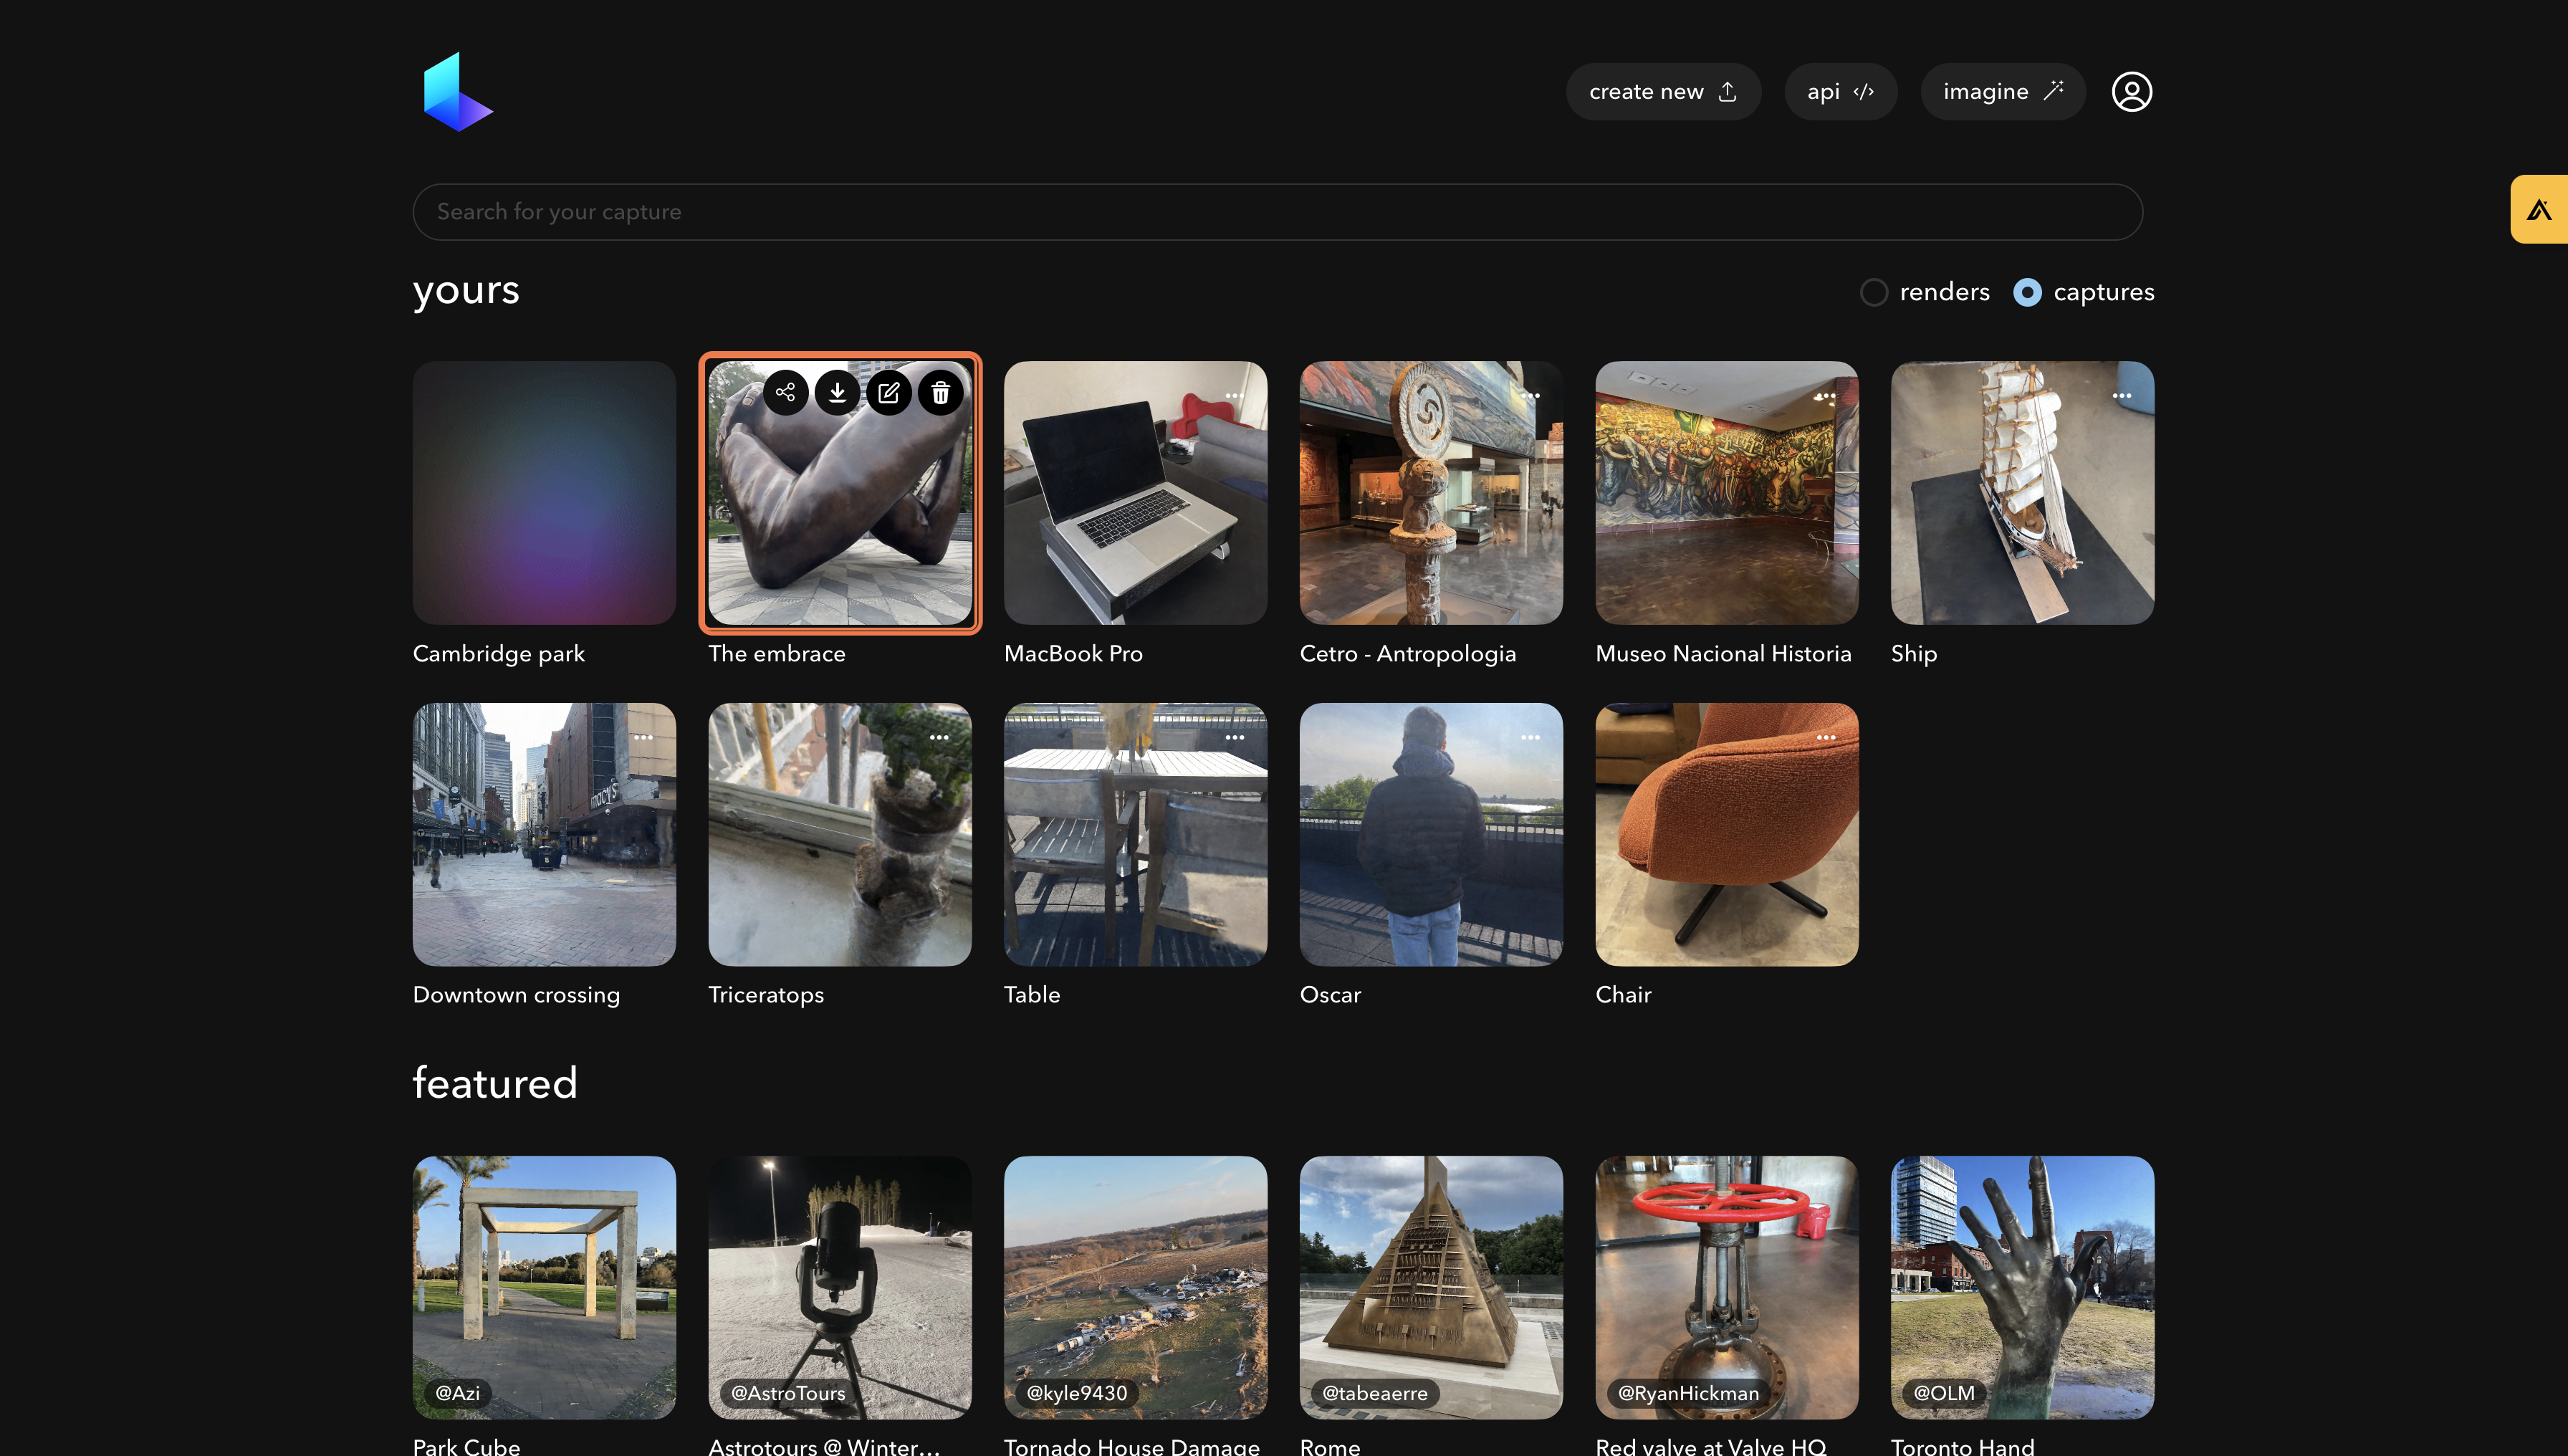
- Open the app or go to the web app and log in with your account.
- Tap on the capture that you want to edit from your library.
- Tap on the camera icon "Reshoot" to open it.
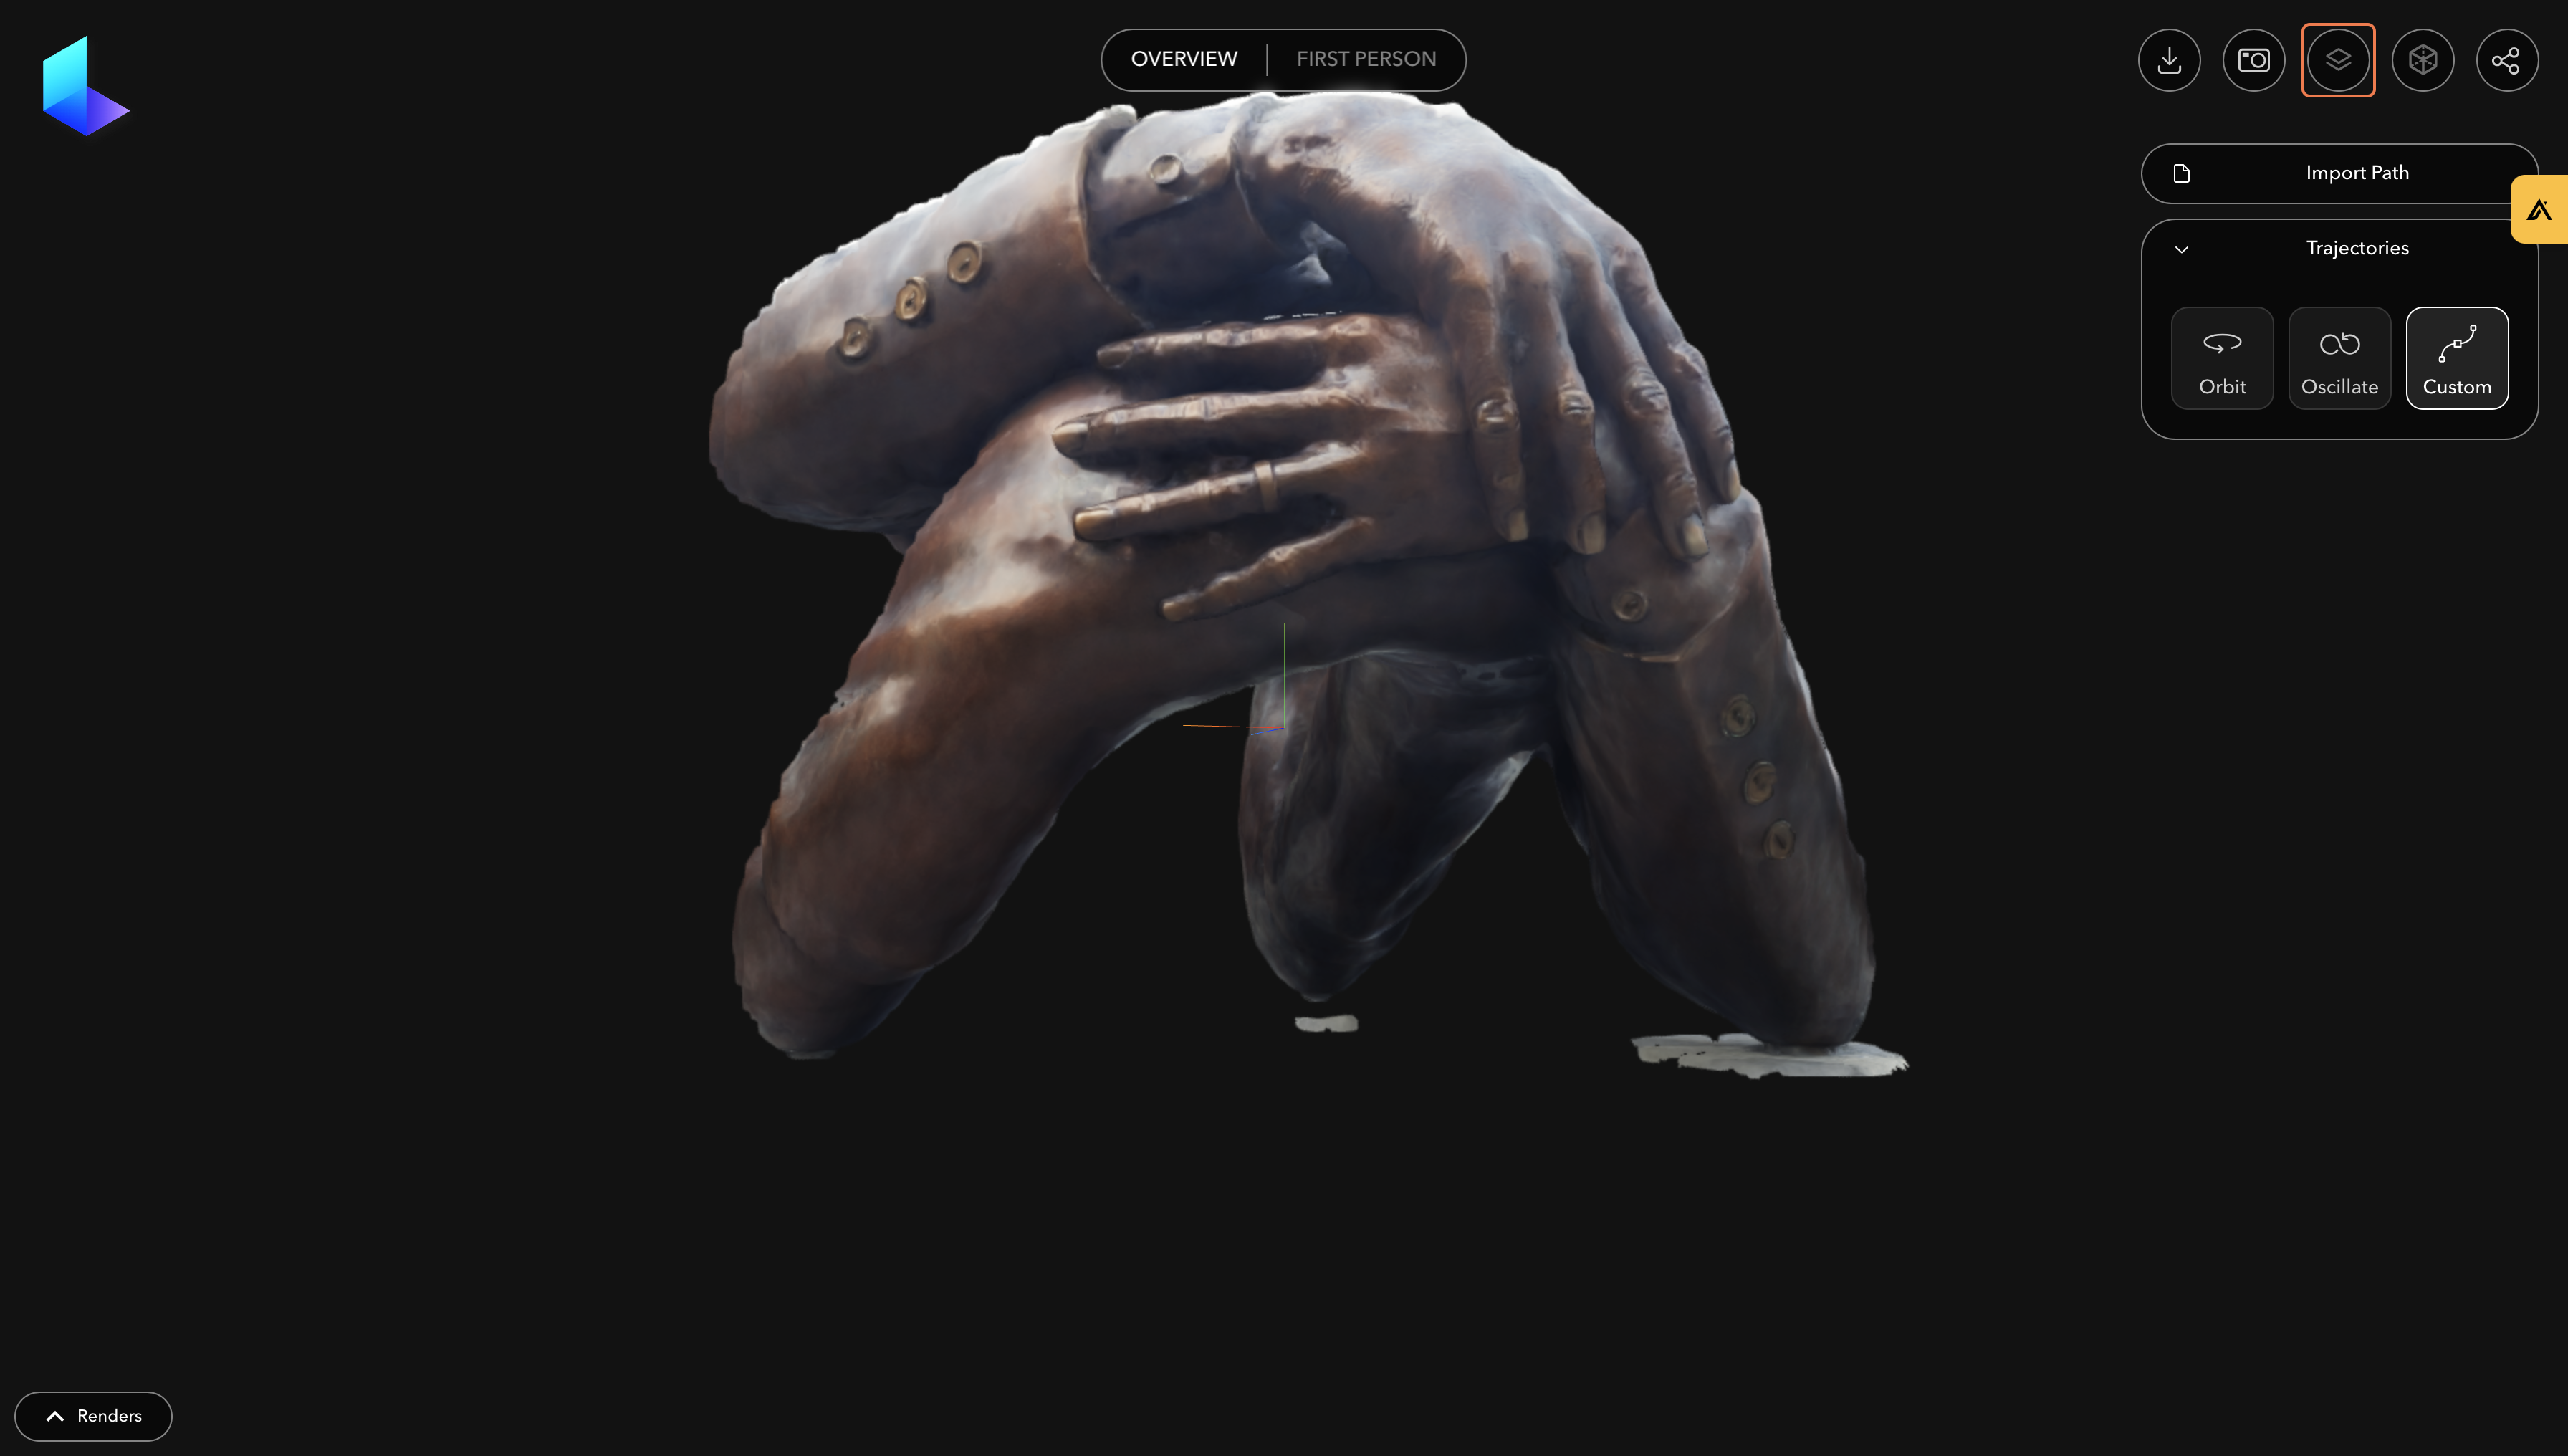
- You'll see your capture in 3D on the screen. You can use your mouse or fingers to navigate around it and zoom in or out.
- To create a camera movement, tap on the add keyframe icon. A keyframe is a point in time where you set the position and orientation of the camera. You can add as many keyframes as you want to create different camera moves.
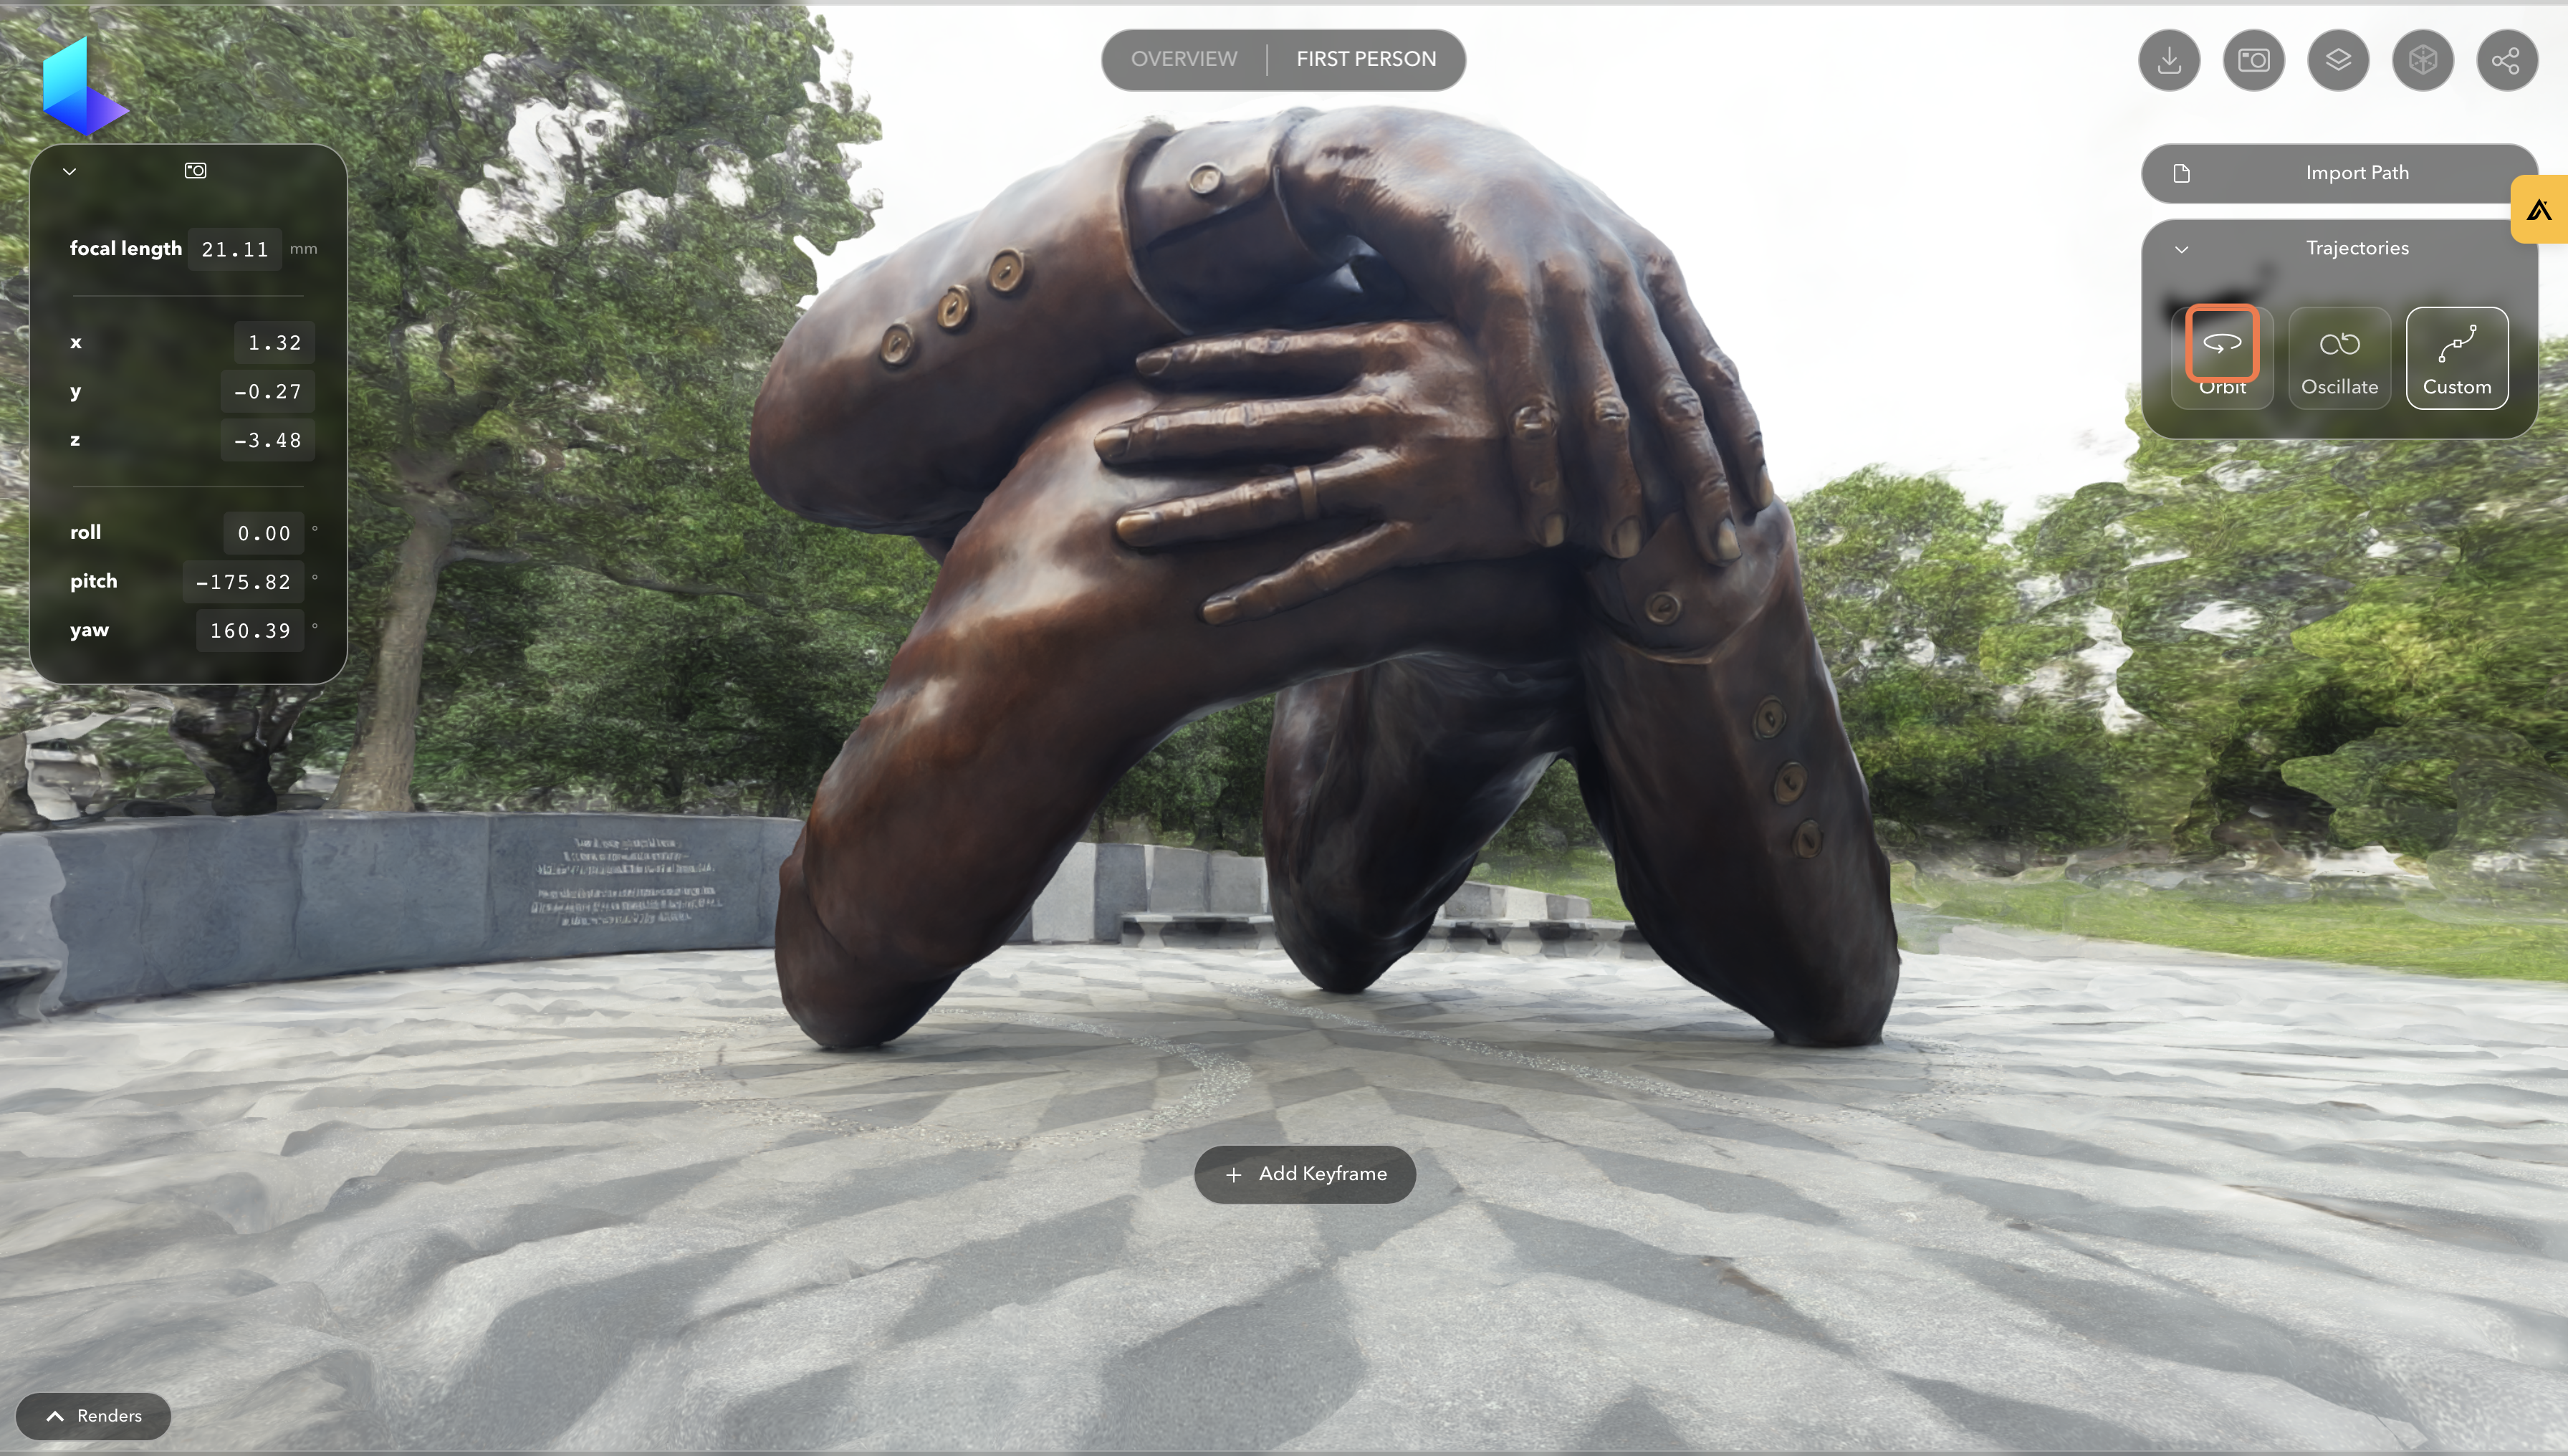
- To apply a preset, tap on the trajectory buttons. You'll see orbit or oscillate. A preset is a predefined camera movement that you can apply to your capture with one click. You can also customize the preset by editing its keyframes.
- To edit a keyframe, tap on it and drag the values on the editor. You can also adjust settings manually by entering the values directly. Use the keyboard shortcuts "E" and "I" to edit and insert keyframes, respectively.
- You can change the focal length of the camera, the distance to the subject, and the different angles around the object.
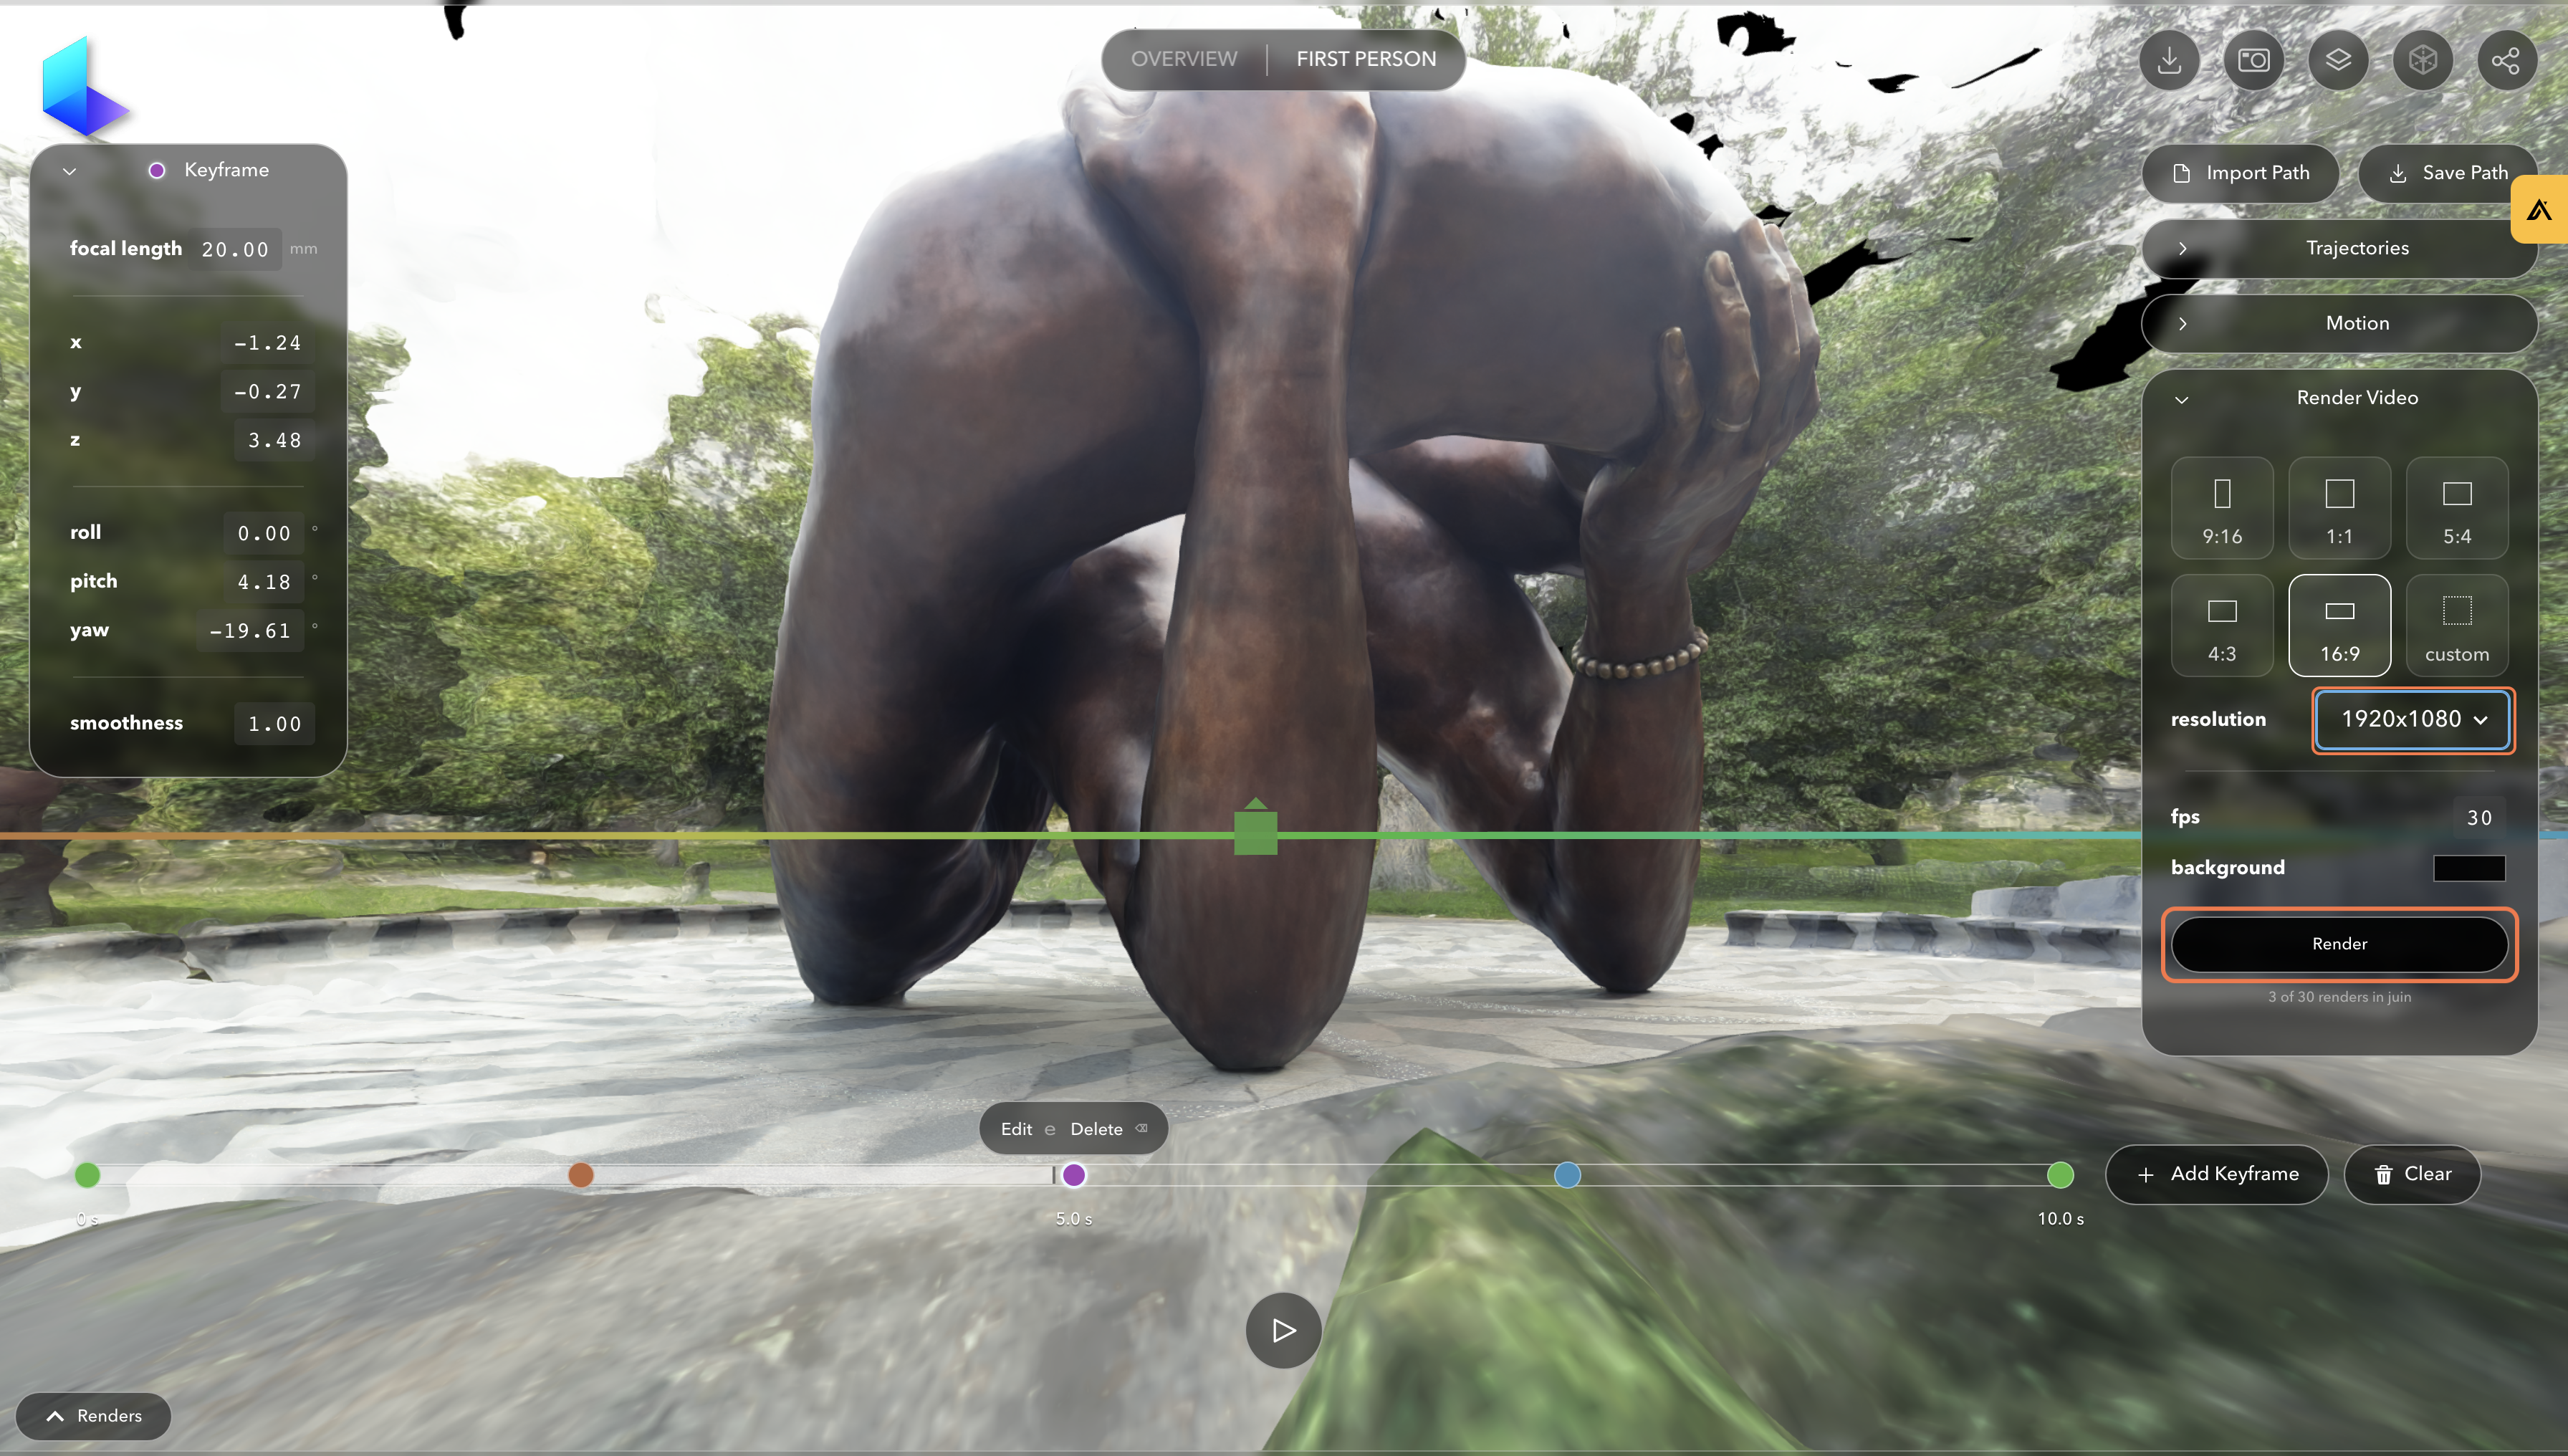
- Once you have created your keyframes, you will have access to parameters on the right hand side of the screen, like "Motion". Here you can select if you want a freeform or in-orbit motion. Freeform lets you move around in the X, y, Z direction, while Orbit fixes the point of view of the camera in the object.
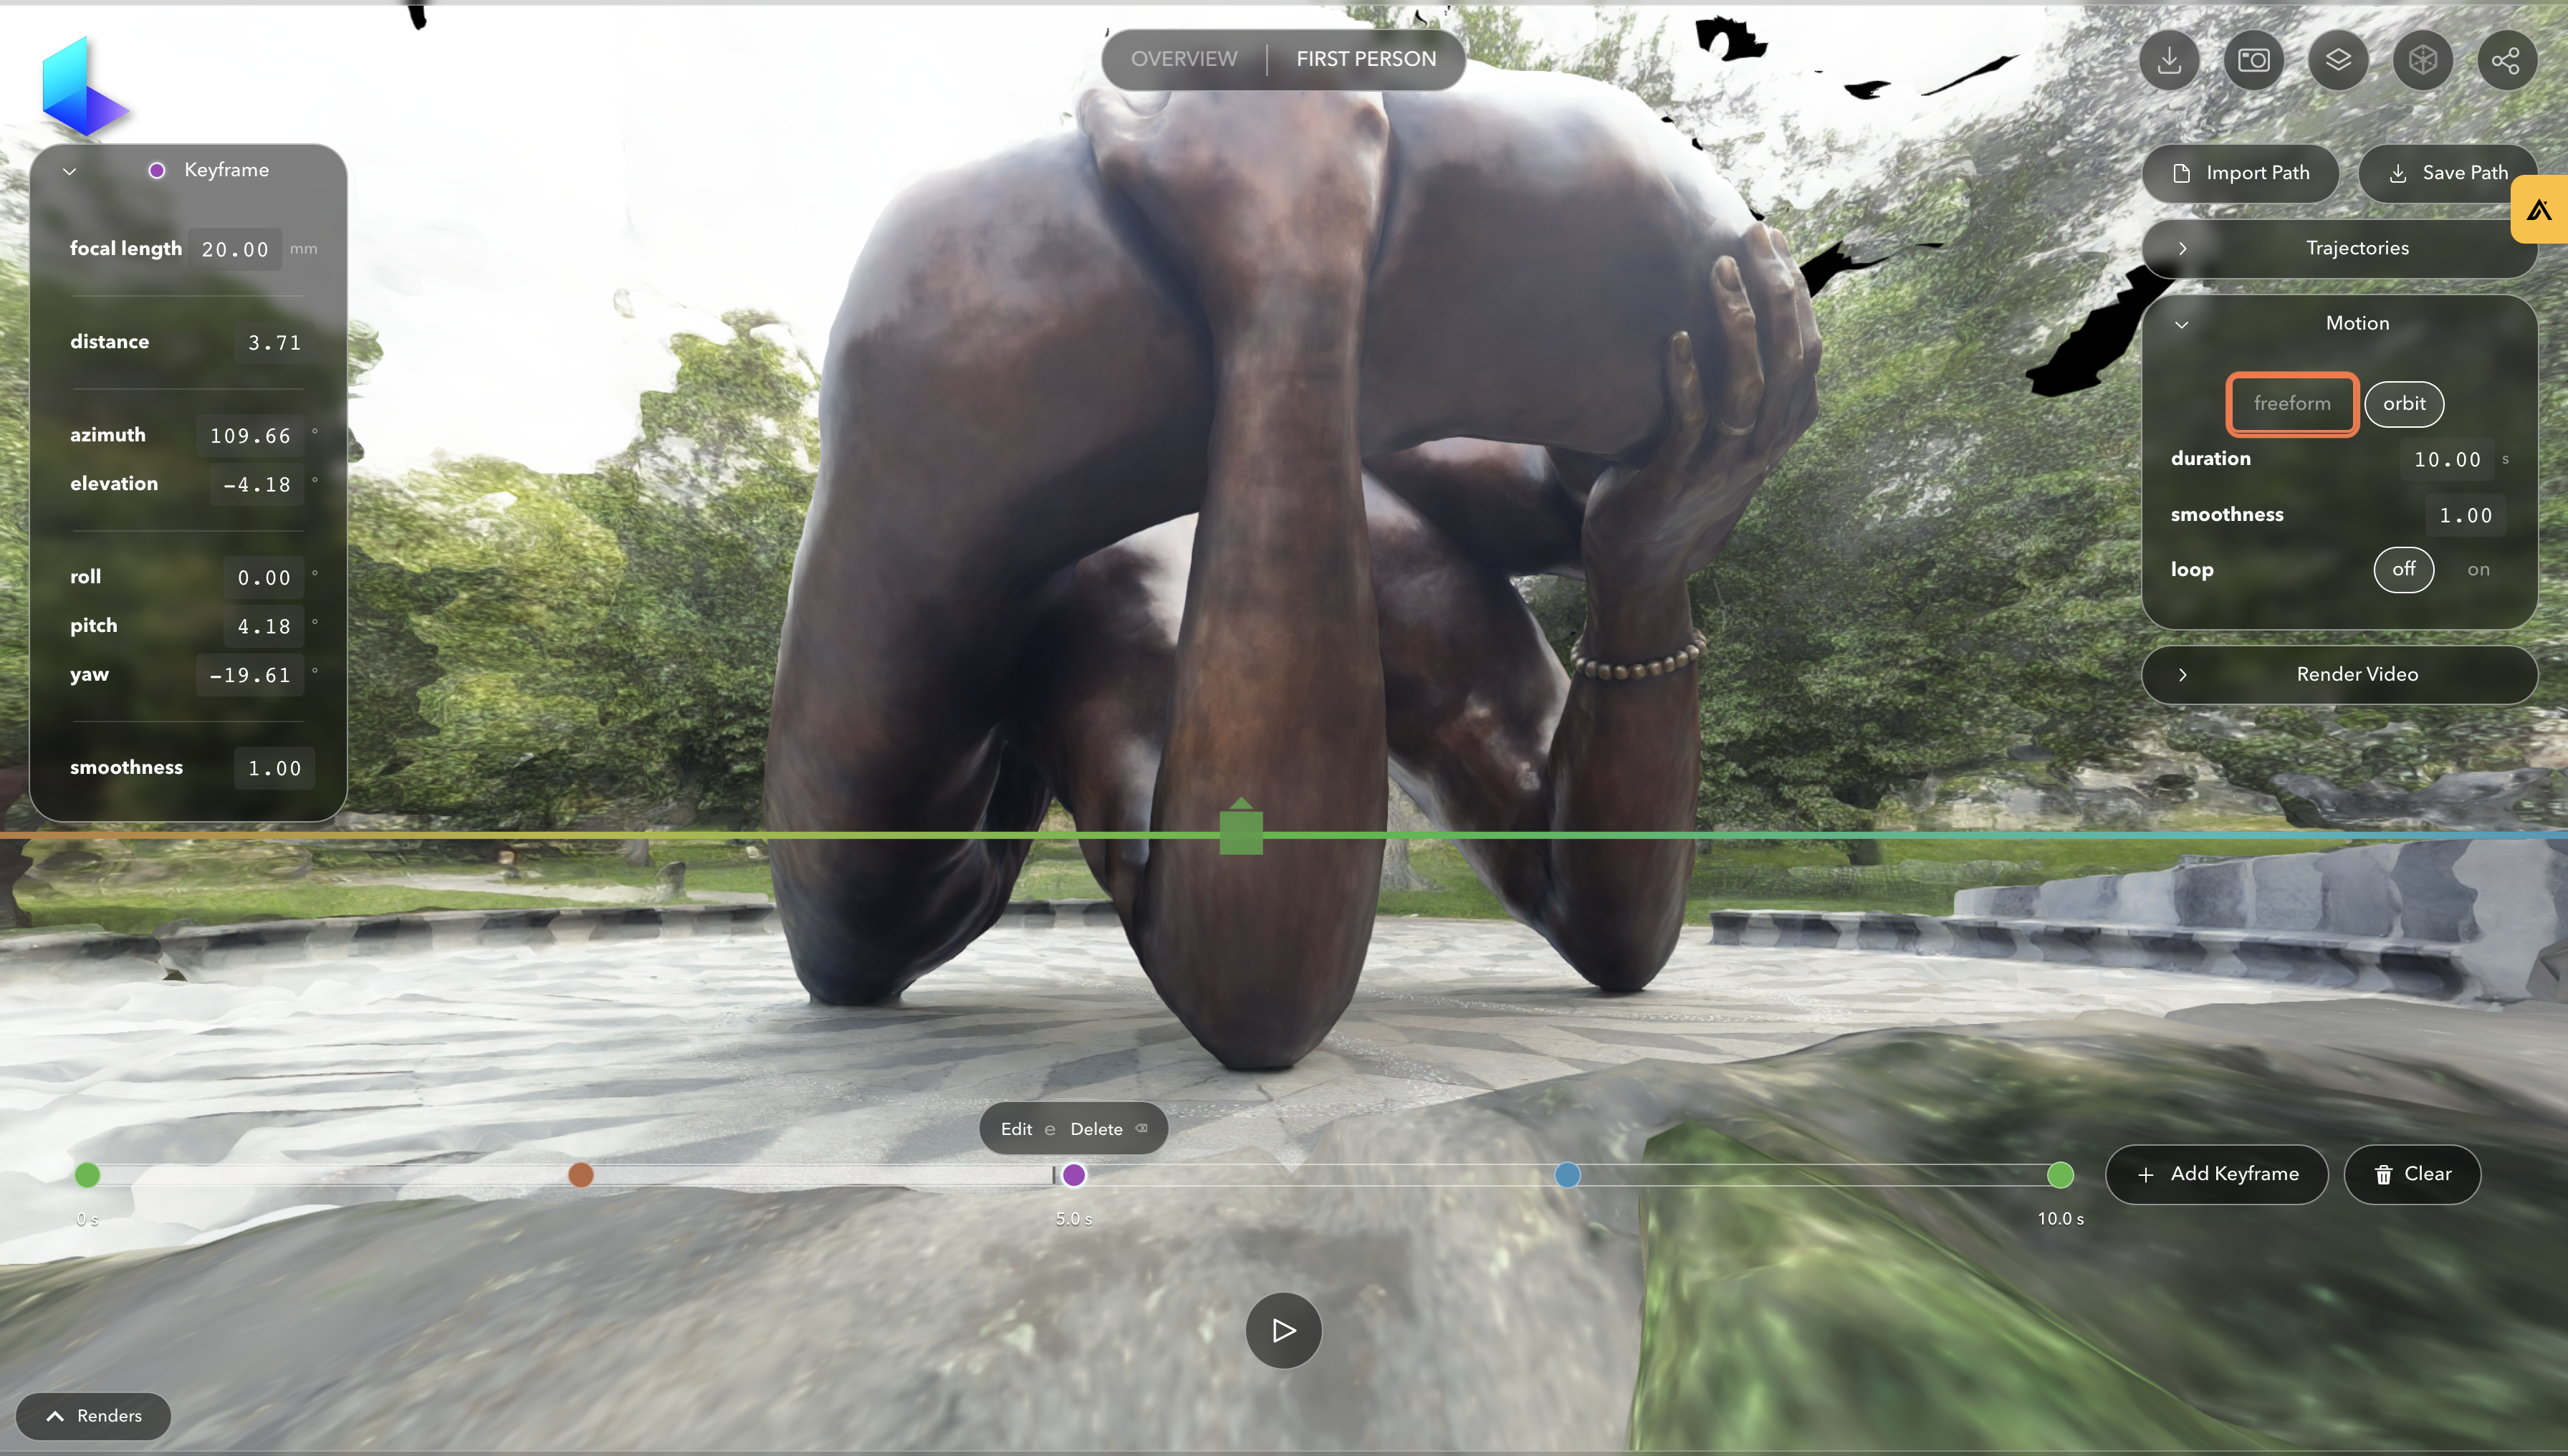
- To preview your animation, tap on the play icon. You'll see how your camera moves along the keyframes. You can also change the duration of your animation by using the controls on the right side. Keep in mind that the preview is draft quality and you will get the full quality once you click render.
- When you're happy with your animation, tap on the render button. You'll see a get your animation in full quality. You can also change the resolution and format of your video by using the options on the screen.
- I'd also recommend you download the motion path, so you can come back to it later if you want to refine the animation.
How to download and share your video from Luma AI
Once you're done with your video, you can download it as an mp4 file to share it wherever you want, including social media platforms such as Facebook, Instagram, YouTube, etc.
To download and share your 3D animation from Luma AI, follow these steps:
- Open the app or go to the web app and log in with your account.
- Tap on the capture that you want to download or share from your library.
-
Tap on the download icon to save your video to your device. You can choose the location and name of your file.
-
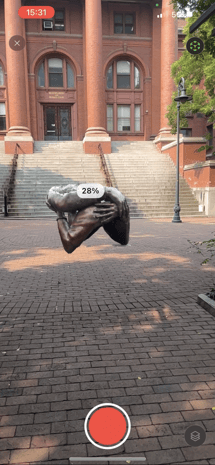
You can also download your scene as a GLTF or OBJ file that contains the geometry and textures of your model to be used in another 3D program like Blender. SketchFab, etc, or as an USDZ file be used in AR apps, for example AR Kit or Reality Composer.
Using Augmented Reality with Luma AI
Comments