
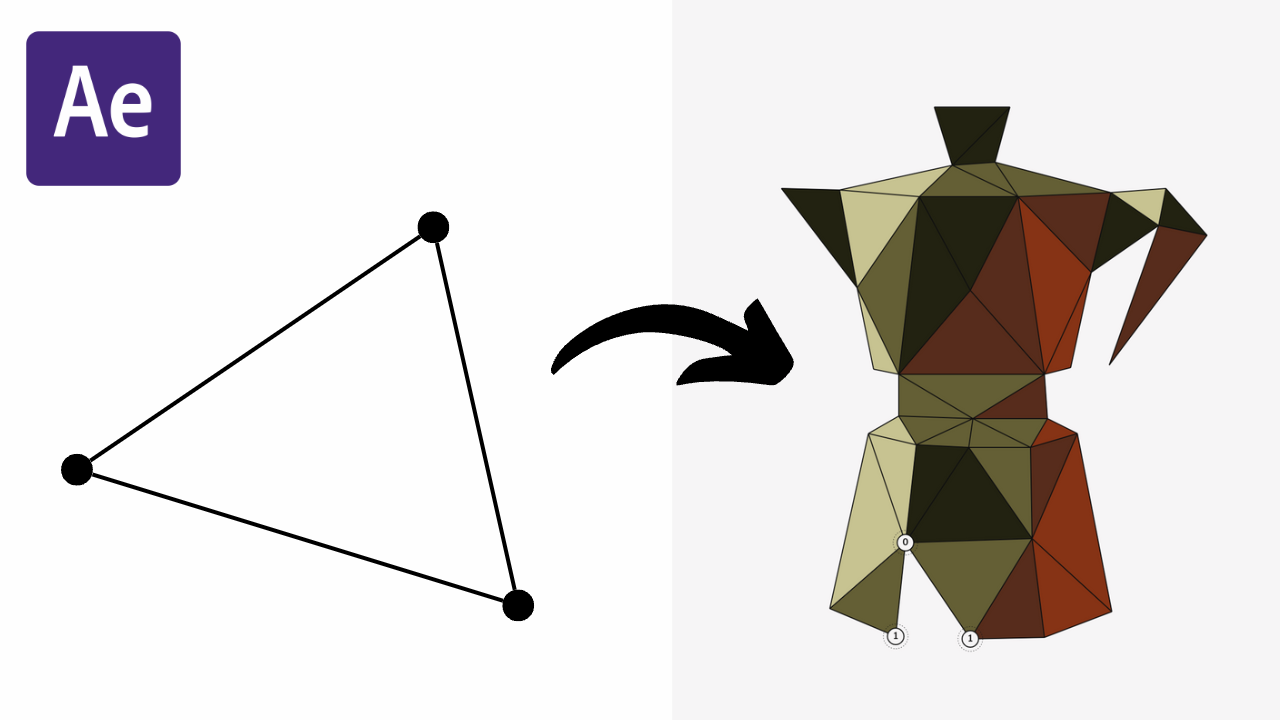
Let's create a connected network in After Effects without plugins!
Connecting dots and lines is one of the most popular styles of motion graphics, since it can be used to represent data, or item relationships in a simple way.
Now, if you've tried using plugins to create them, for example, like Connect Layers or the Beam Effect, you'll notice that they're great for creating abstract networks or
rather simple dots and lines.
But if you want to follow a specific design as a reference, like for example
, one you got from a designer
, I found those plugins rather difficult to implement.
So today I'm going to show you a process using the Essential Graphics Panel and your layer names so that you can easily create and expand simple networks into complex ones.
You will also
want
some basic knowledge of shape layers and expressions
to follow along, but I'll also explain them along the way.
Let's get started!
Step 1: Create Your Shapes
The first step is to create your shapes that will form the
vertices of the
network. You can use any shape you want, such as circles, squares, triangles, stars, etc. For this tutorial, we will use circles.
To create a circle shape layer, go to Layer > New > Shape Layer. Then go to the Add menu on the shape layer and choose Ellipse Path. This will create a circle path on the shape layer.
You can adjust the size and position of the circle by using the Ellipse Path properties. You can also change the fill and stroke color by using the Fill and Stroke properties.
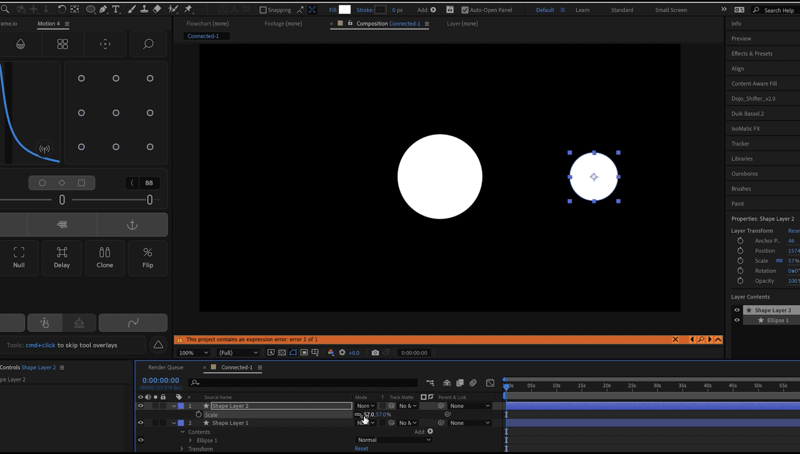
Once you're happy with it, duplicate
the shape layer by selecting it and pressing Ctrl+D (Windows) or Command+D (Mac)
, to create the next vertex.
Step 2: Draw a Path Between Shapes
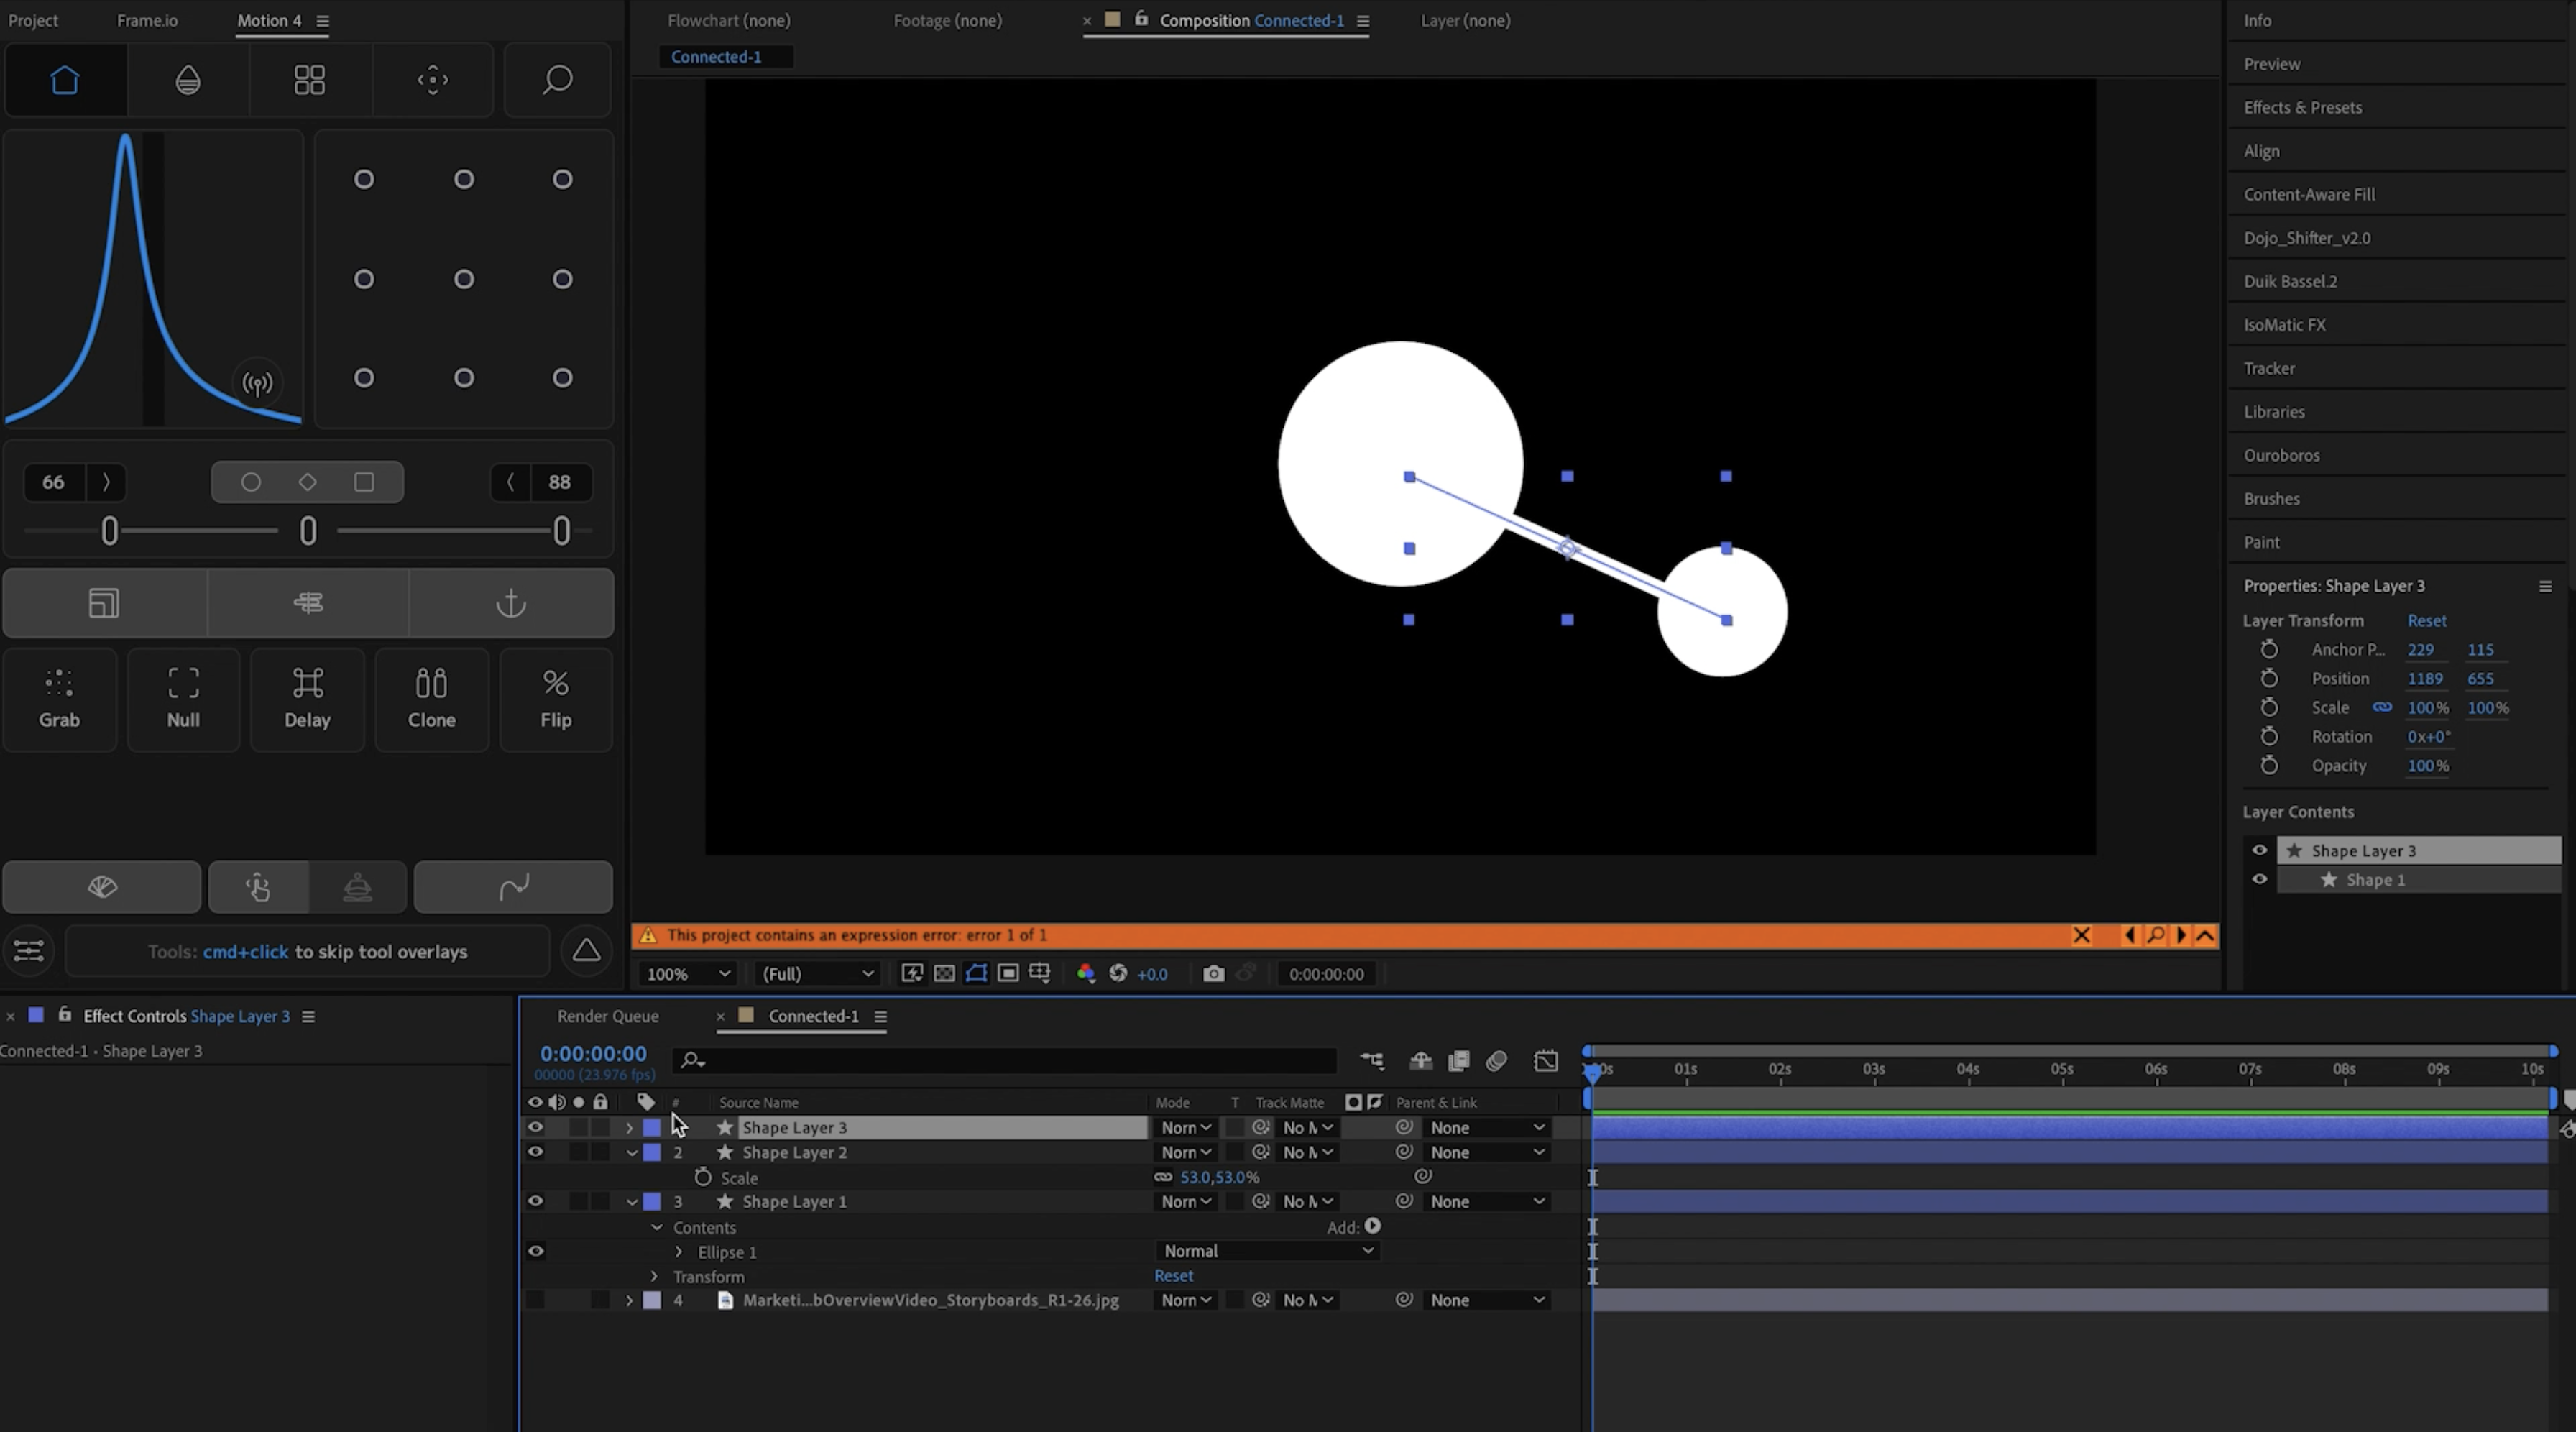
The next step is to draw a path between your shapes that will form the connection.
The easiest way is with
the Pen tool.
To draw a path with the Pen tool,
select it
from the
or click P in your keyboard.
Then click on on
the center of the first circle, and then on the center of the second one, to create
a path between
your layers.
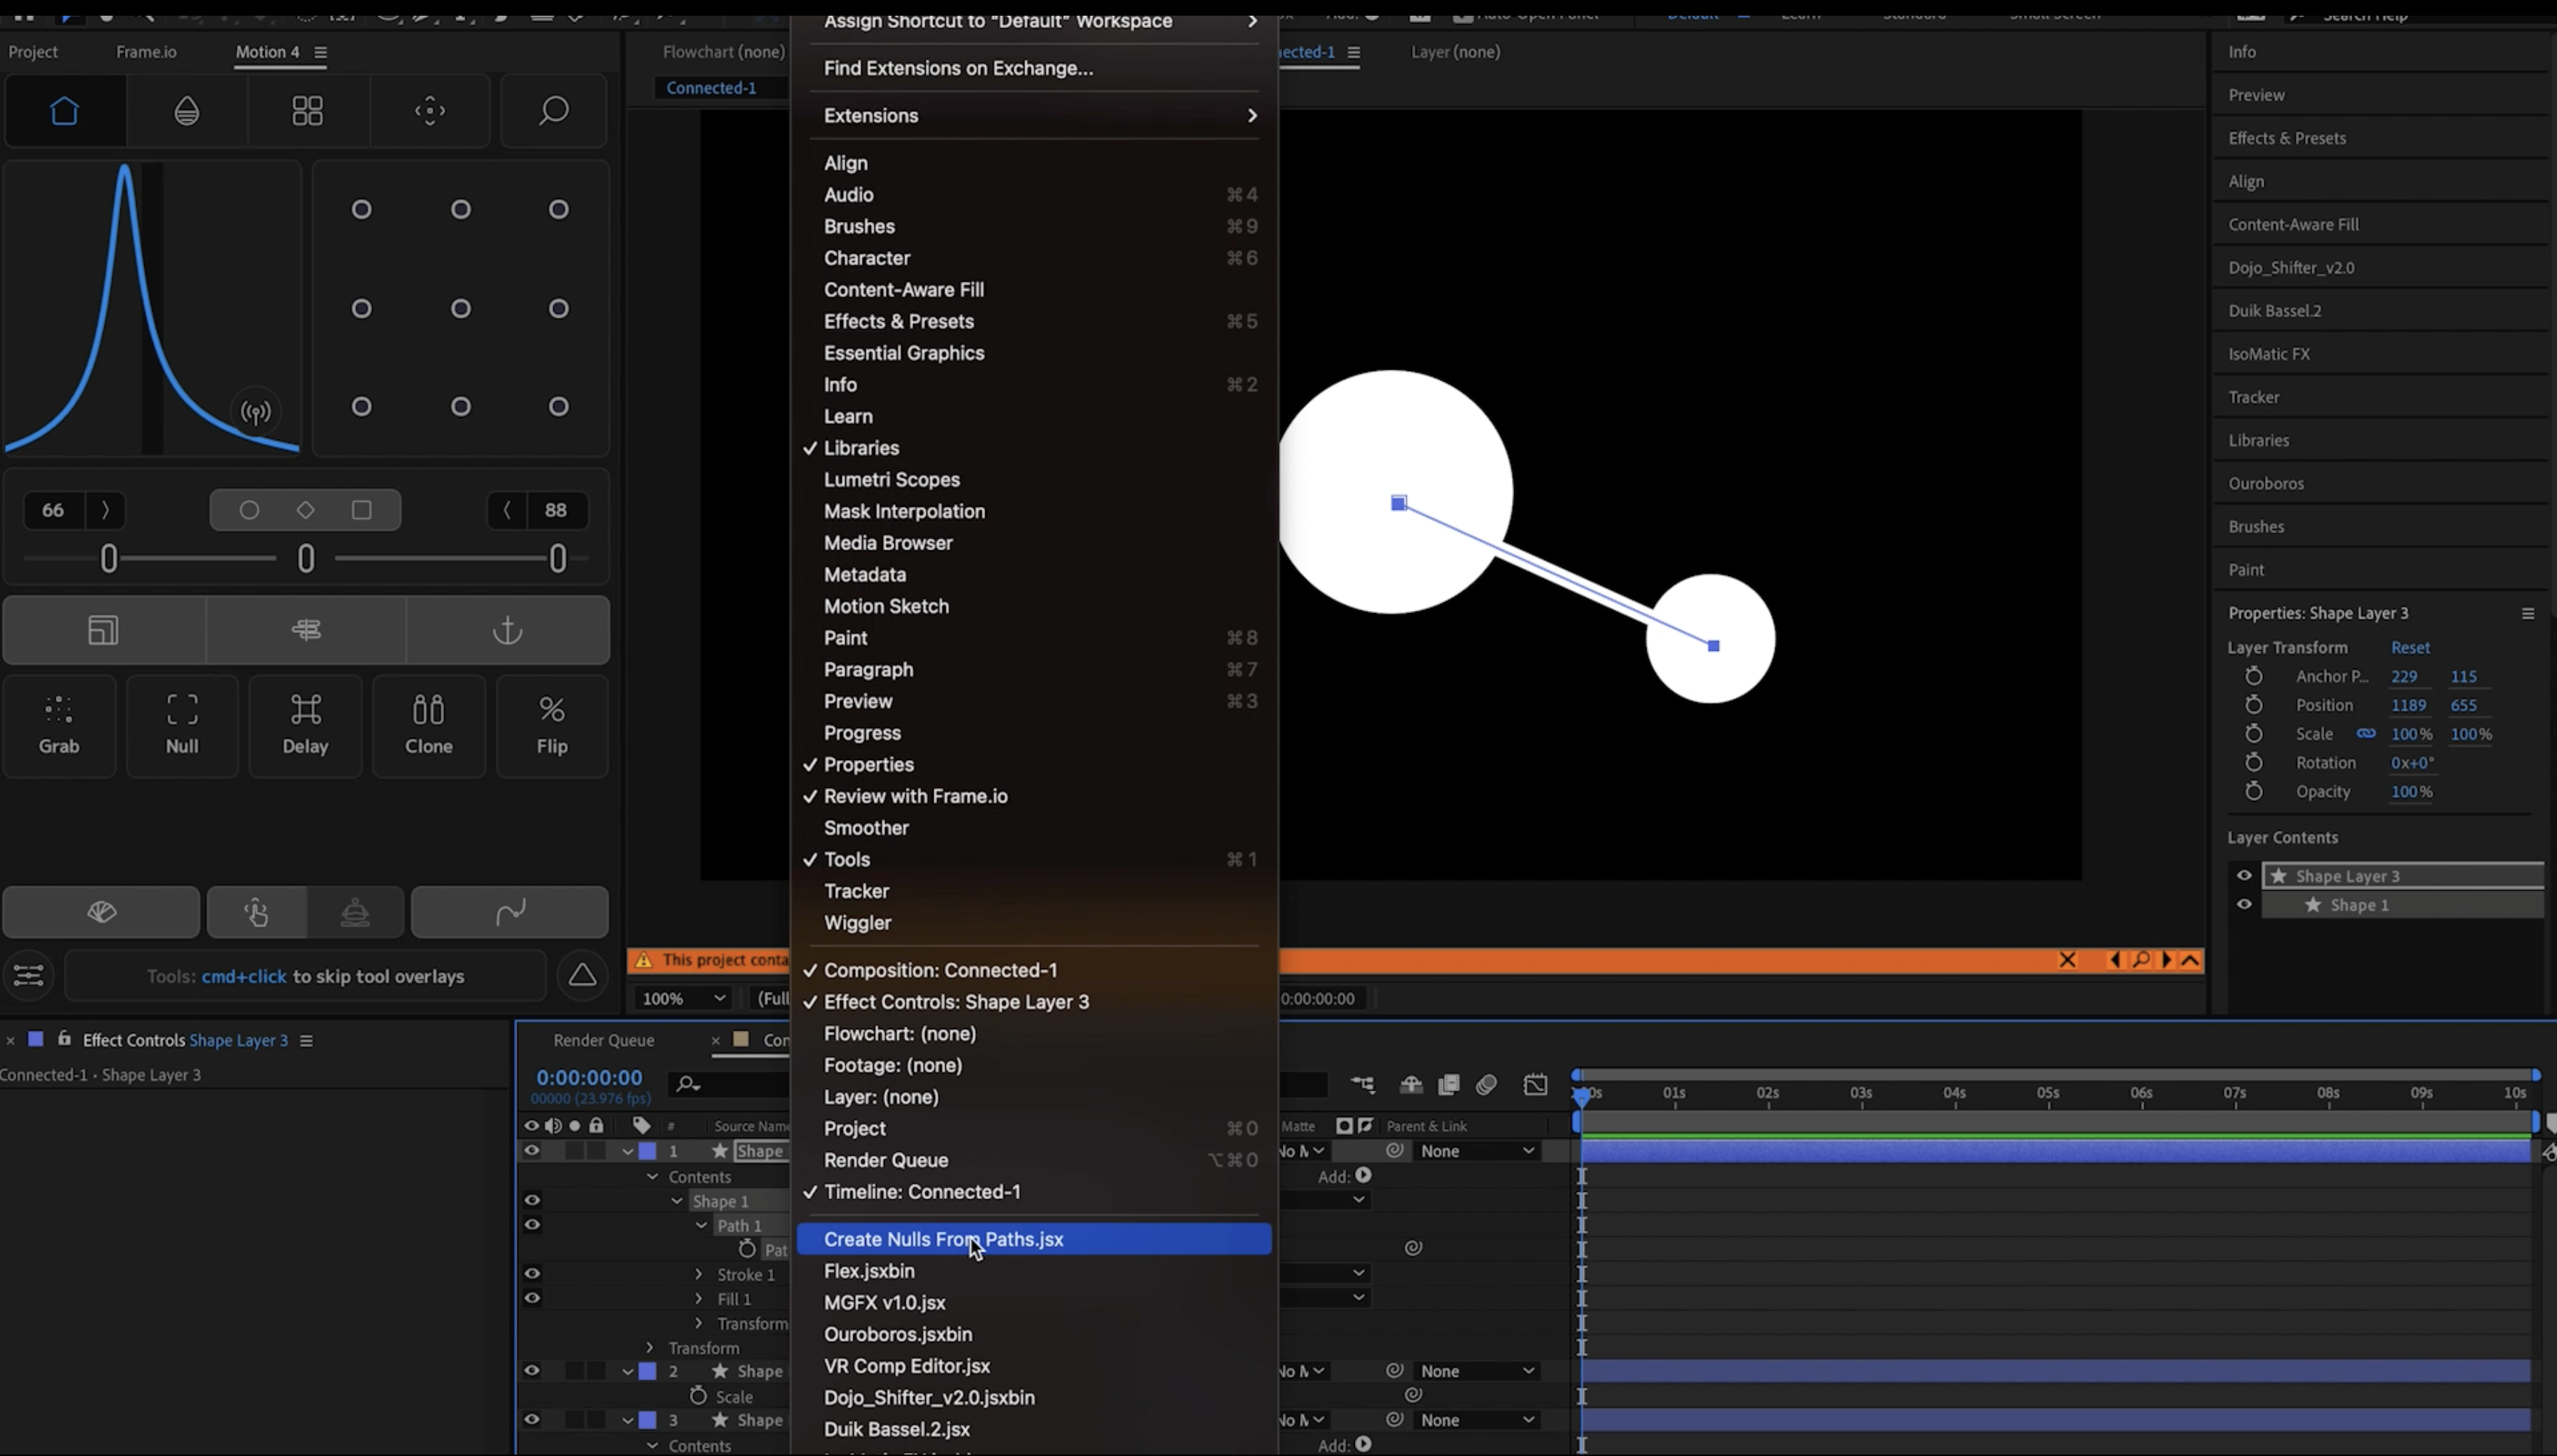
Step 3: Create Nulls from Paths
The next step is to create nulls
objects
that will control the
position of each end of your path
. Nulls are invisible layers that can be used as controllers or parents for other layers.
S
elect your path layer
, and go in the drop downs until you select the "Path" property. Then
go to Window > Create Nulls from Paths. This will open a script panel that allows you to create
the nulls.
Click on
Points Follow Nulls in the script panel. This will create
two
nulls on your composition that correspond to each
ends
of your path.
You can rename each Null and Path for simplicity.
Step 4: Precompose Your Path and Nulls
The next step is to precompose your path and nulls into a separate composition.
We will use this composition as a preset that we can then duplicate as many times as we need.
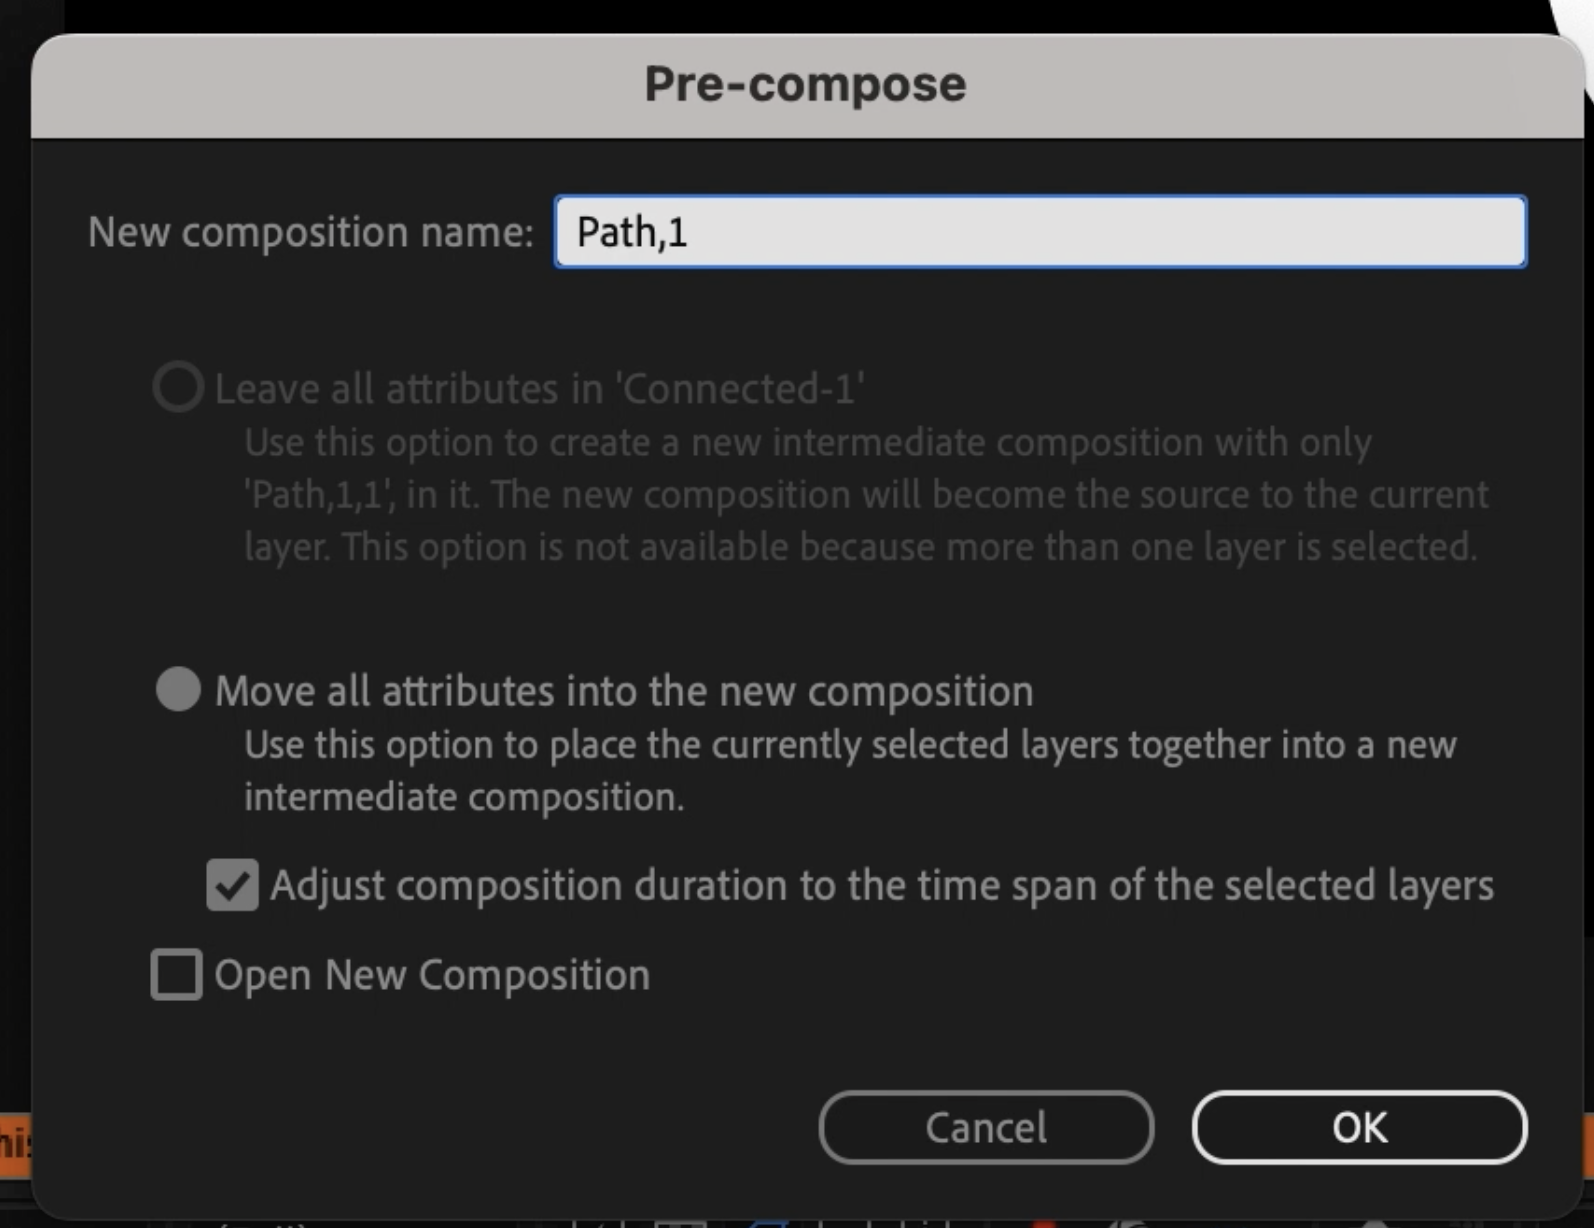
To precompose your path and nulls, select your path layer and your null layers and press Ctrl+Shift+C (Windows) or Command+Shift+C (Mac). This will open the Pre-compose dialog box.
Then choose a name for your precomp, such as
Path
1, and make sure that Move all attributes into the new composition is checked. Then click OK.
This will create a new composition with your path and nulls inside it, and replace them with a single layer in your main composition.
You can double-click on the precomposition layer to open it and see your path and nulls inside it.
Step 5: Add the Position of the Nulls and a Trim Paths to the Essential Graphics Panel
The next step is to add the position of the nulls and a trim paths to the Essential Graphics panel. The Essential Graphics panel allows you to create controls for
layers in your precomp
that can be edited
directly
the main composition
, without having to go back and forth between comps.
To open the Essential Graphics panel, go to
Composition
>
Open in
Essential Graphics.
In
the
precomp,
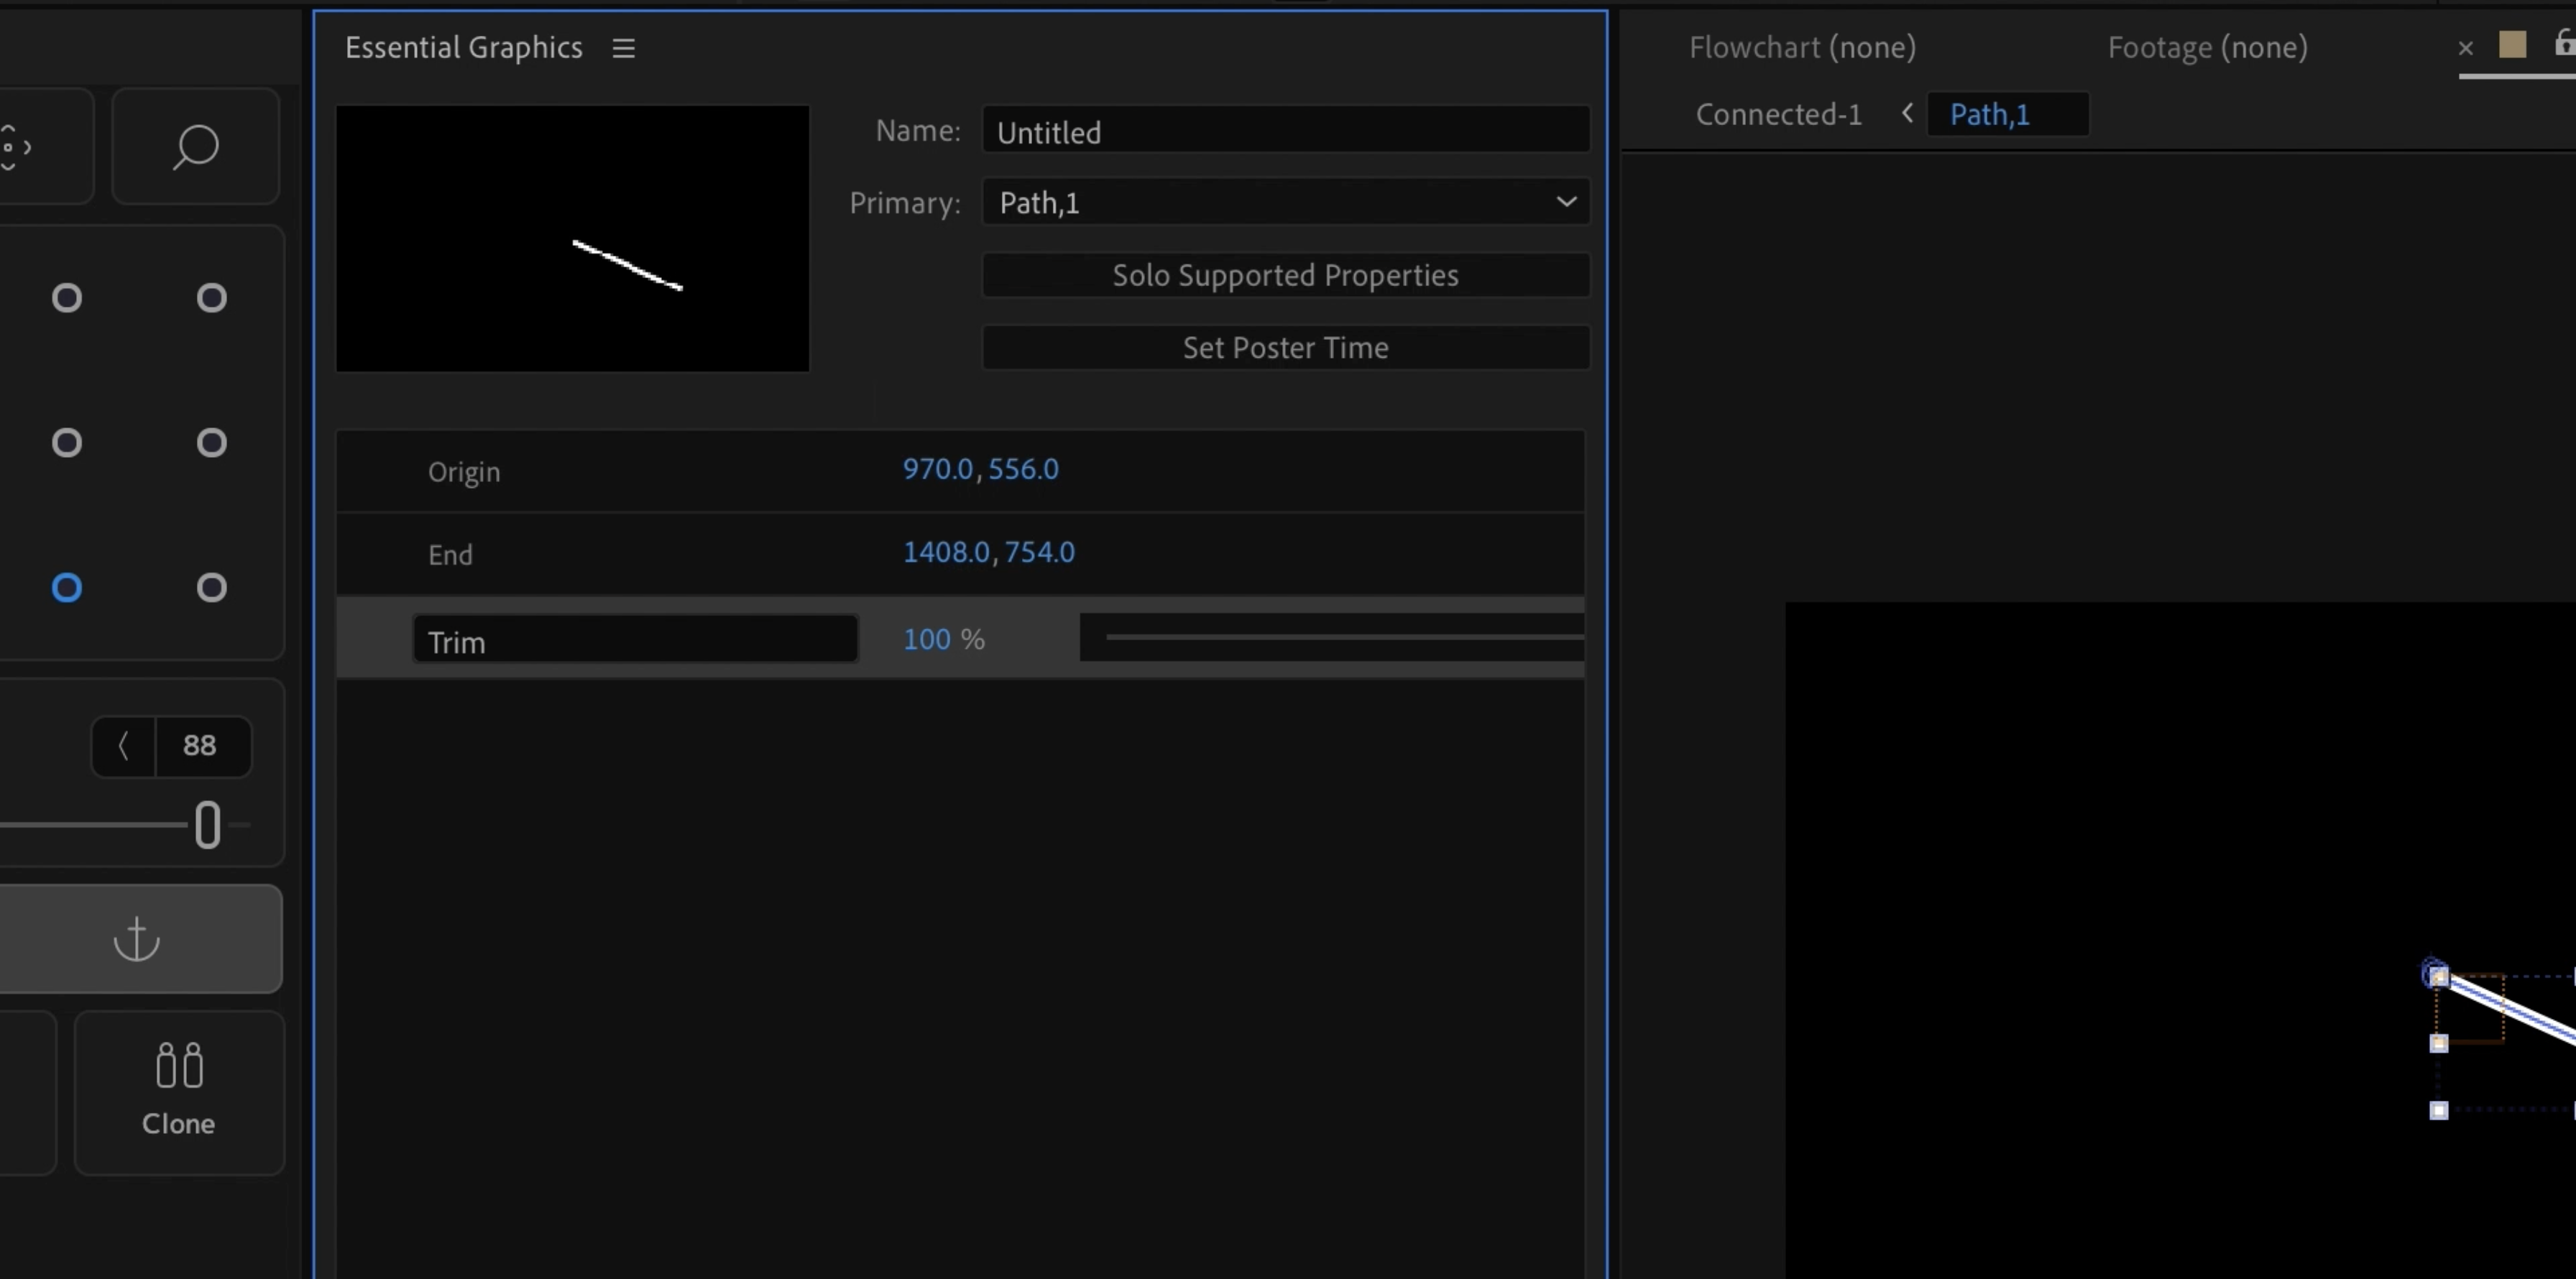
select your path layer. Then go to the Add menu on the shape layer and choose Trim Paths. This will add a trim paths property to your path layer that allows you to control the start and end point of your path.
Then drag the Position property of each null layer and the
End
property of your path layer to the Essential Graphics panel. This will create
controls
for each property that you can edit in the main composition.
You can rename each
control
by double-clicking on its name and typing a new name.
We'll rename them as:
Origin, End, and Trim.
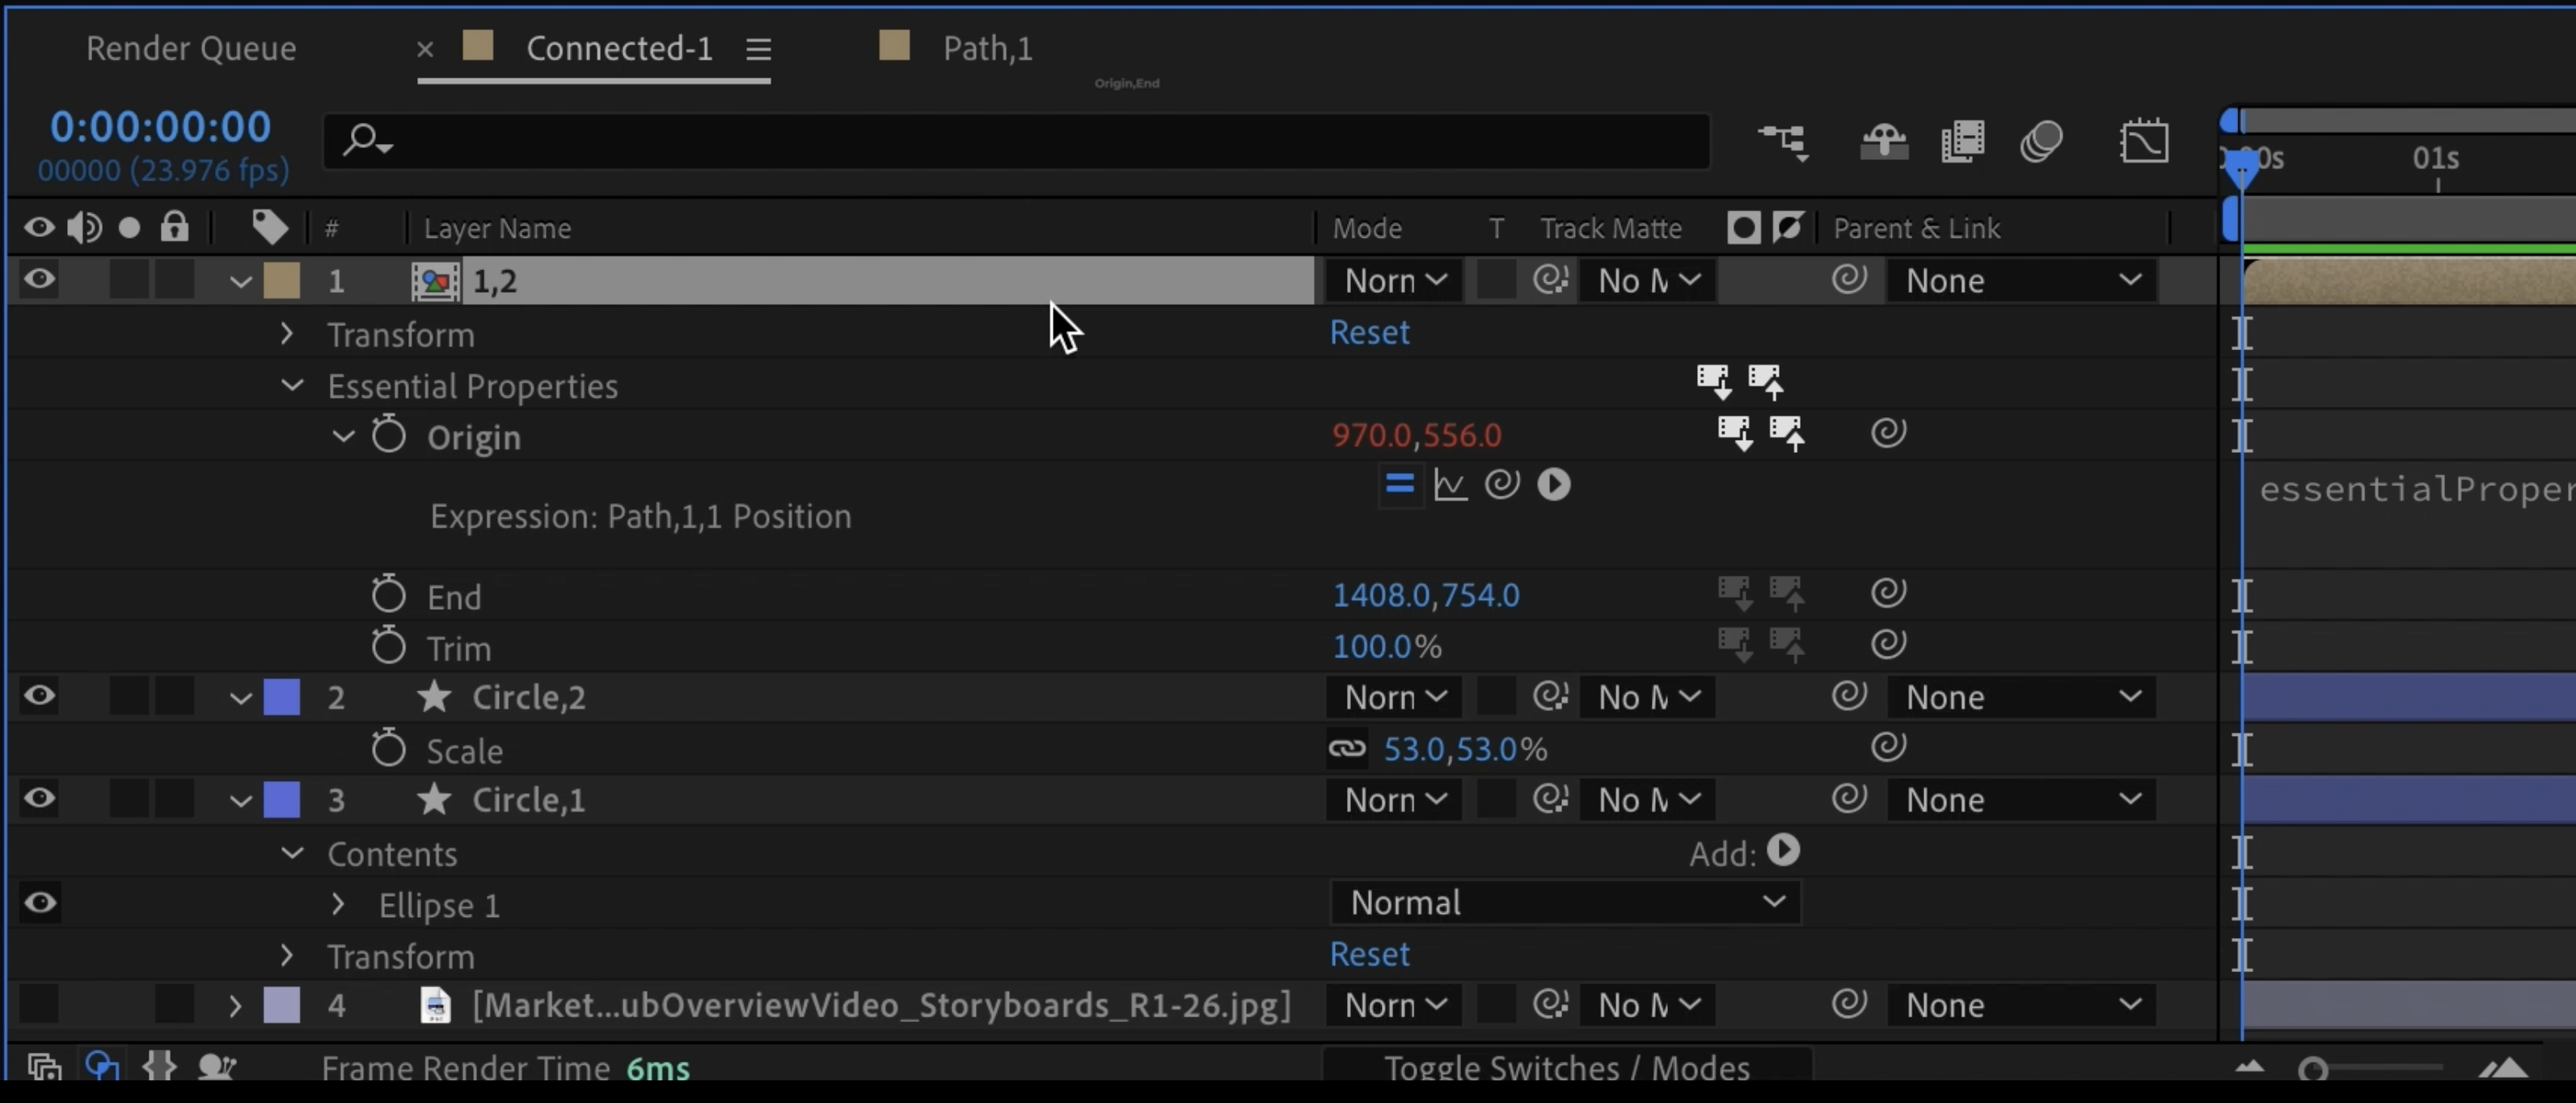
Back in the main comp, you'll see the property controls for Origin, End and Trim. Select the comp layer, and then go in the dropdown, to Essential Graphics Properties.
Step 6: Rename Your Shapes in Numerical Order
The next step is to rename your shapes in
numerical
order in your main composition. This will make it easier to link them to your path later.
To rename your shapes, select each shape layer and press Enter (Windows) or Return (Mac). Then type a new name for each shape layer
, making sure they end with a unique number.
We'll do "Circle,1" and "Circle,2" The numbers will serve as the shapes' unique IDs.
Step 7: Name Your Path Based on the Numbers of the Shapes It Connects
The next step is to name your path based on the
IDs
of the shapes it
links
. This will make it easier
to keep track of each path, and their corresponding shapes later on.
To name your path
comp, select it
and press Enter (Windows) or Return (Mac). Then type
the IDs
for your path layer
in the following format "Origin, End"
.
Since this path connects Circle,1, to Circle,2, we'll name it "1,2".
Step 8: Paste Expressions for the Origin and End of the Path
The final step is to paste expressions
to
the origin and end
properties of the comp
. Expressions are snippets of code that can control or link properties of layers in After Effects. In this case, we will use expressions to link the origin and end point of our path to
the shapes that have the number written in the path name.
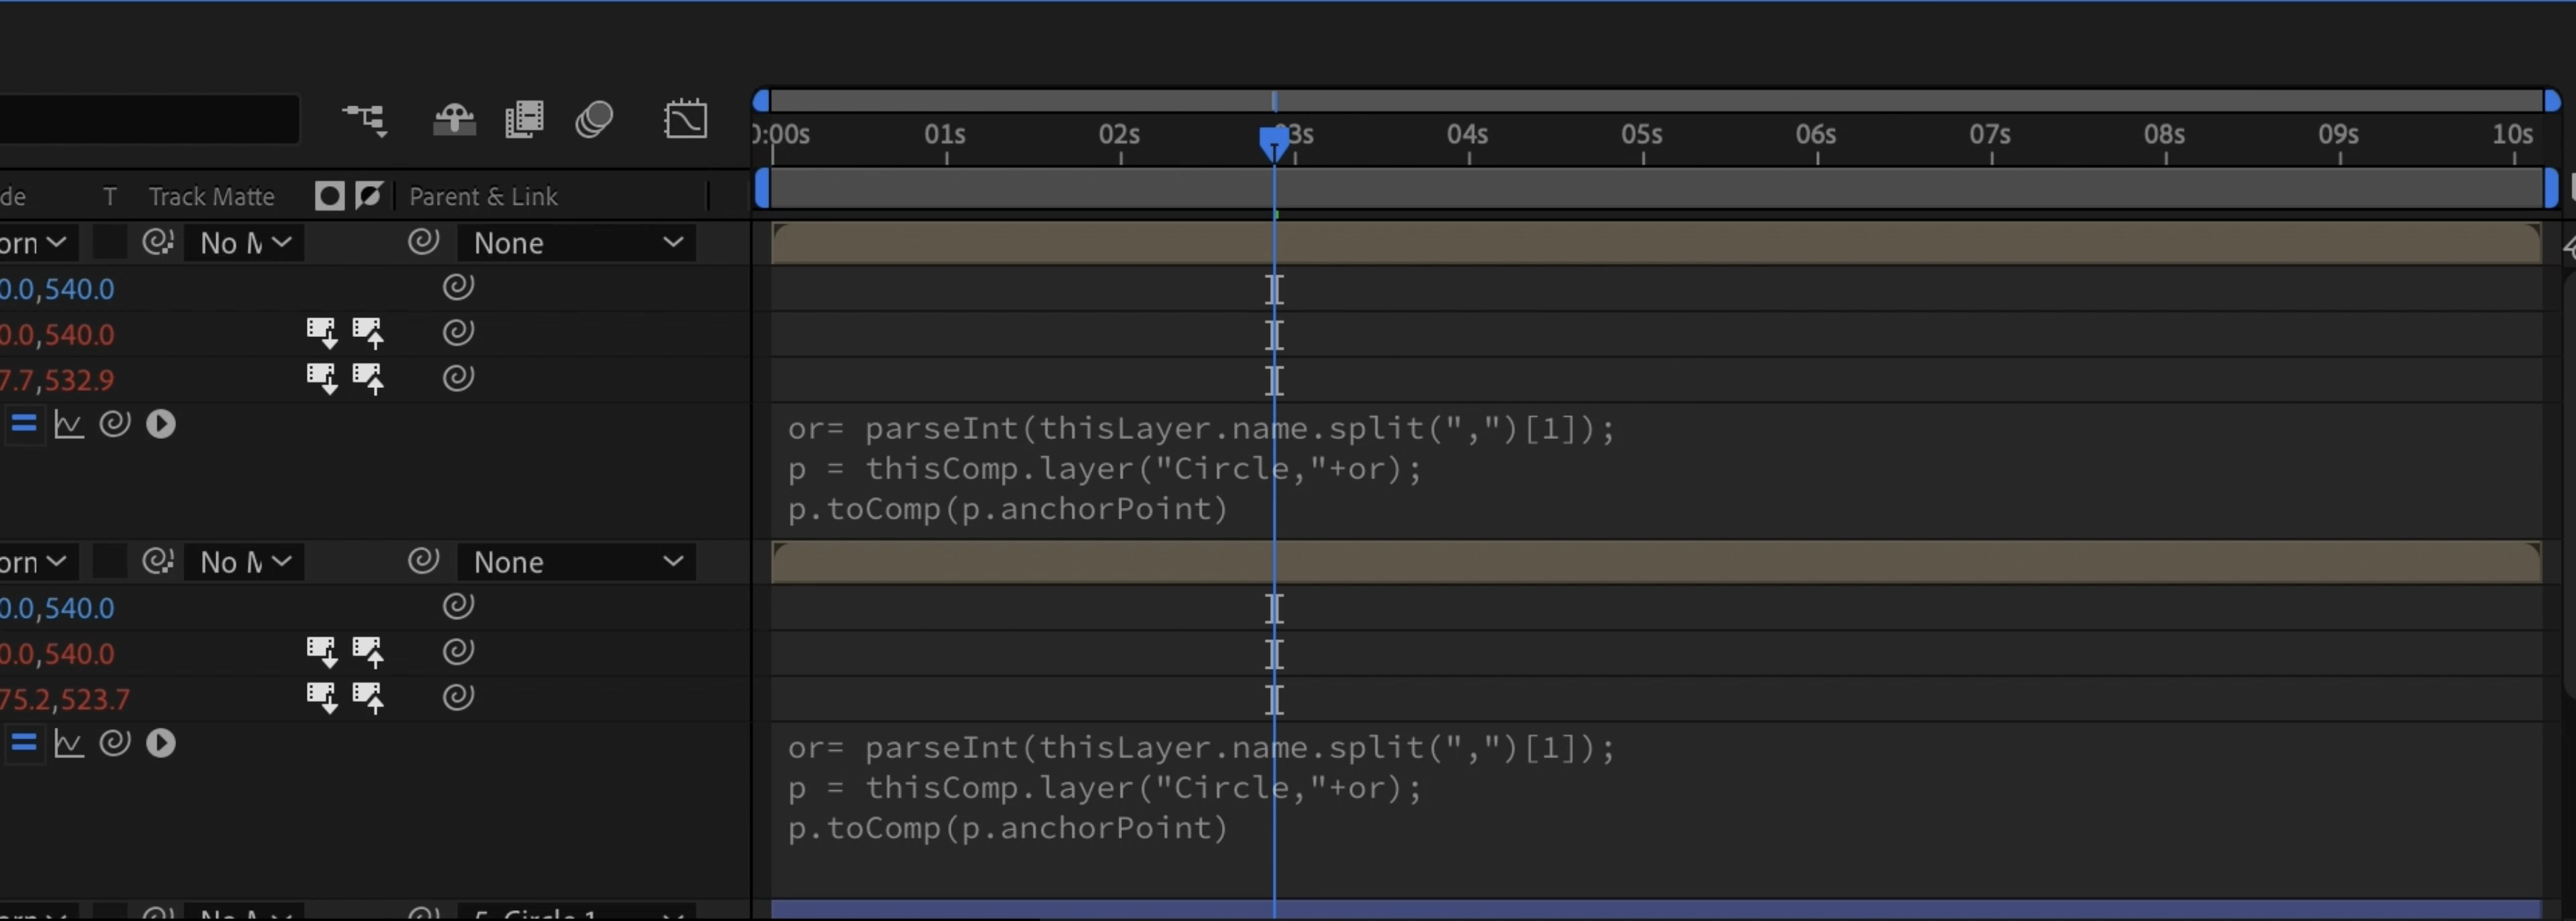
In the main Comp, find the Origin property of the path, under Essential Graphics Properties, and
alt-click (Windows) or option-click (Mac) on the stopwatch icon next to
Origin
. This will open an expression field where you can type or paste code.
Then copy and paste this expression into the expression field:
or=parseInt(thisLayer.name.split(",")[0]);
p = thisComp.layer("Circle,"+or);
p.toComp(p.anchorPoint);
This expression will get the
first number from the layer's name
,
which corresponds to the ID of the circle that corresponds to the origin of that path. Then it will use the position of that circle to link the origin of the path.
For more clarity: the first line splits the path's layer name by the comma, creating an array of 2 numbers (1 and 2). Then, it grabs the value that corresponds to the index [0] (first value) of the array, which is 1. Since the array can contain a variety of characters, then we tell After Effects to convert it into an integer.
The second line uses the number we got from the first part, and adds it to "Circle,", to find the name of the origin layer.
The third line grabs the position of the origin
shape
, and transforms it to Comp space, which is super important if the origin shape is parented to another layer, or is part of a more complex
rig.
Now repeat this expression, but with the End property, and change the [0] for [1], to reference the number after the comma. In our case it will reference Circle
2.
As you can see, the path automatically selects the position of the given circles. And whenever you move any of the circles, the path will follow automatically. Now, adding more vertex
and paths is super easy because we have added the layer numbers at the end.
Every time you duplicate a circle, it will increase in numbers, and every time you duplicate the path, it will also increase in numbers for the ending, which will automatically create a new path that is linked to that new circle.
Now, you can animate this network in any way that you want.
Bonus: Additional examples
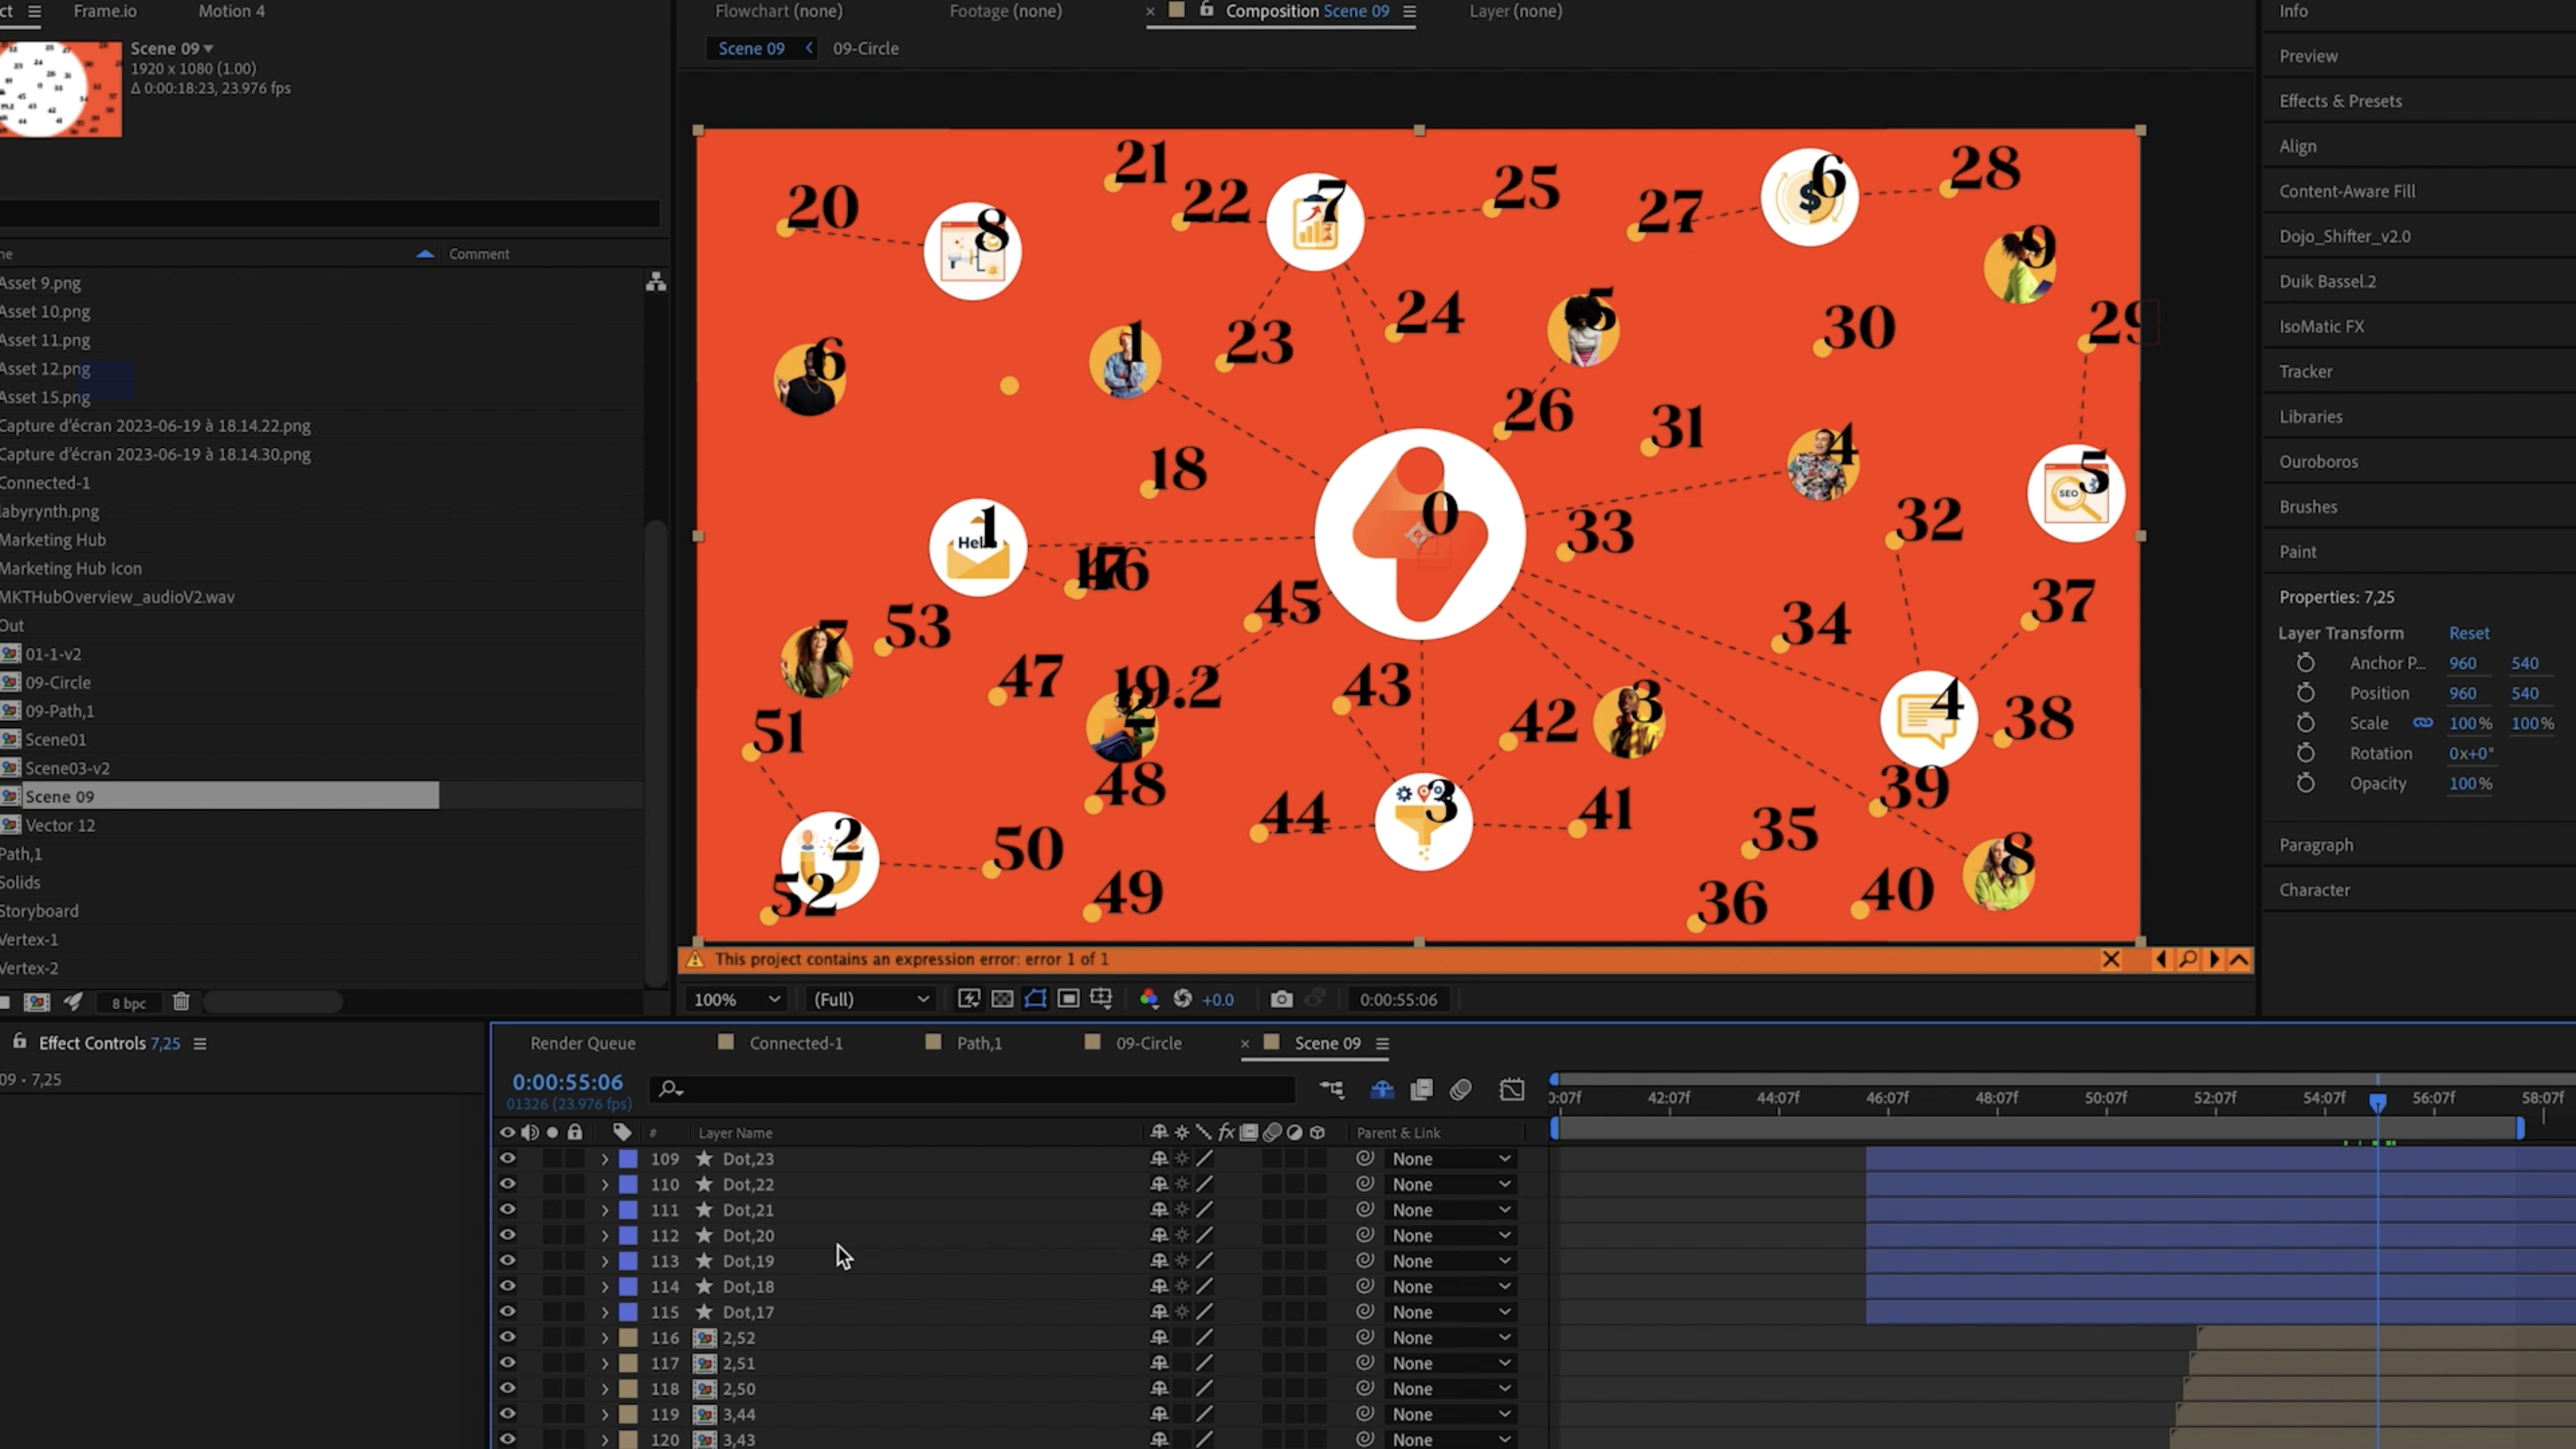
Now, let's take a look at a different example, which is a more complex network.
For this one, it is super important to have a very good organization in place, since now we have more than 50 vertices that correspond to shapes, images and comps.
To properly tag and keep track of each layer's IDs, I created text layers that I overlayed on top of the original design
before creating any shapes. This saved me a lot of time, since I was able to see which layers were connected, and easily create the comma separated pairs for the paths.
And if I make a mistake, or want to relink any path, it's super easy to correct. All I need is to change the name of the layer to the corresponding numbers.
Finally, having a single master composition enables me to quickly change the appearance of the links all at once. All I have to do is double click into the pre-comp, adjust any stroke values for the path, and it will be automatically updated in the main comp.
I hope you enjoyed this tutorial and learned something new. If you have any questions or feedback, let me know!
If you want to see more tutorials like this, subscribe to the blog and YouTube channel.
See you on the next one!
Comments