
We'll be putting these 3 AI image generators to the test to find out which one can create the ultimate zoom background.
Tired of using the outer space background in Zoom?
With AI tools like RunwayML, Midjourney, and Photoshop, you can create a natural looking background easily without spending a lot of time or money.
In this post, we’ll test and compare the generative inpainting features of these tools to create a more professional background. We'll be evaluating each tool based on user experience, and quality of the output.
Let's get started.
What is Inpainting?
Inpainting is an AI technique that lets you edit images by removing or adding elements to an image, based on the surrounding contents.
It's commonly used for artwork restoration, but today we’ll use it to improve our Zoom background.
Capturing the Current Background
The first step is to take a reference photo of your current background.
I quickly captured my background wall with my webcam using QuickTime player. It's a free and easy solution if you have a Mac.
No matter what system you're using, you need to capture exactly what your webcam is seeing.
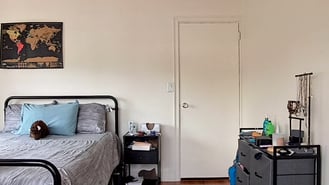
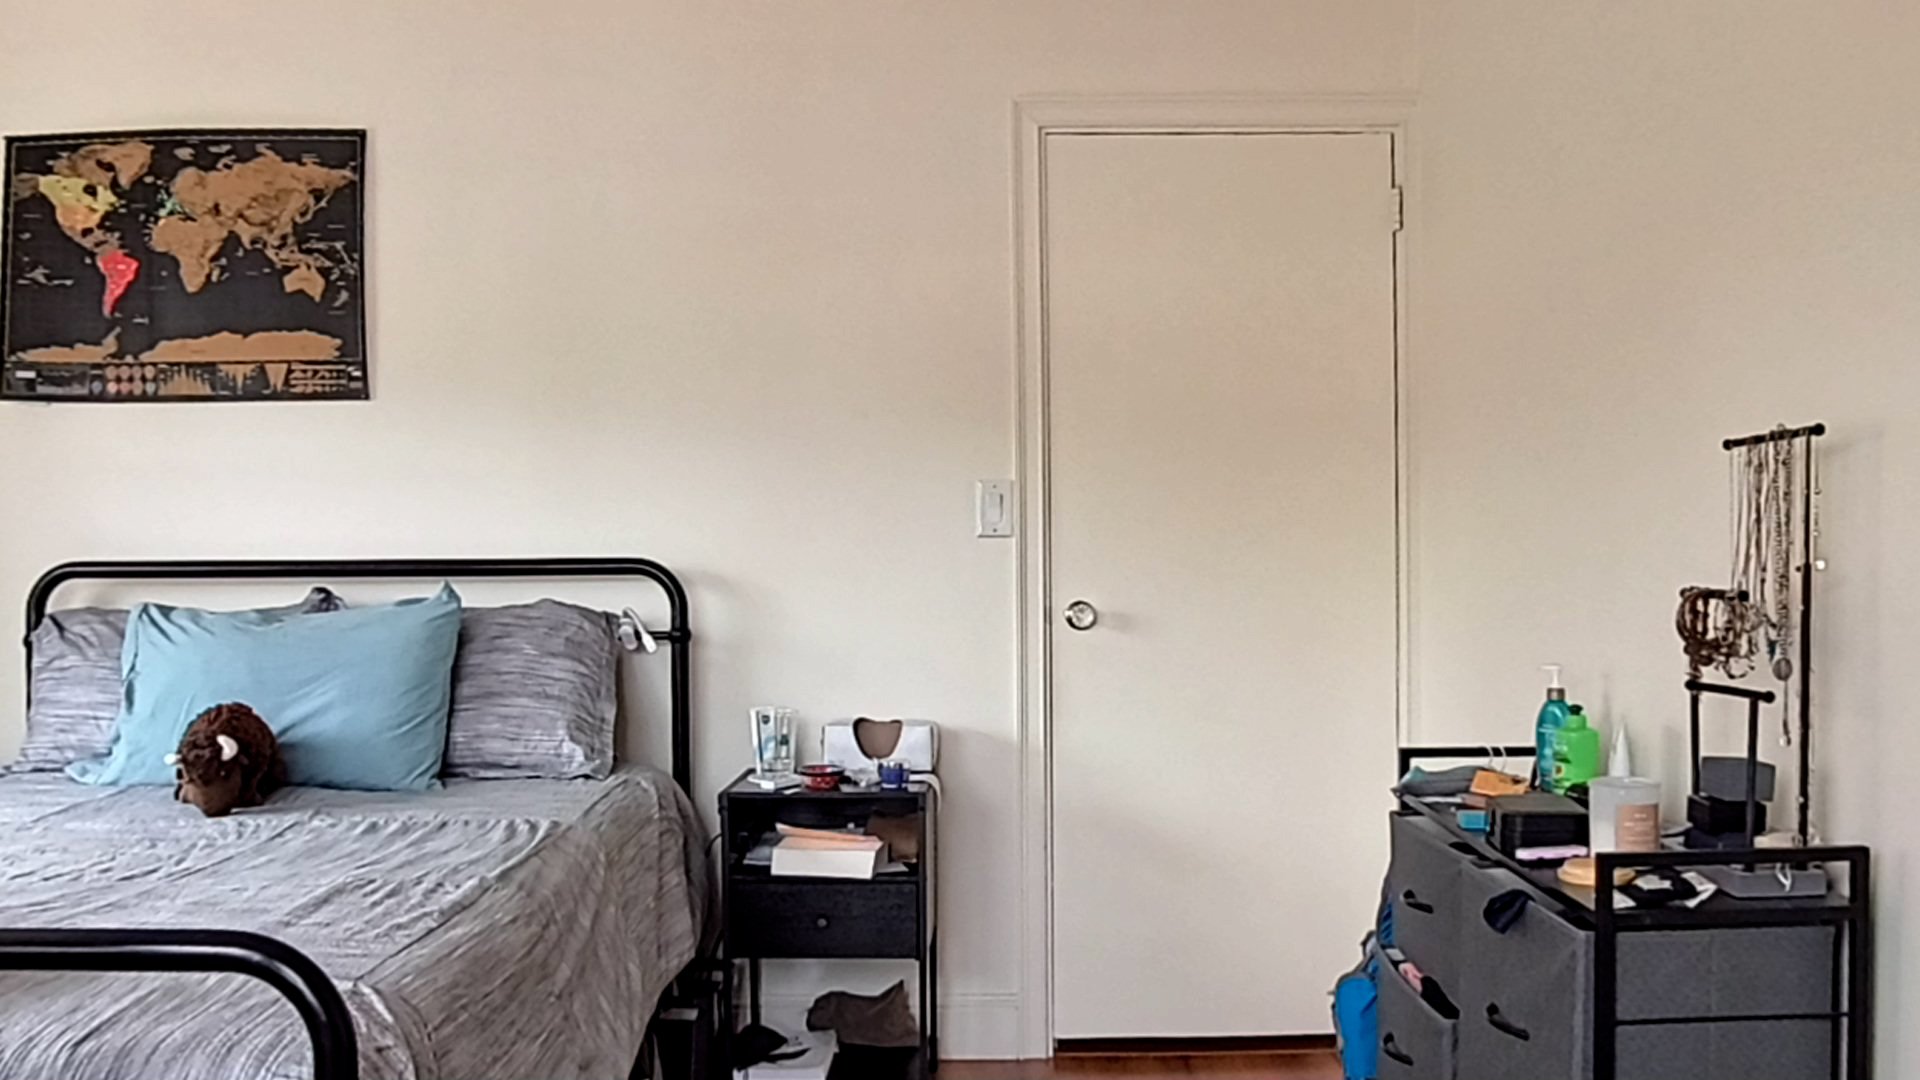 An image of how my zoom background looks from my webcam. Not bad, but could use a little upgrade.
Then, crop out everything except the area where you'll be sitting. We want to keep this area looking as natural as possible, to minimize the artifacts that are created when using a Zoom Virtual background.
Try to remove any furniture from the picture.
This is key - any existing objects that are left partially in the picture, the AI will try to complete them, which doesn't look natural.
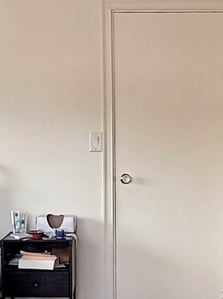 Cropped out version of the background. I left as little furniture as possible so that the AI could generate it from scratch, rather than trying to fill it in.
 In this example, I left part of the bedding and the dresser to be filled-in by the AI, but it didn't work out.
Testing Out RunwayML
Let's get started with RunwayML, a web platform for generating videos and images with AI models. There's a lot of different tools that you can choose from.
While currently their main focus is on generative video models, we'll be trying out the generative image ones.
Runway Expand Image
Let's try the Expand Image tool.
The interface is super simple. After you upload your image, you get 3 main parameters:
And that's it! Then you can start generating.
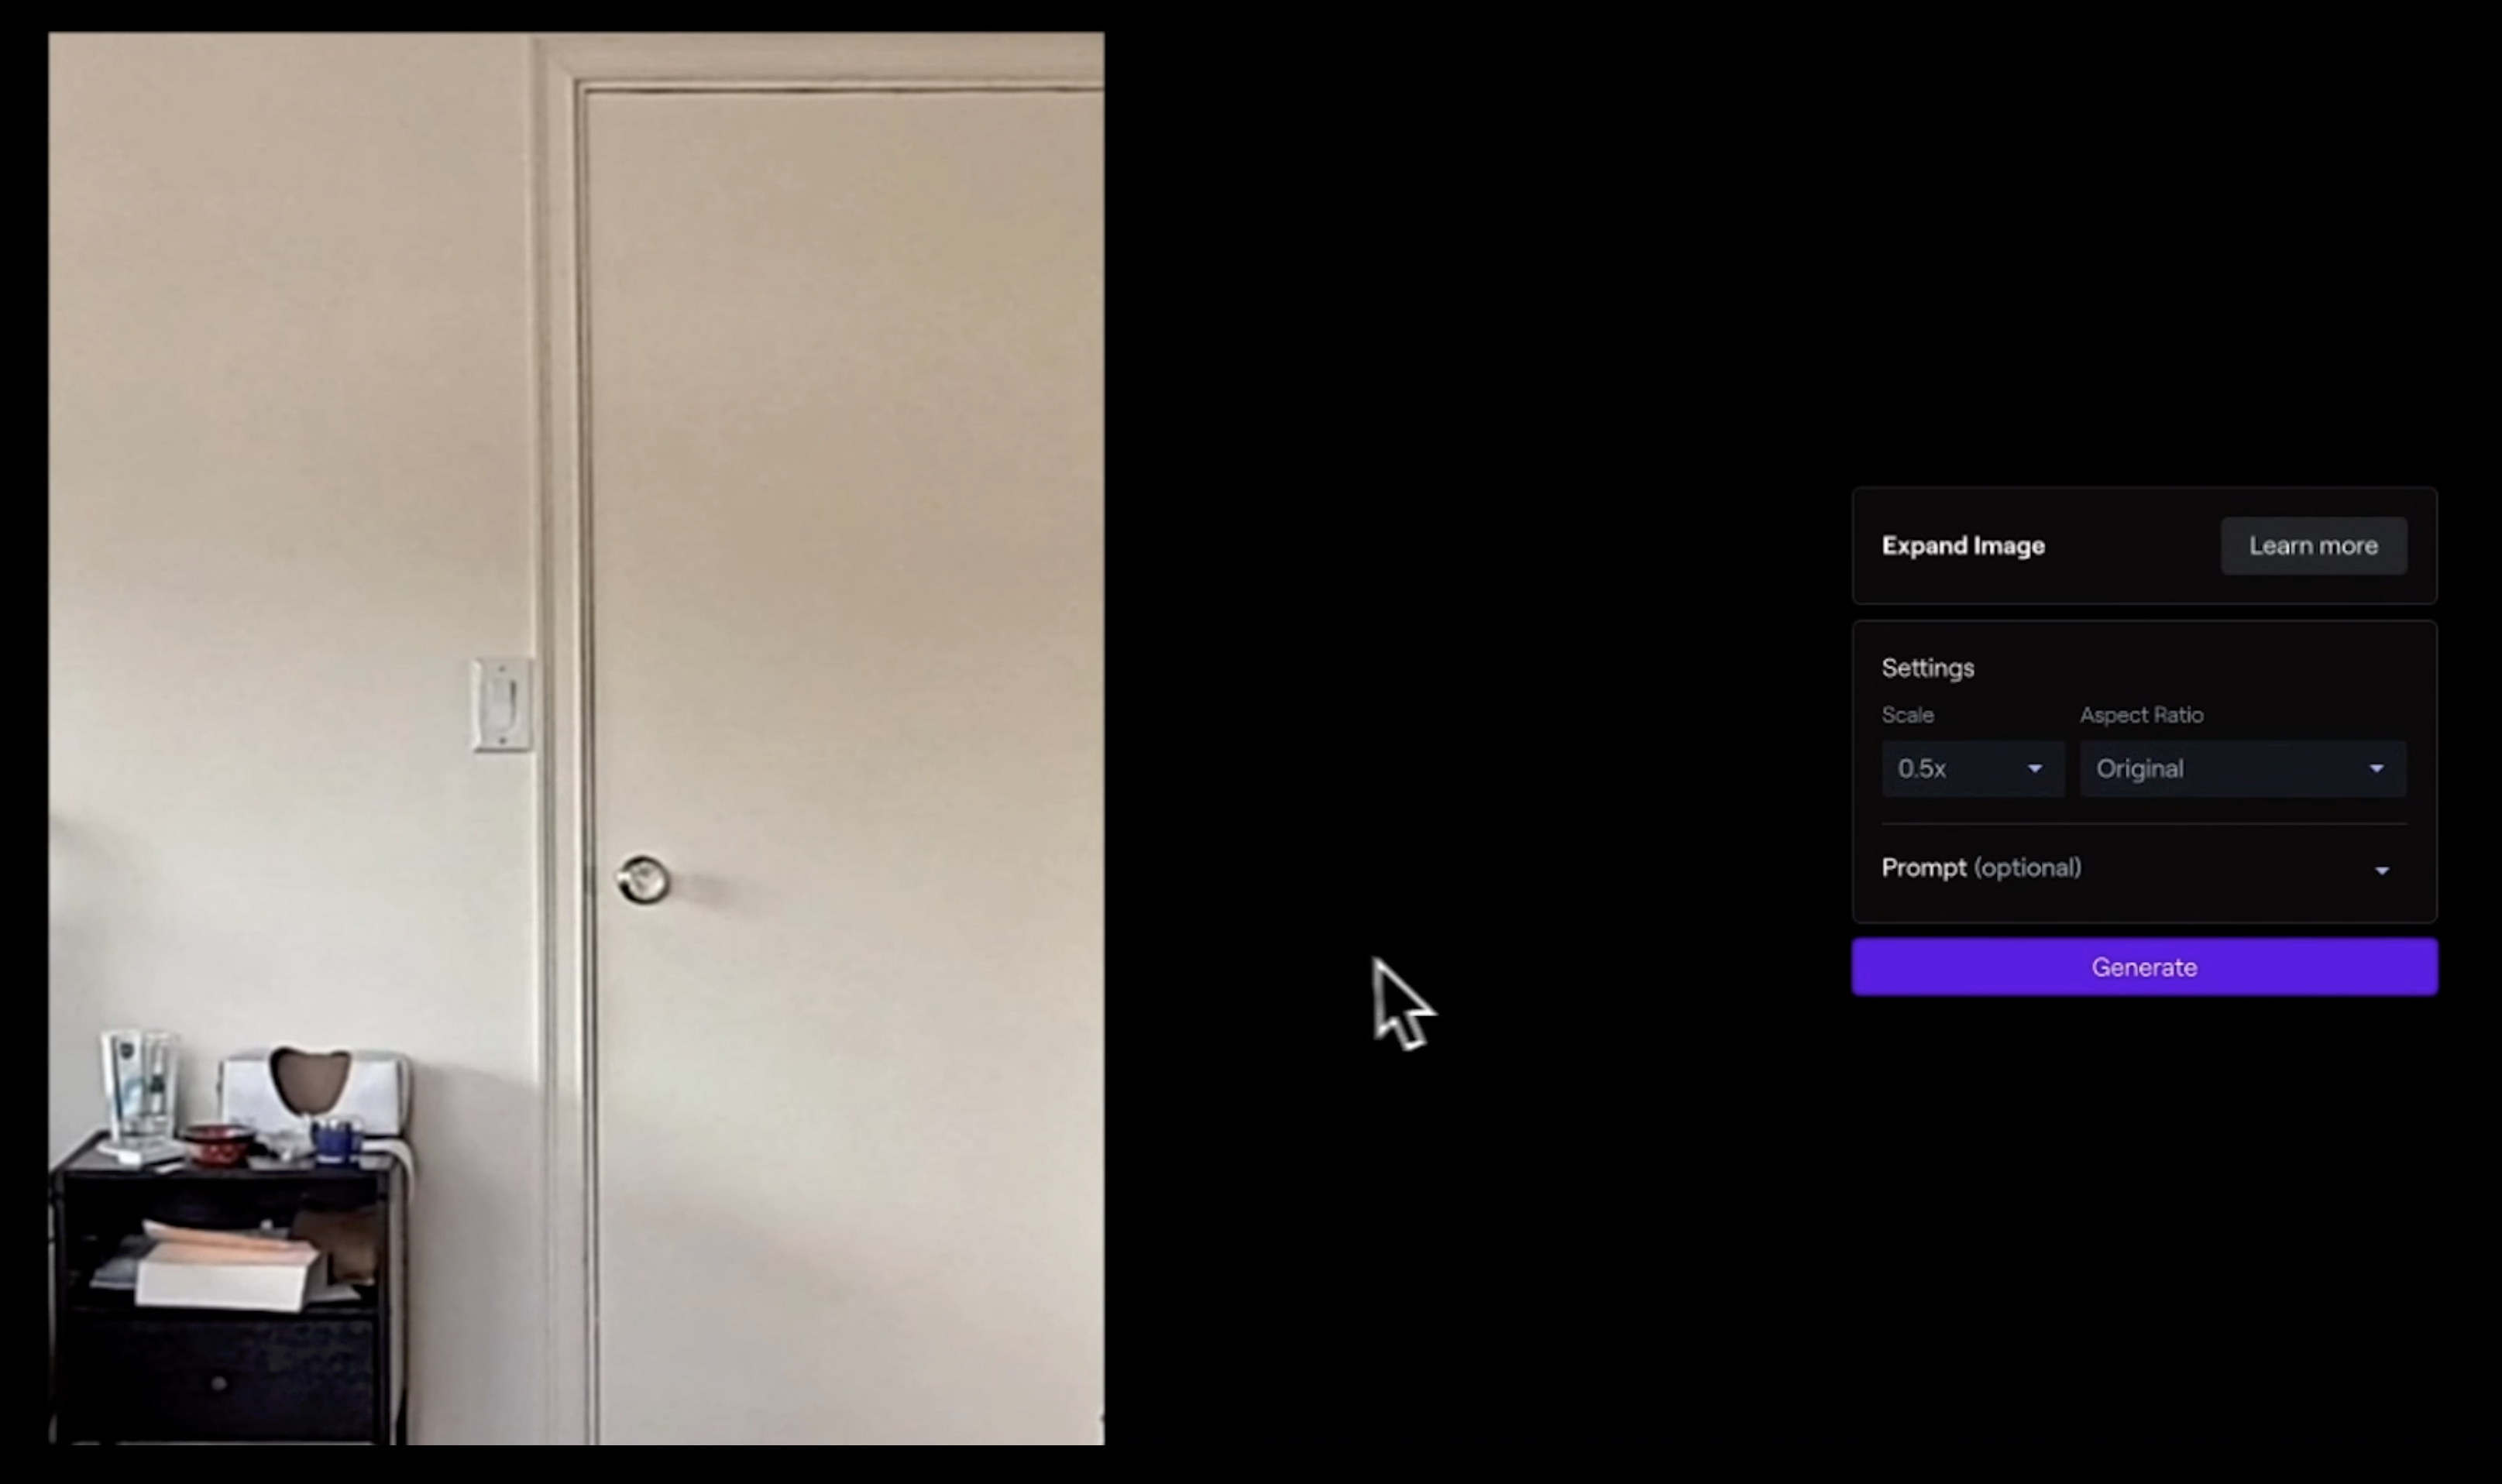 The Expand Image interface in RunwayML. It has a simple user interface, and it's easy to get started.
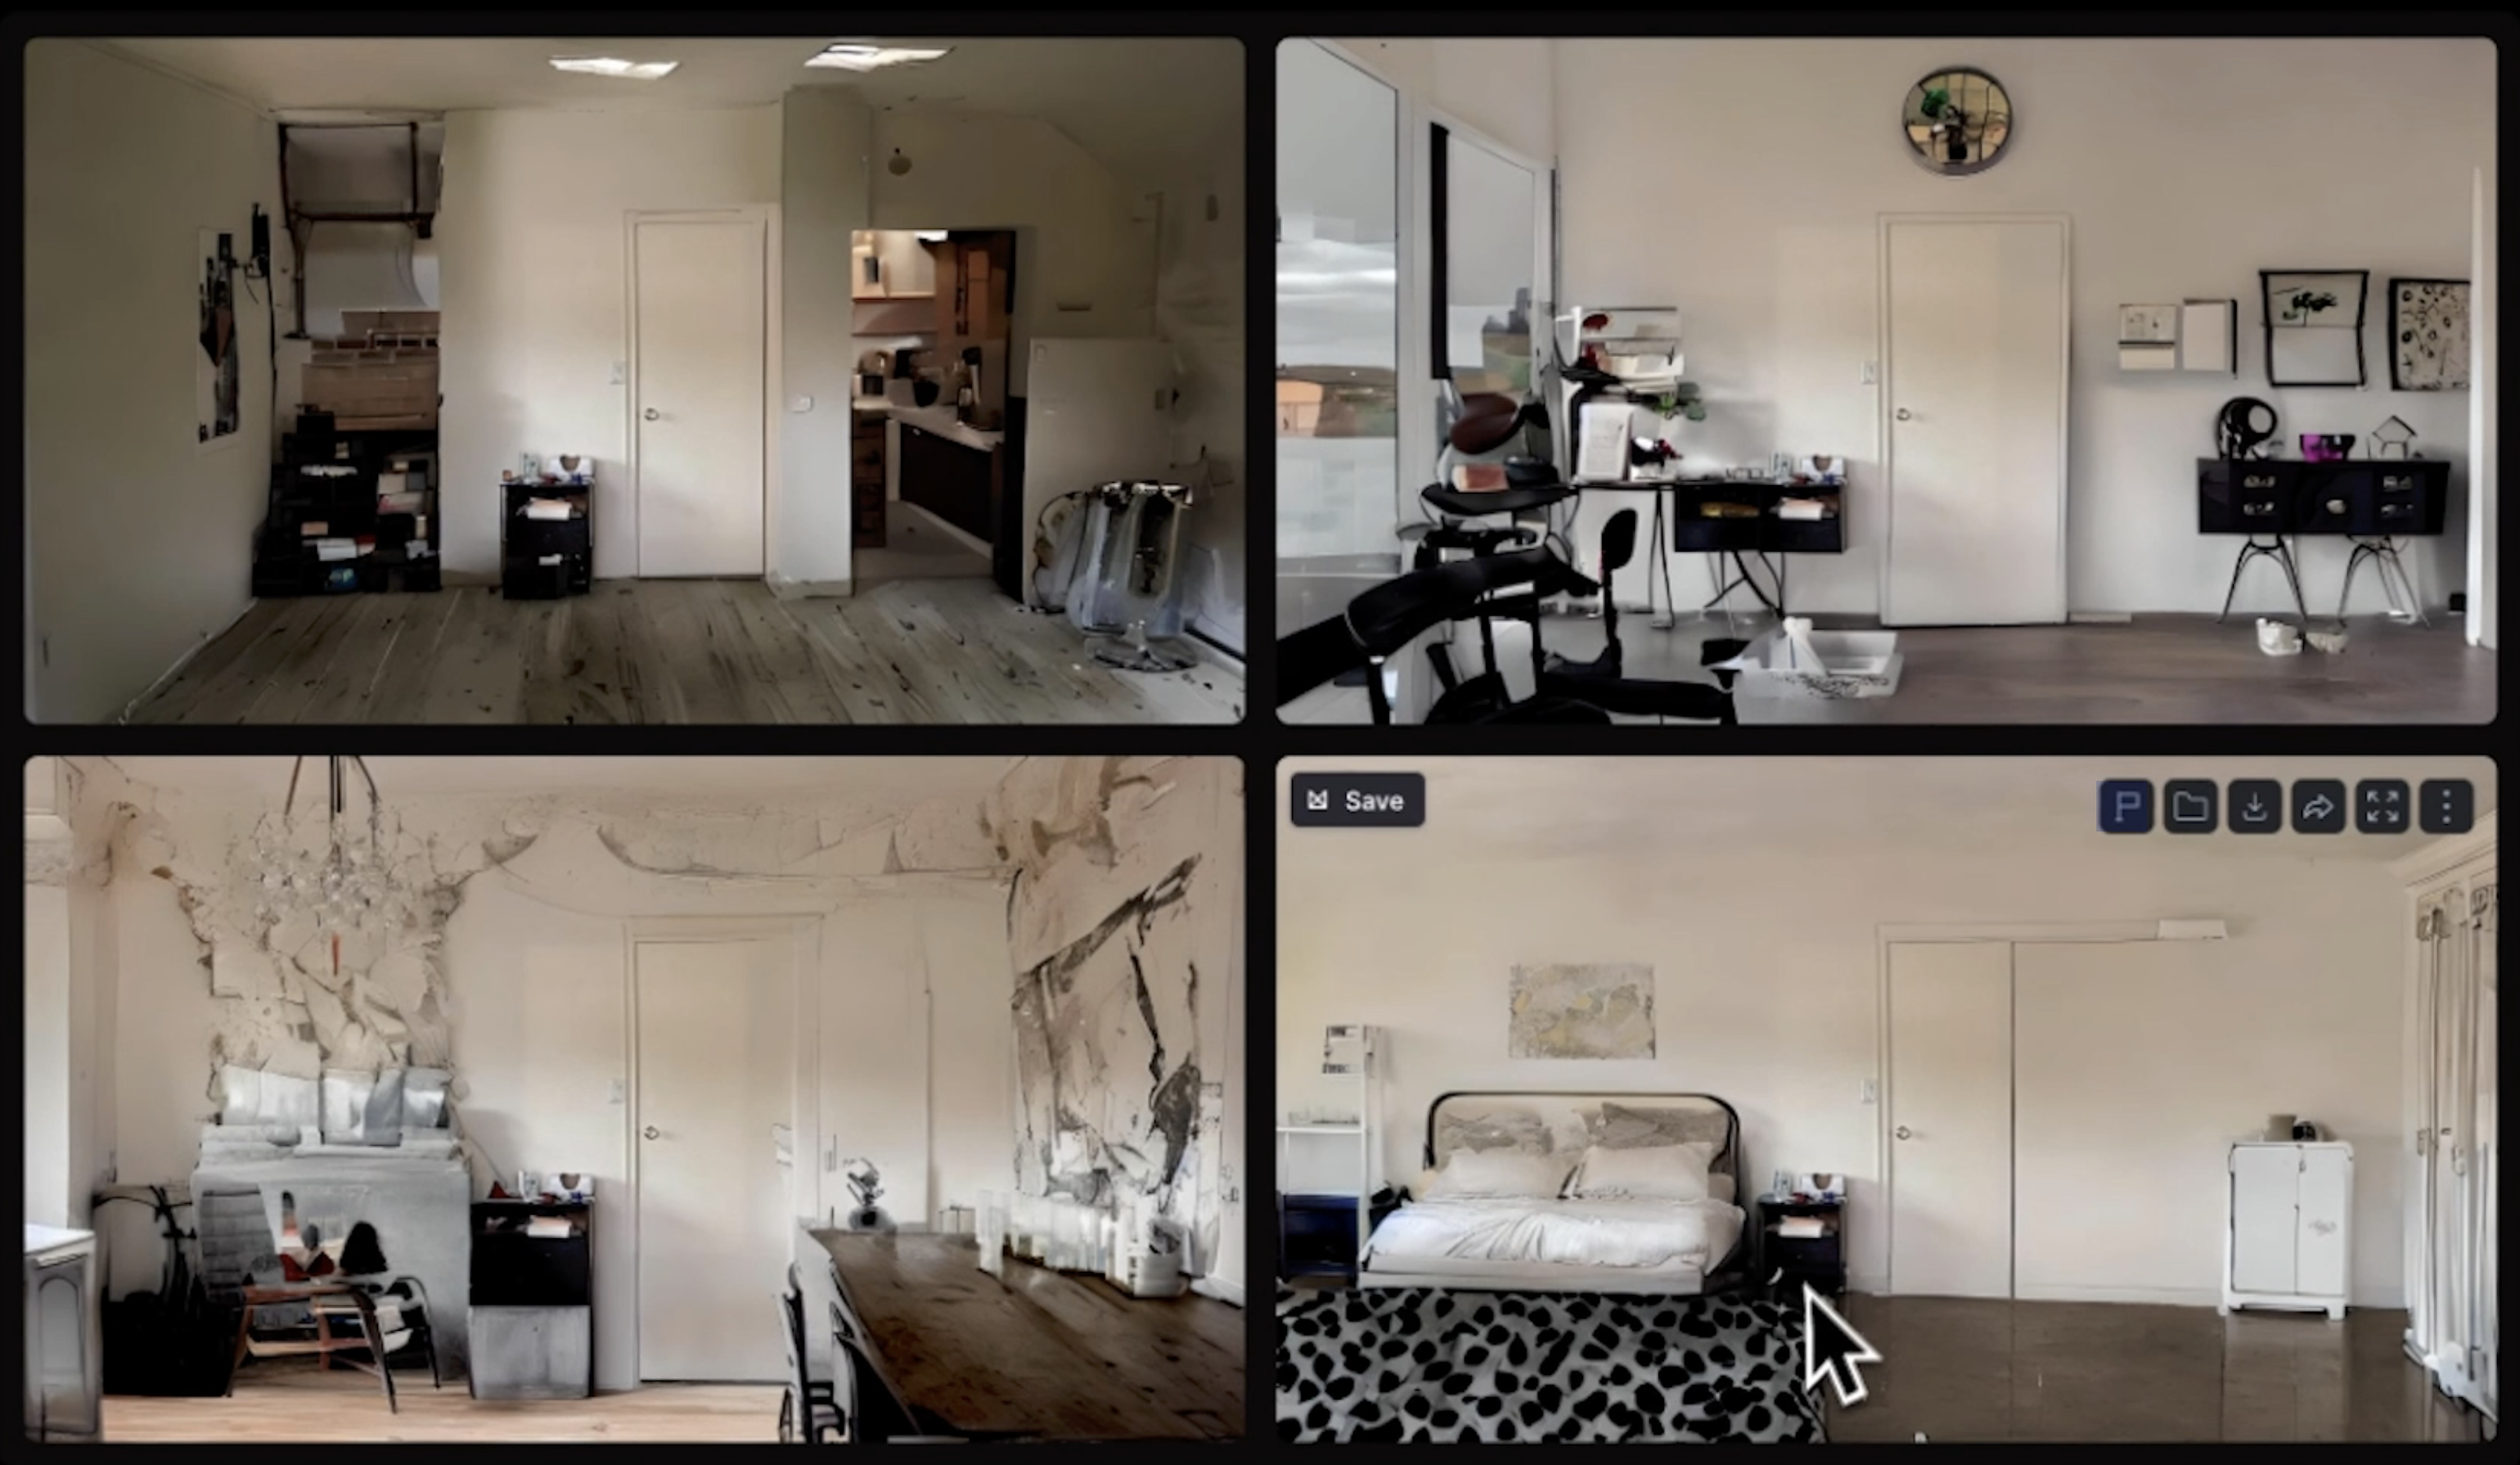 Examples from Expand Image. For these series, I selected a scale of 0.5x, and a widescreen aspect ratio. You can see it identified it as a room, but there's a lot of weird stuff going on towards the sides.
The initial results looked a bit weird and funky. I'd like the area around the door to be looking clean, since that's where I'll be sitting when on Zoom.
Let's try adding a text prompt to give it more context.
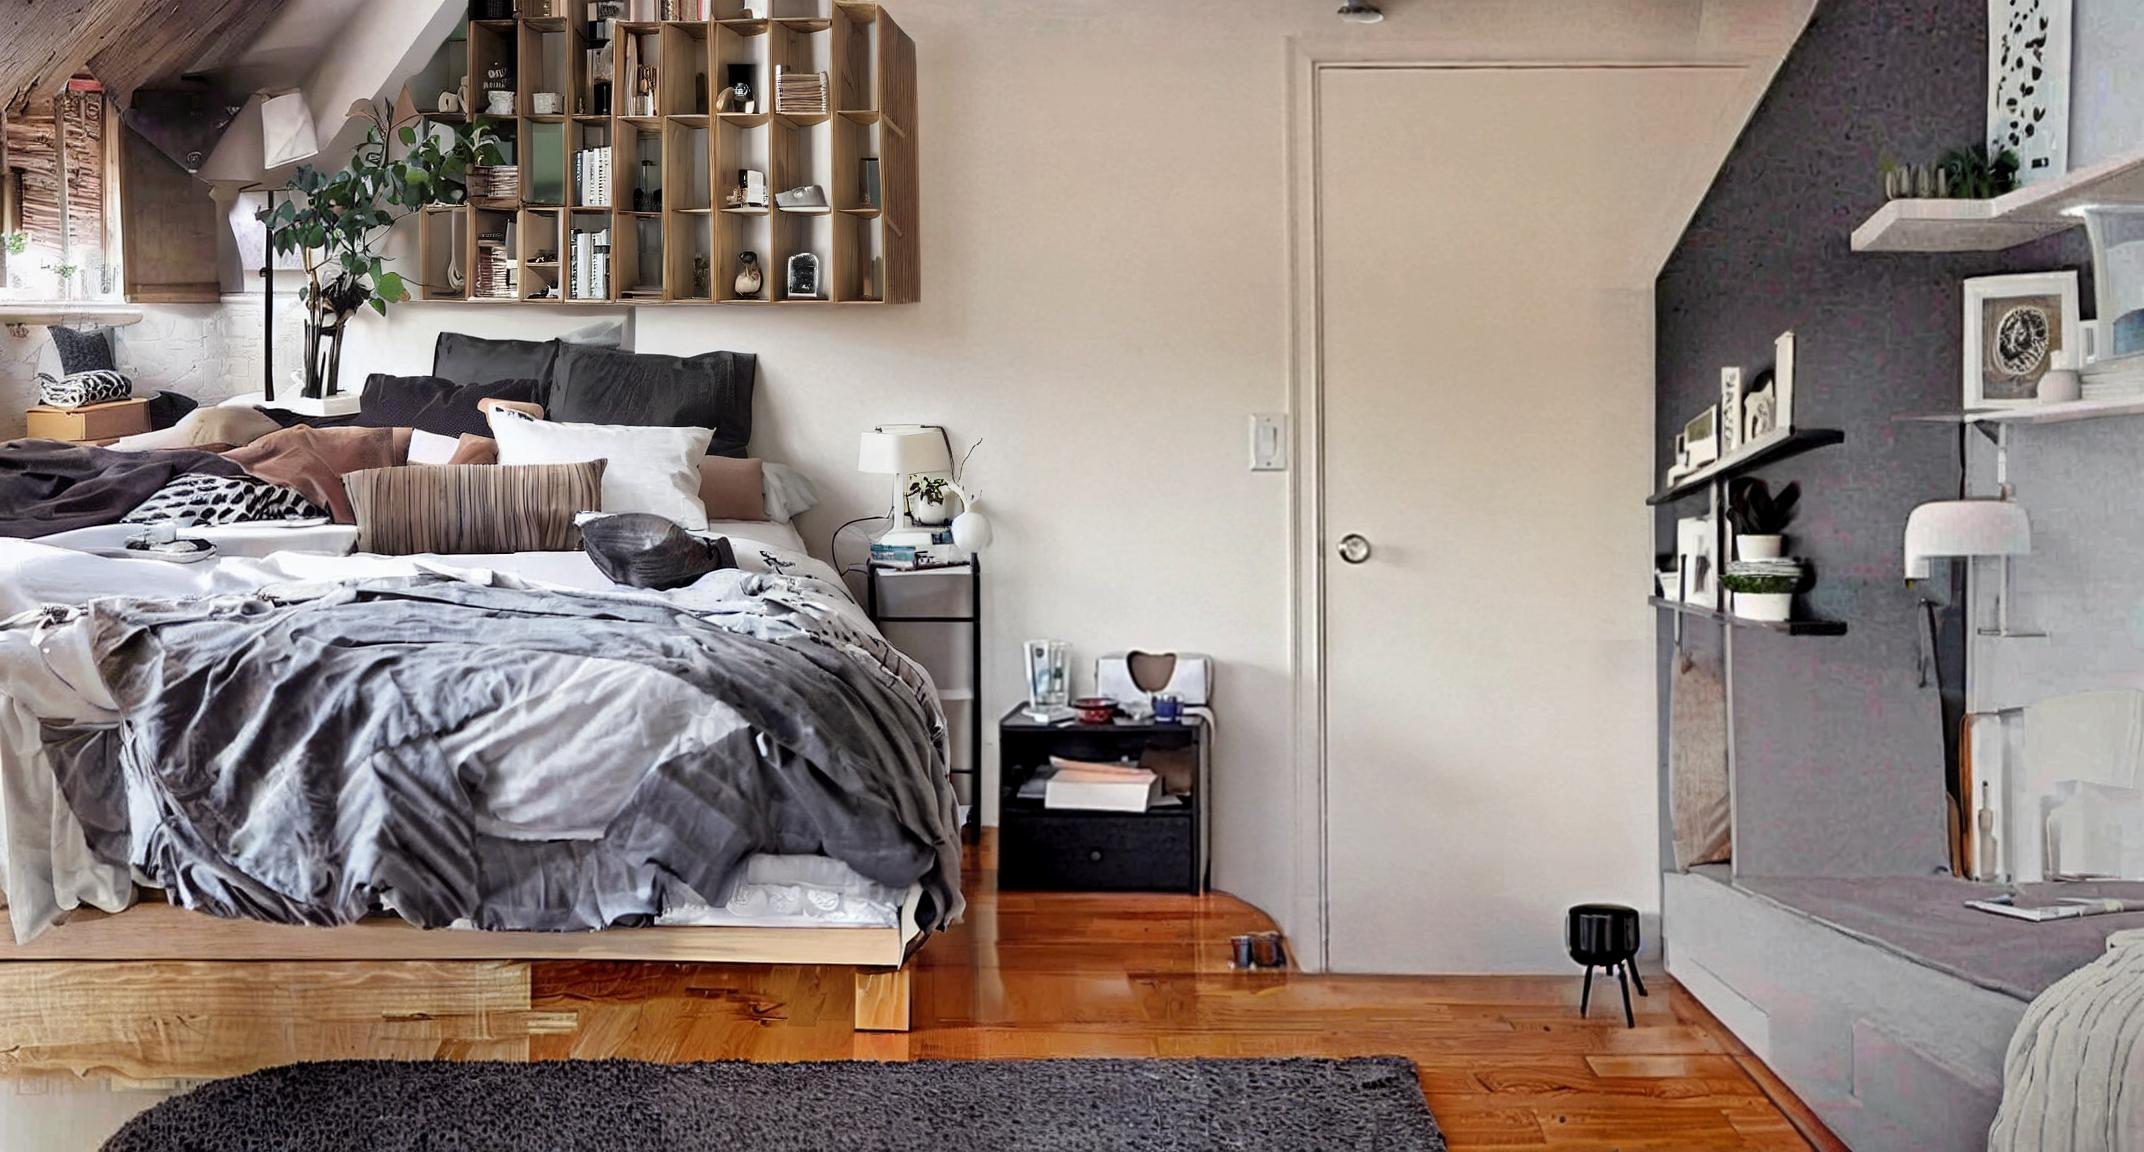
After some trial and error on prompts like "a beautiful Scandinavian room wall", I got a slightly better result.
 The plants add a nice touch and make the image look inviting, while distracting from the warped edges of the painting and the furniture.
Runway Infinite Image
Another image inpainting tool from RunwayML is Infinite Image. This tool lets you modify parts of the image independently.
You place a rectangle over the area of the image that you'd like to generate or modify, and it only applies the changes on that area. You get more granular control with this tool.
However, the results are very hit or miss. The tool only considers what's inside the rectangle, and ignores the rest of the image, including previous generations.
It seems that you're building the image block by block without considering the overall context, and end up with a patchwork of mismatched elements.
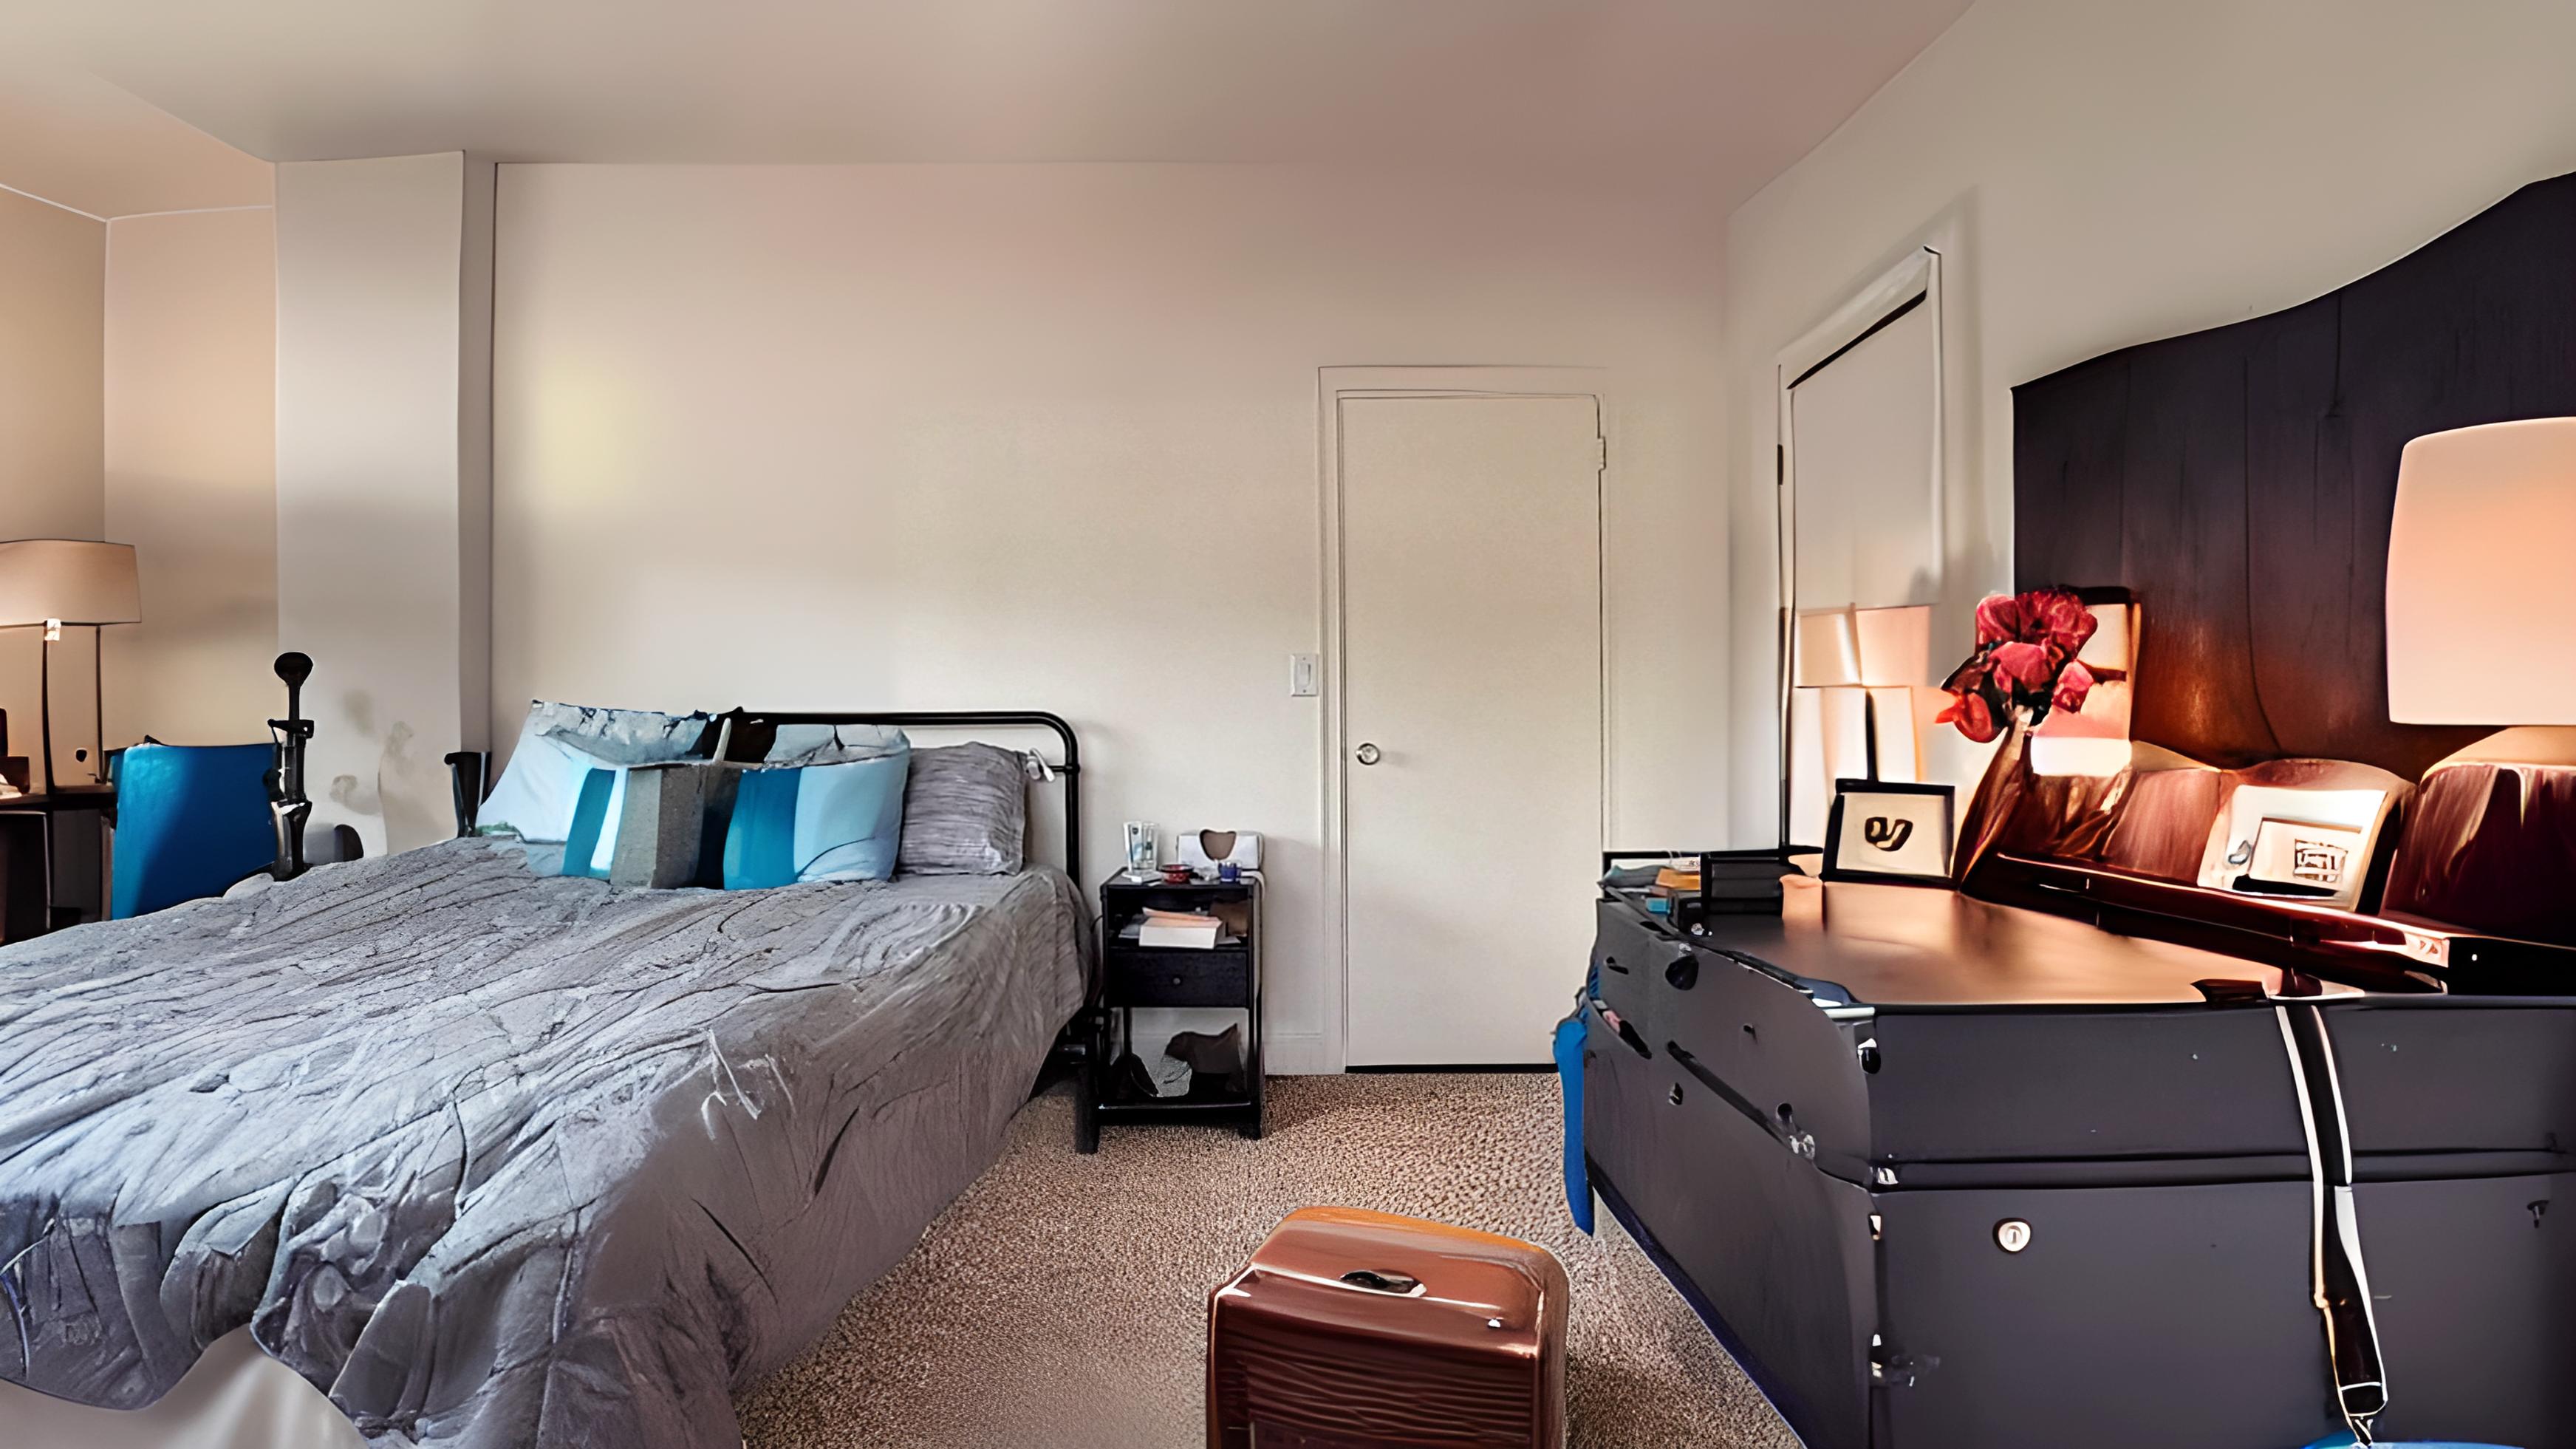
 After several attempts, this was the best result at creating a good background with Infinite image. NOtice how the perspective gets more distorted as we move to the edges of the image.
In conclusion, RunwayML image tools feel more like an add-on than a comprehensive solution, especially when compared to their generative video tools.
I loved the speed of the Expand Image tool, but the low quality and lack of customization of the output makes it an unusable tool.
Testing Out Midjourney
Next up is Midjourney, a Discord-based platform that's my favorite for image generation. If you've seen AI images gone viral, they were probably created with Midjourney.
I highly recommend browsing their gallery - people are doing amazing things with this tool.
Getting started is easy. Provide an image, a simple prompt for context, and Midjourney starts creating different versions immediately.
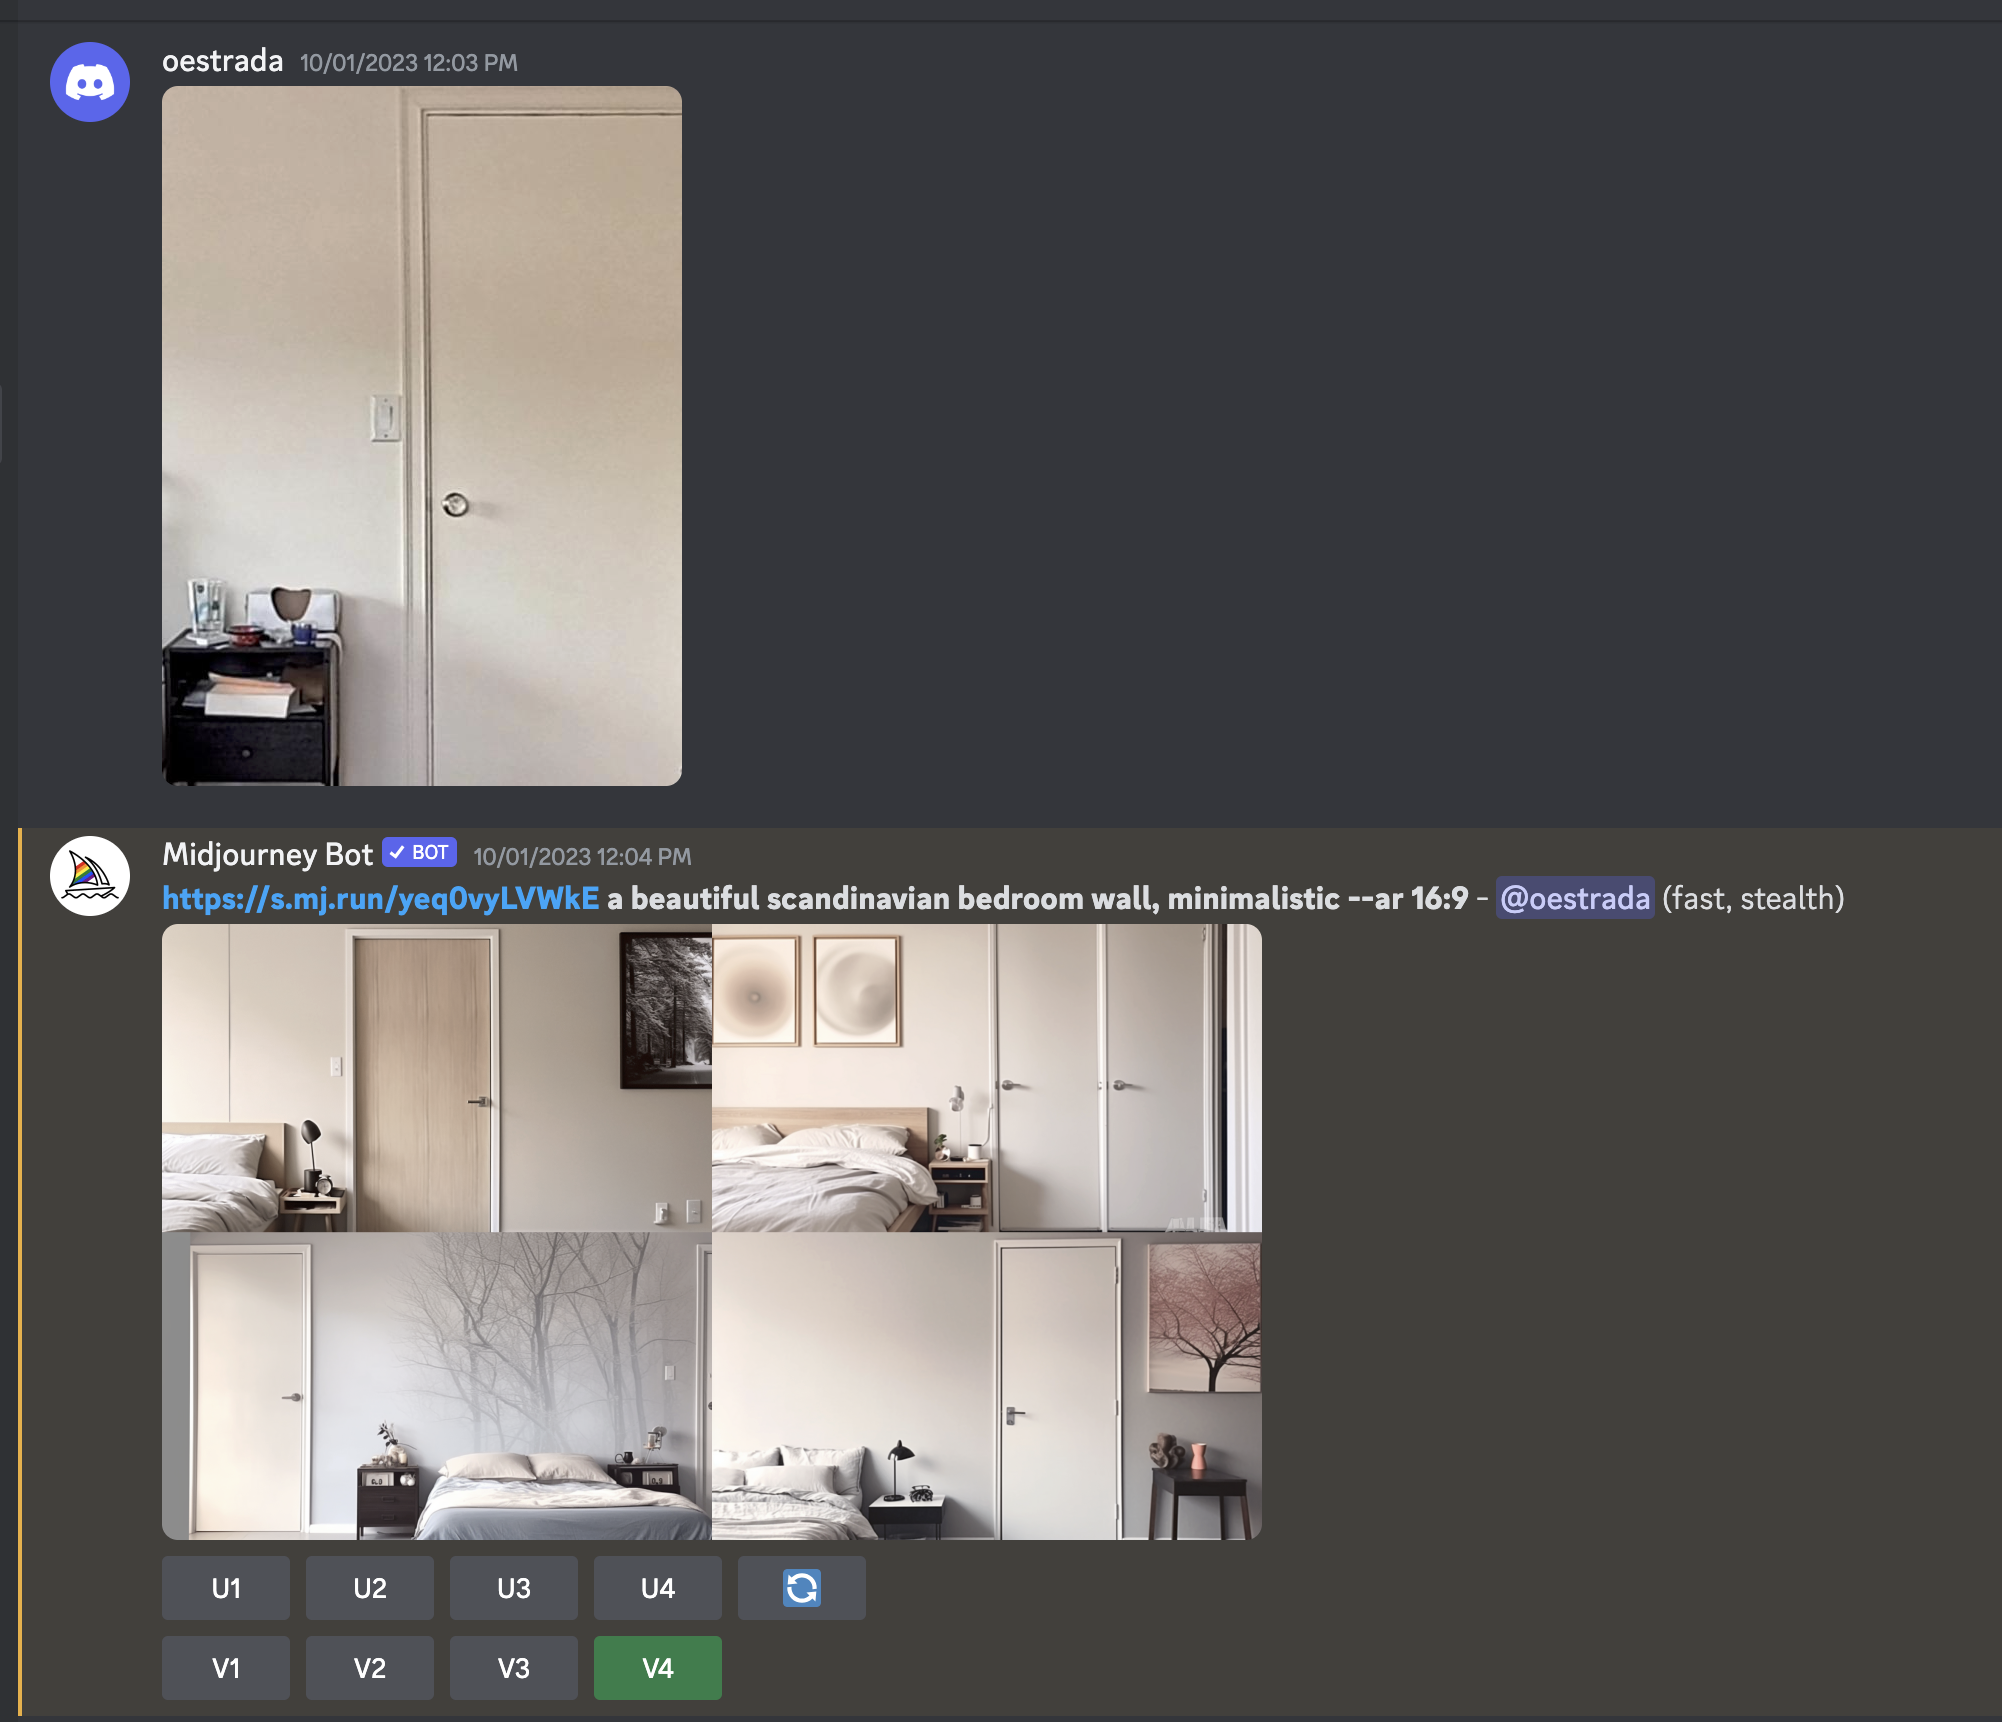 Midjourney chat interface. You first upload the image and then add the image link with the prompt.
I like to start with simple prompts and then to add more complexity.
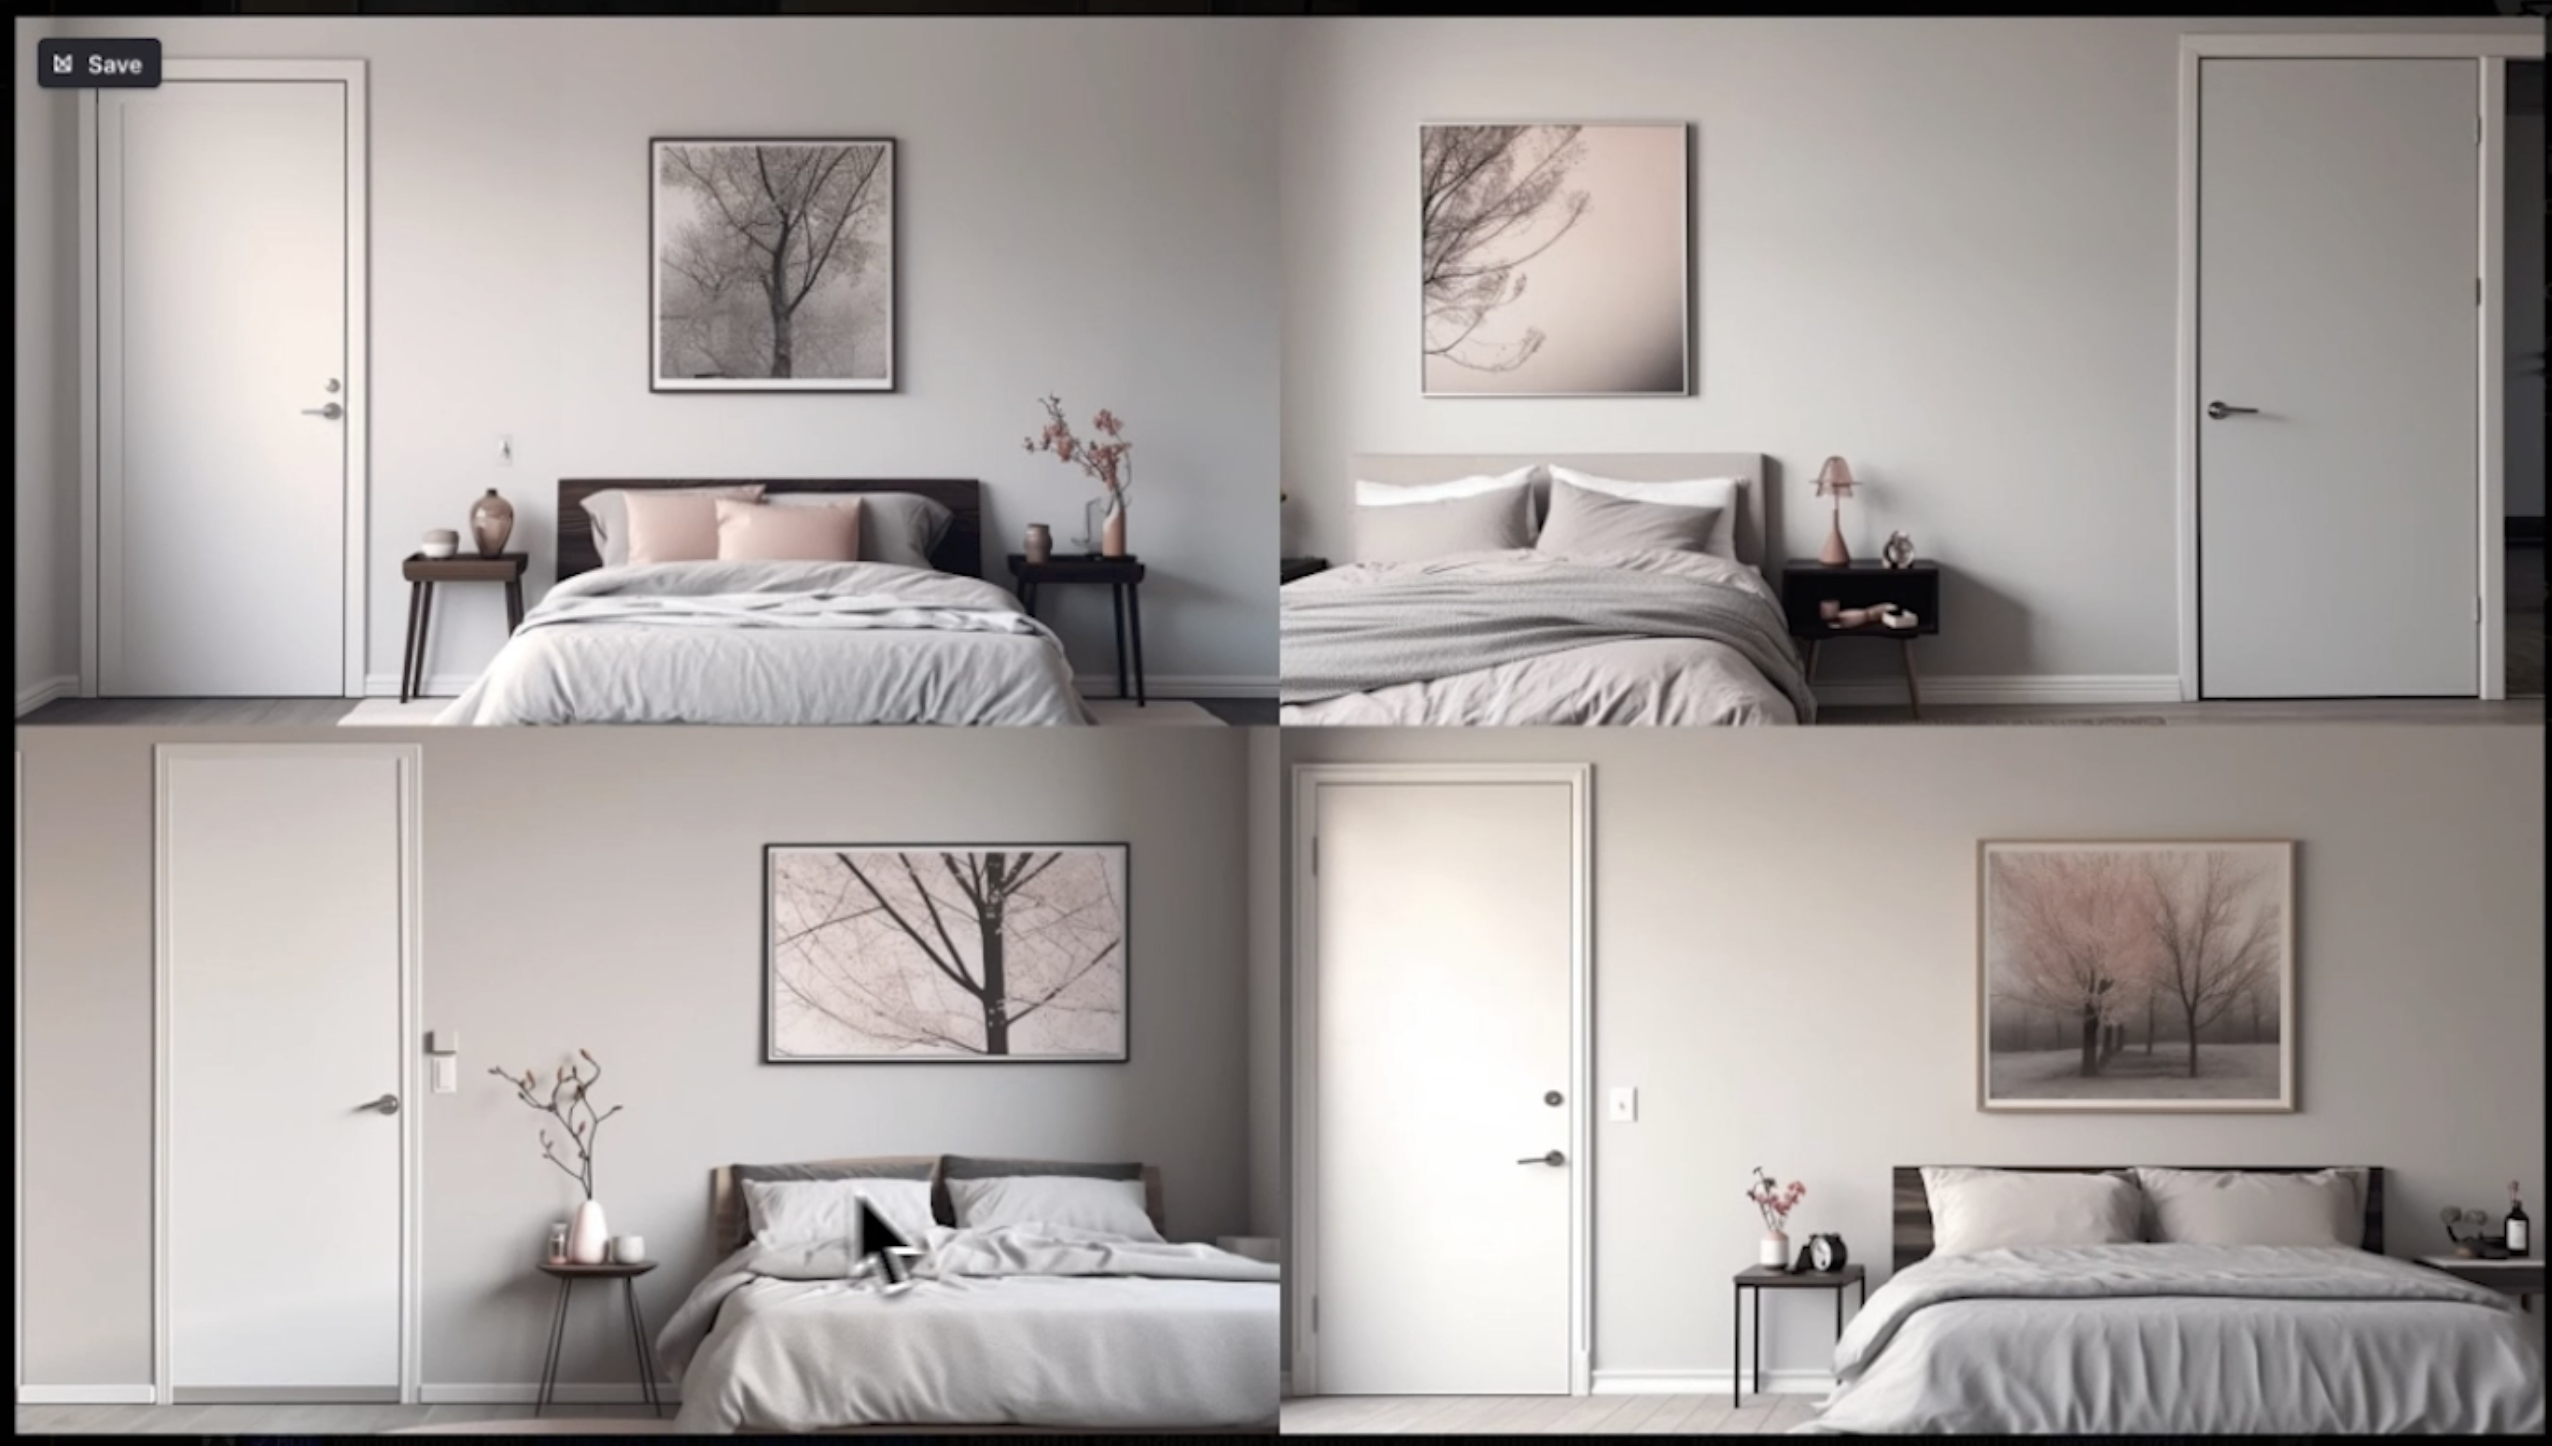
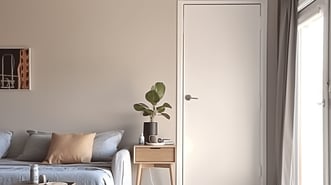
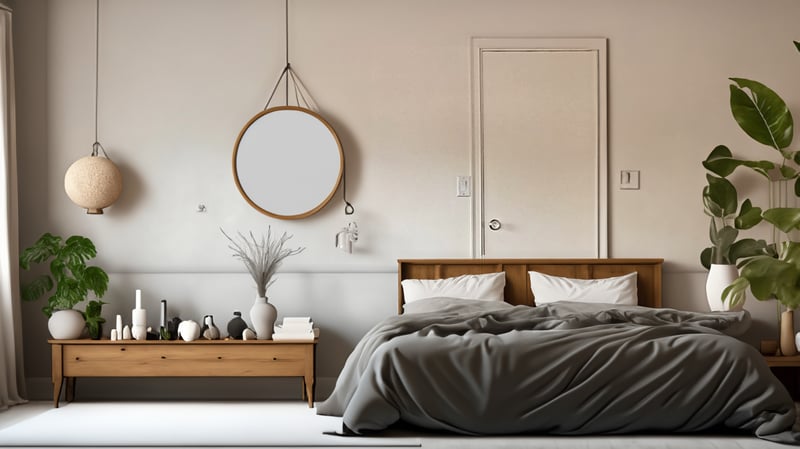
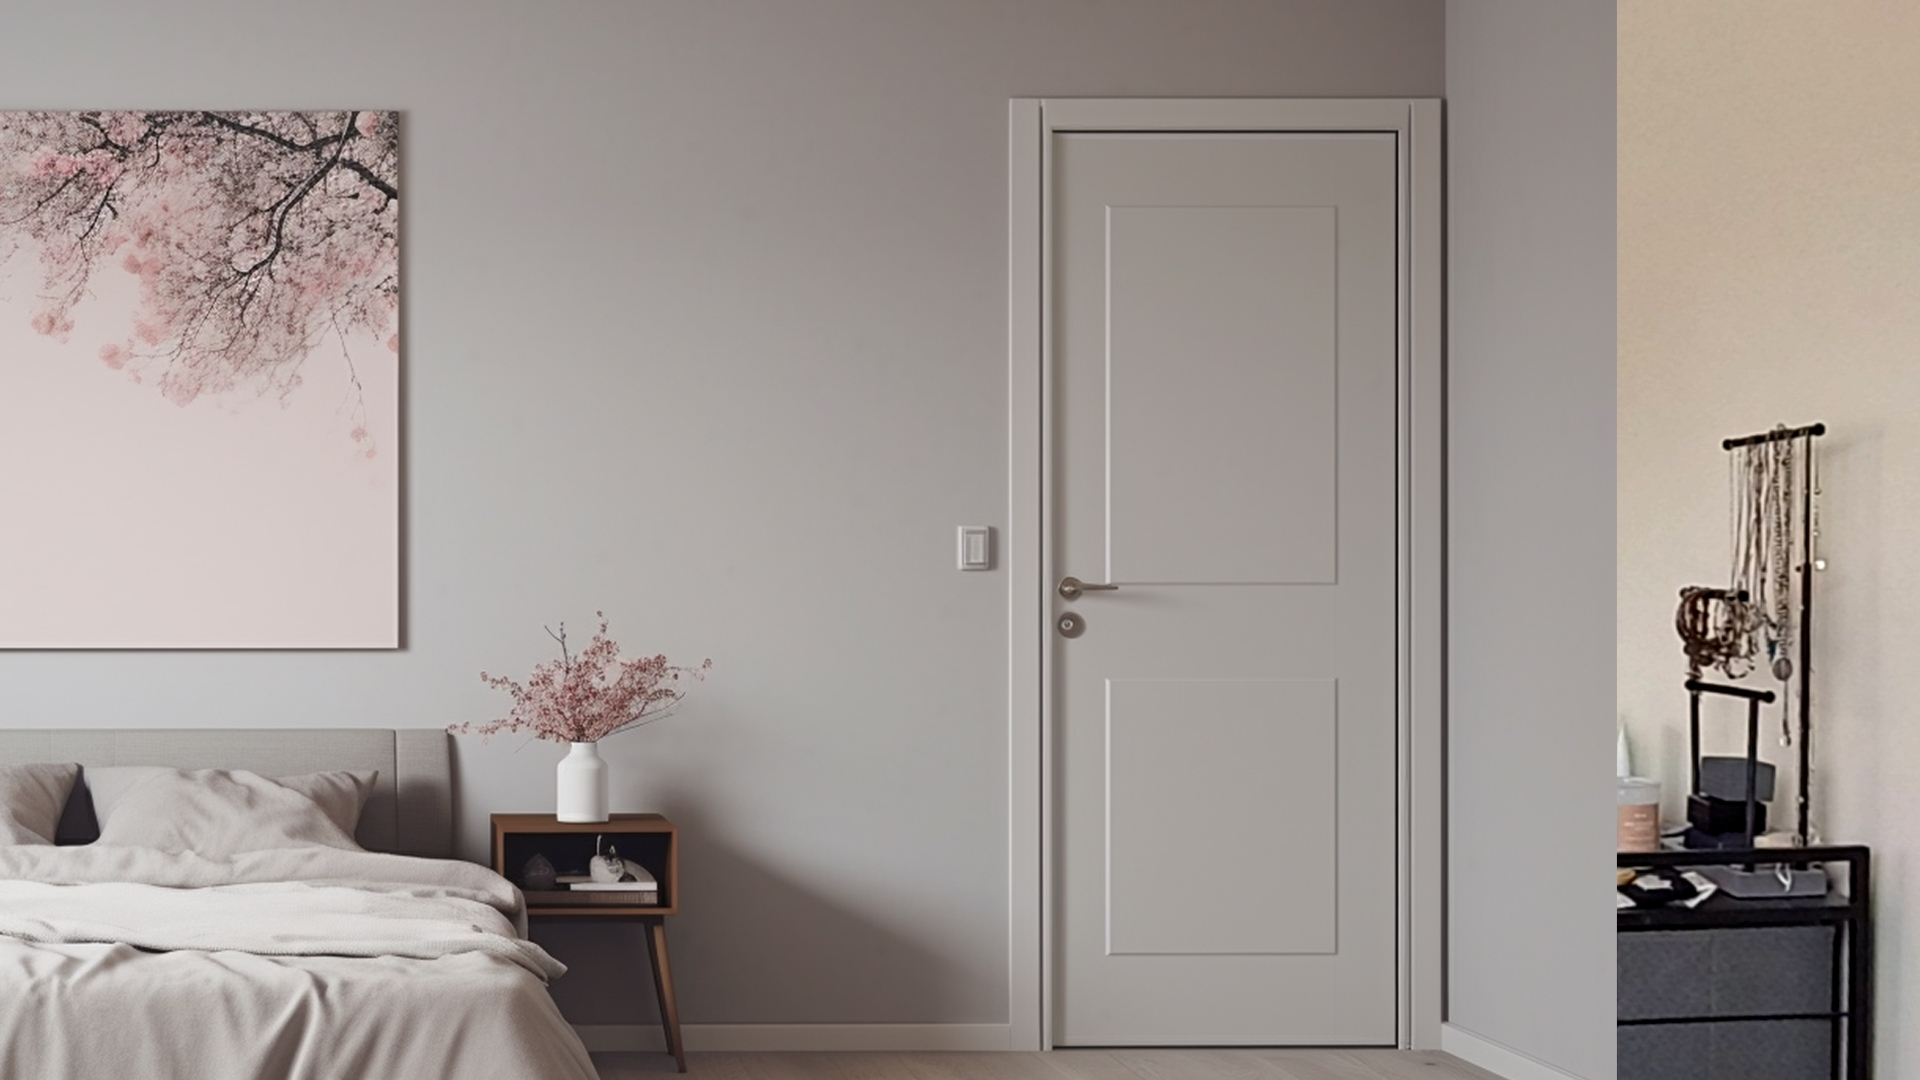
 Image generated with Midjourney, using the prompt: A beautiful, Scandinavian bedroom wall, minimalistic --ar 16:9
Right off the bat we get better results. It keeps the same design of the door, but the quality of the images is way better. I’d actually love if my apartment looked like this.
If you want more specific details, you can also ask another AI tool like Bing, to help you create an optimized post for Midjourney. You'll usually get more interesting results.
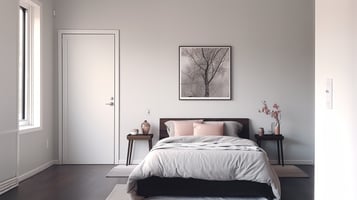
 Midjourney output with prompt: a wall of a bedroom that has a Scandinavian style. The wall is painted in a light gray color and has a large window that lets in natural light. The window has white curtains and a wooden frame. On the wall, there are some simple and elegant decorations, such as a round mirror, a framed poster, and a hanging plant. The wall also has a wooden shelf that holds some books, candles, and vases. The wall matches the rest of the bedroom, which has a cozy and minimalistic vibe. The floor is covered with a fluffy white rug and the bed has white bedding and pillows. There is also a wooden nightstand with a lamp and a clock on it. The bedroom looks inviting and relaxing --ar 16:9
A key tip is to match the original image's lighting direction. My room's light comes from the left, so I focus on results with left-side lighting too. Otherwise the mashup will look off.
Notice how in the above images the light is coming from different directions. If I were to place these in Zoom as a background, they'd look way off.
Since I'm starting out with a cropped rectangle of a door, I need to ensure that I'm generating enough surroundings to fully cover the background frame. For this, it is super helpful to use the "Zoom Out" option in Midjourney. Simply click it and you'll be able to generate more context around the initial frame.
.png?width=357&height=200&name=oestrada_a_beautiful_scandinavian_bedroom_wall_minimalistic_f0332649-4b65-4b66-87ac-38f6cd750df3%20(1).png) .
. 
Example using the Zoom Out feature to generate a wider version of the room. On the left, original generation, and on the right after using the Zoom Out modifier.
Overall I'm really happy with Midjourney's quality and possibilities. Even though the position of the door with respect to the other items in the room varies a lot, the quality of the generations is superior to what we've seen with Runway.
Testing Out Photoshop
Finally, let's dive into Photoshop. Photoshop is a powerful software that lets you create and edit images with various tools.
Adobe recently introduced Generative AI to modify images only using text prompts. And you can combine it with Photoshop's traditional editing tools, it is an insane combo.
To begin, I utilize the Generative Expand feature. Here's how to get started:
- Select the crop tool
- Expand the boundaries to the size you'd like
- Write a prompt (optional)
- Click Generate
What I like the most is that it gives you 4 different options, with a history record. You can regenerate or modify the prompt as needed, and always come back to your previous generations.
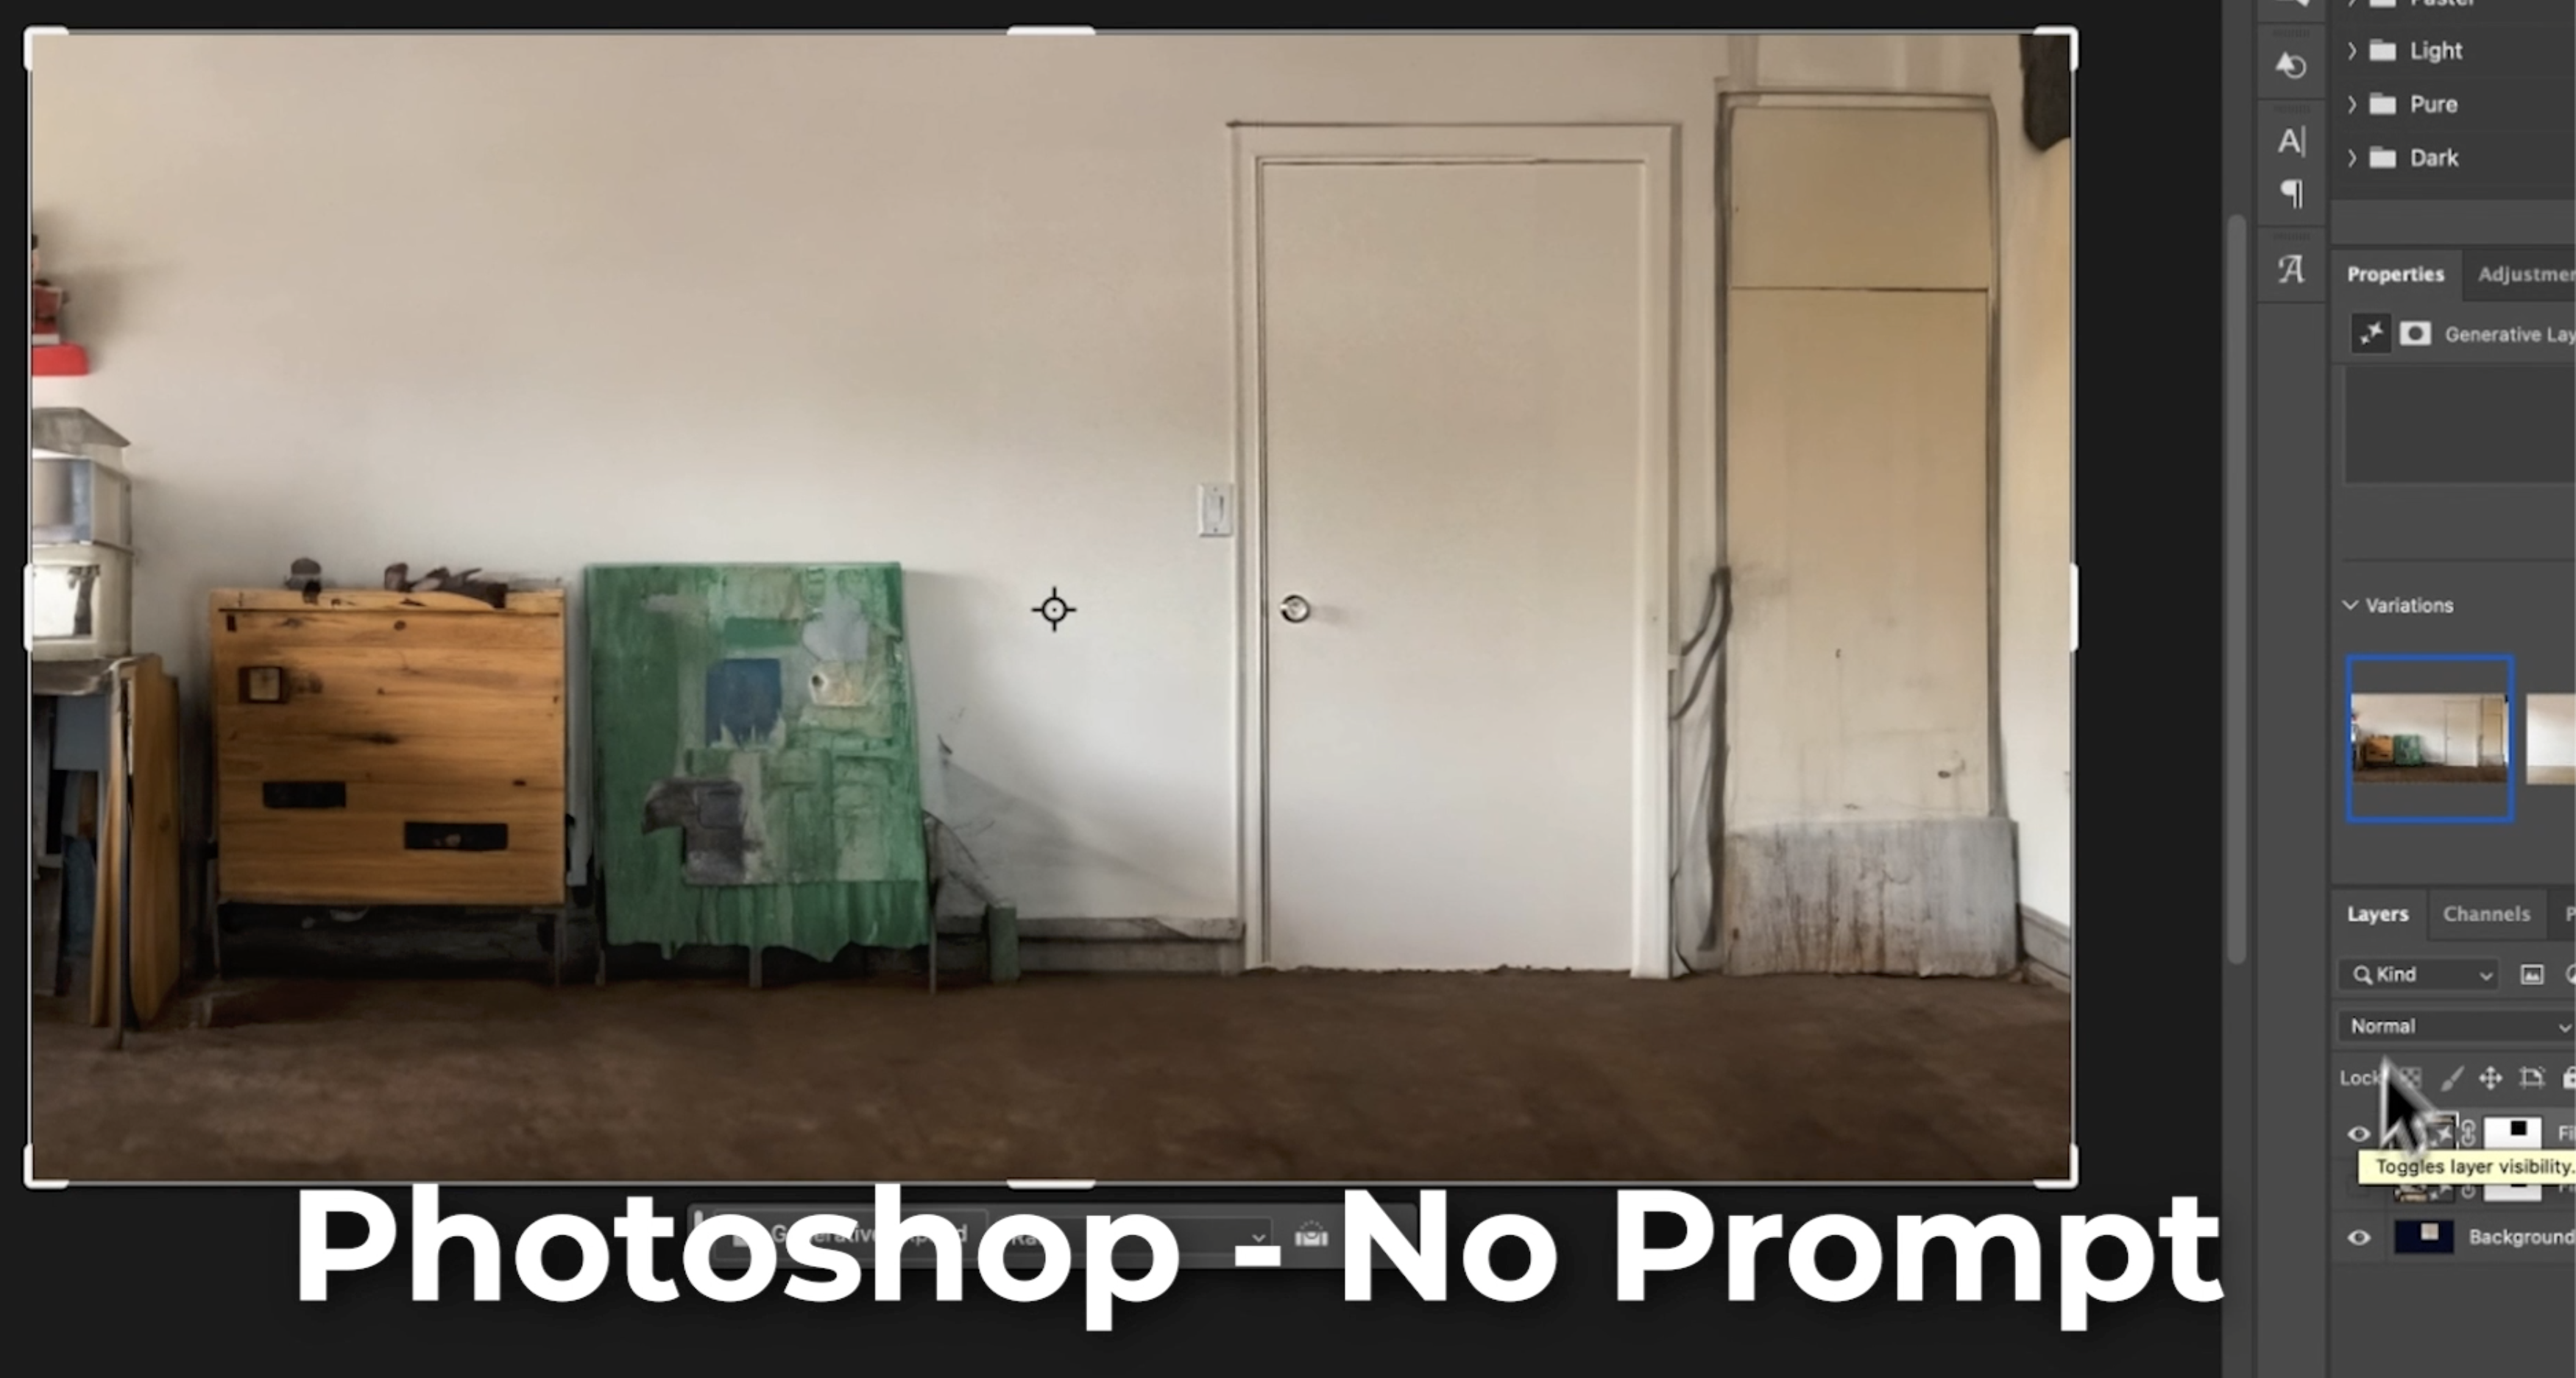 Initial results using Photoshop Generative Expand, without giving it a prompt.
However, the initial results were not very creative or appealing. The new background looks very rough and sketchy.
So I decide to ask Bing for an optimized prompt that depicts a beautiful space. Here are the results:
 Photoshop Generative Expand, prompt: Fill the image with a light gray wall. Add some decorations on the wall, such as a round mirror, a framed poster, and a hanging plant. Add a wooden shelf with some books, candles, and vases. Match the style of the wall with the rest of the bedroom, which has a cozy and minimalistic vibe. Make the bedroom look inviting and relaxing.
This is looking way better.
However, I'm faced with an issue - furniture keeps getting generated right over the door area where I'll be sitting. This will make the Zoom background seem very unnatural.
After many iterations, I end up with a clean background with the door. This is looking really nice, although the quality is not on par as with Midjourney.
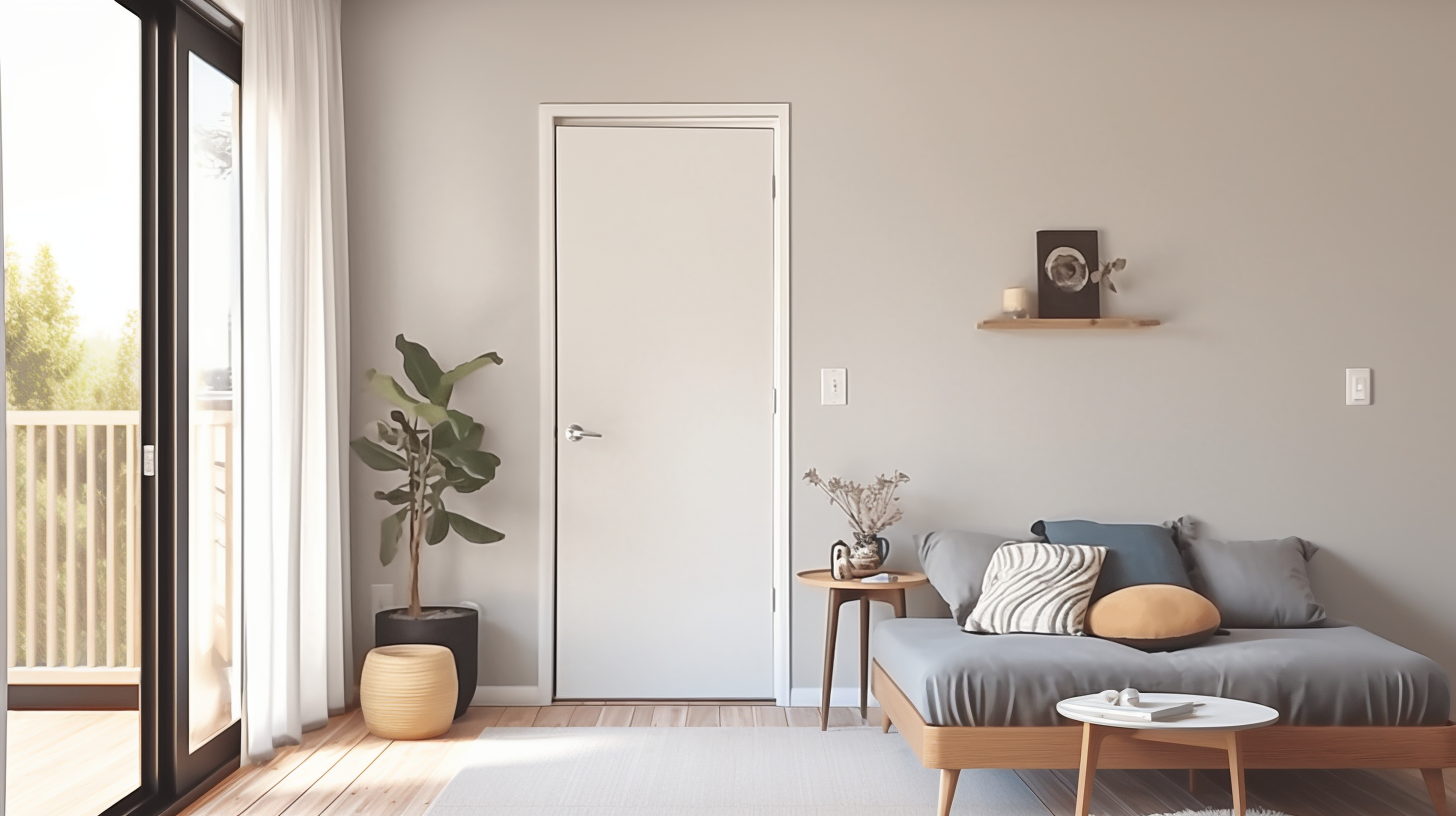
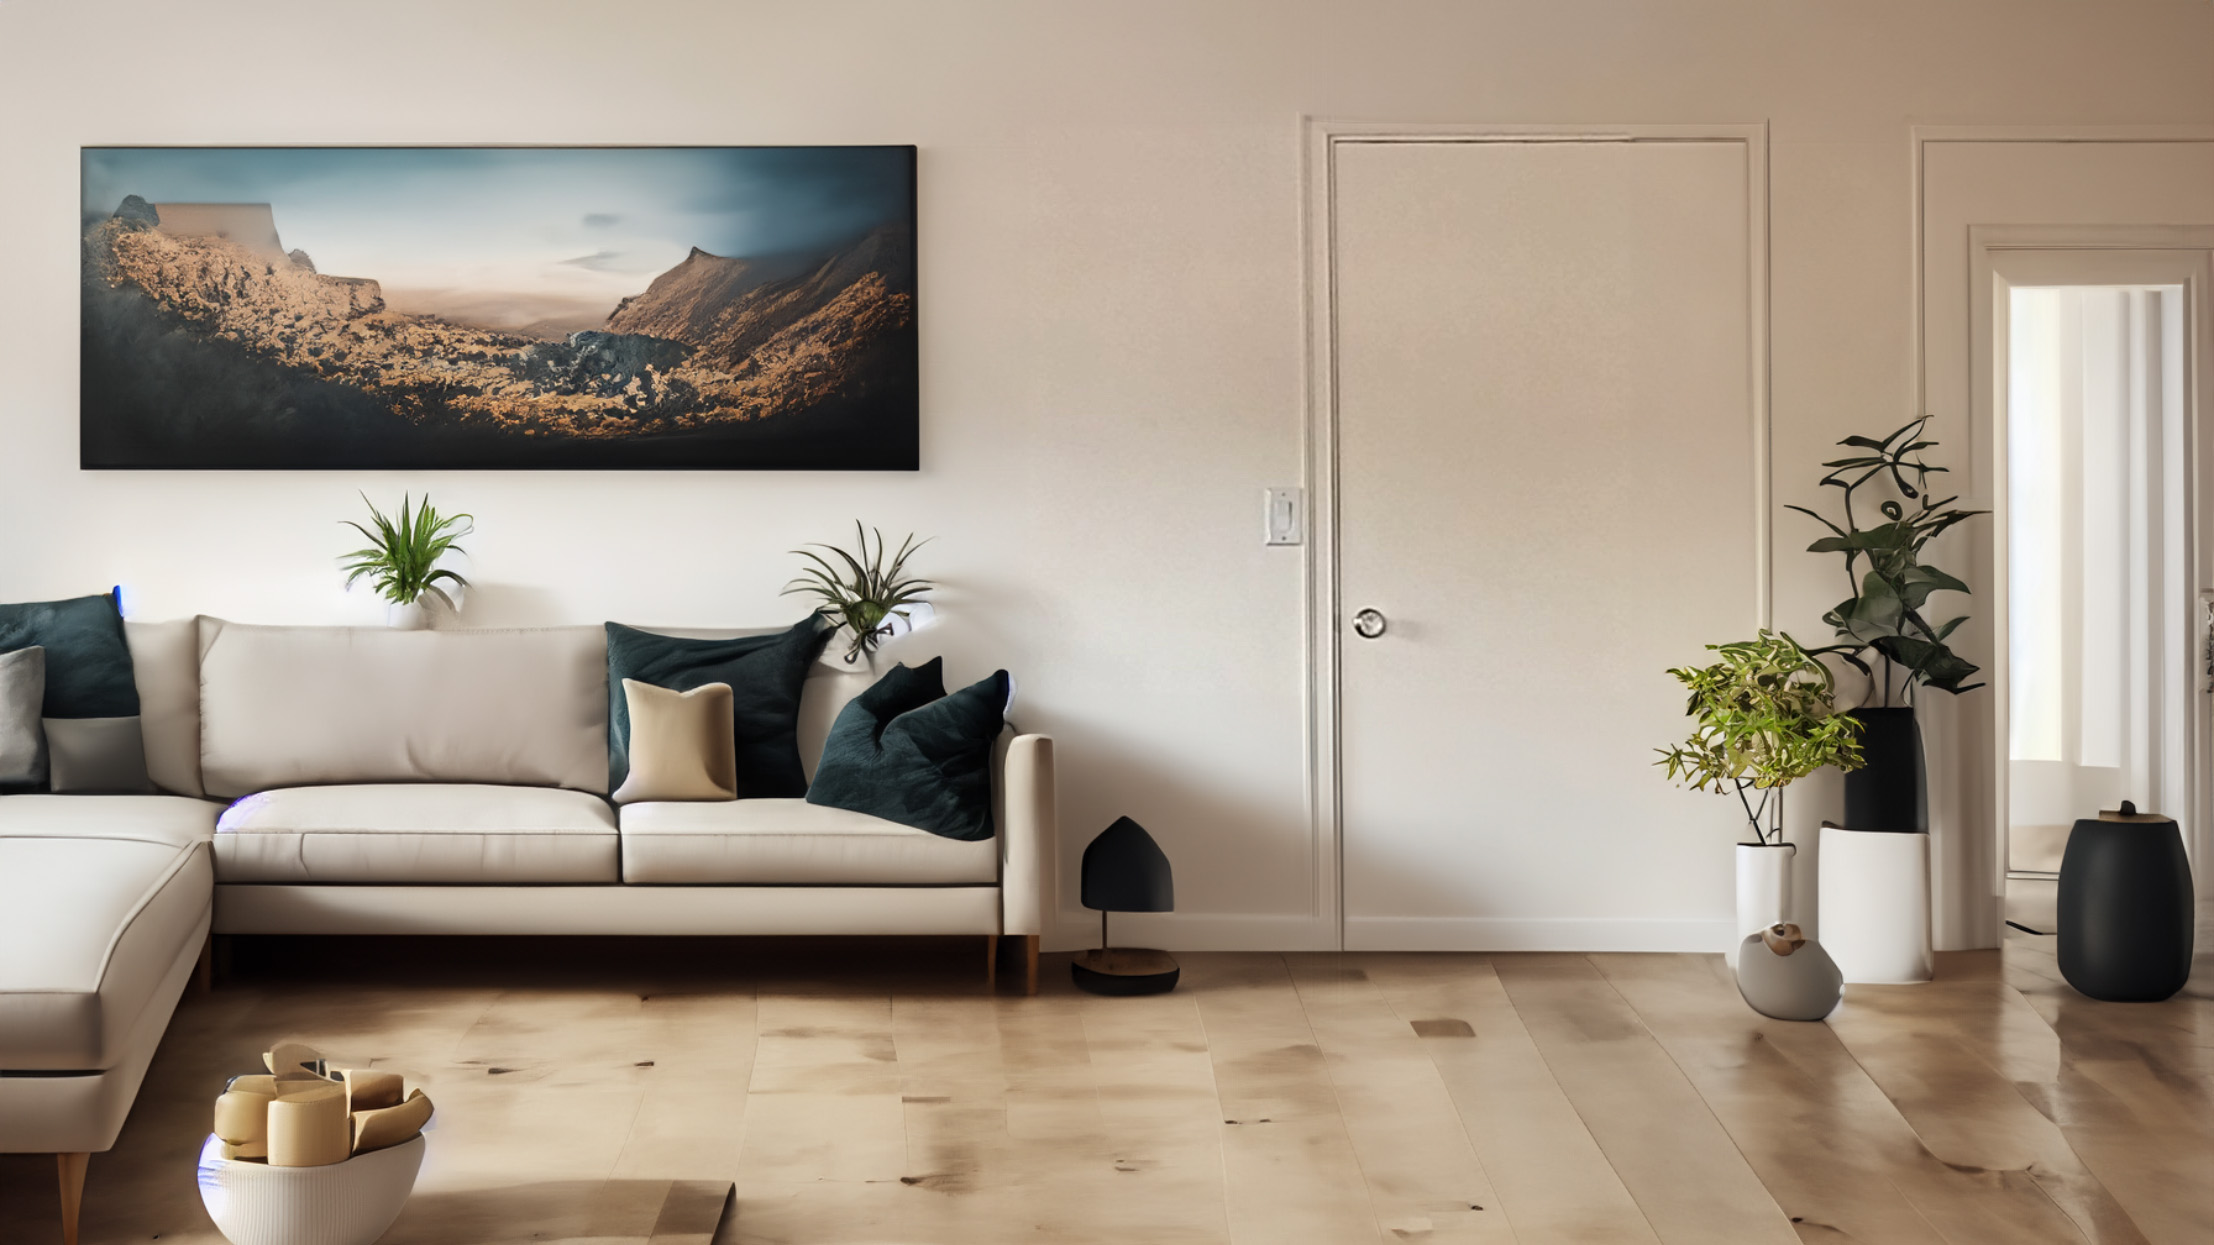 Photoshop Generative Expand, prompt: an architecture shot of a scandinavian living room, a left side sectional couch, a clear door on the right, and few paintings in the wall.
Photoshop's real advantage is combining AI generation with manual editing tools. I can fine-tune elements in a generated background easily, making it the best tool for customizing the outputs.
And they're improving the AI model rapidly.
Putting It All Together
The final step is aligning the generated backgrounds to the original one. As we will replace them in Zoom, we want them to match the perspective of the original background.
The results from Runway's Expand Image and Photoshop matched perfectly, since we specified the resolution and aspect ratio we wanted.
However, Midjourney's results need a bit more adjustment. Even when using the Zoom Out feature, Midjourney didn't generate enough content to fill the frame, so I had to use Photoshop's Generative Expand once again to fill in the gaps.
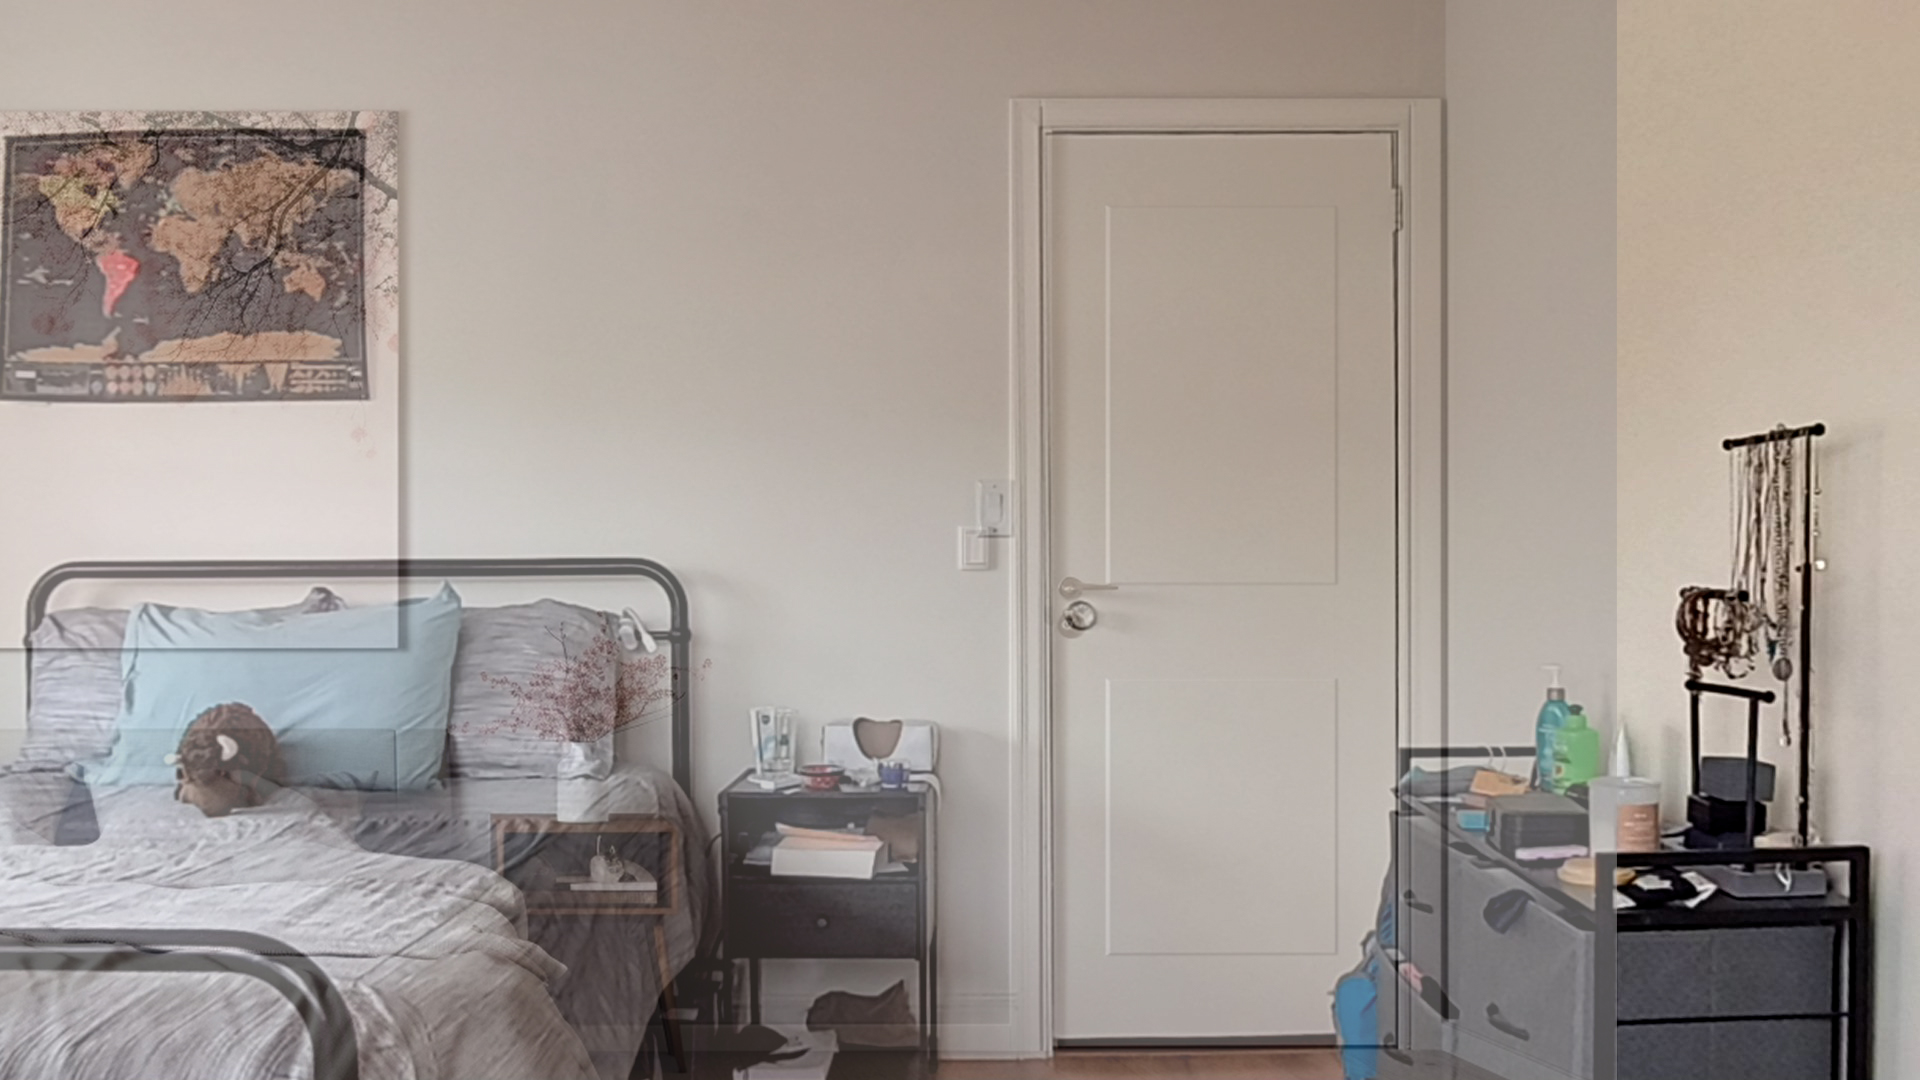 Midjourney generated image aligned to the original background, with opacity of 50%. Although the doors are aligned, the Midjourney image lacks pixels to fill out the right side of the image.
I also had to adjust colors and lighting so the new backgrounds looks natural.
Since Midjourney creates images from scratch, the lighting is quite different from my room's - so I need to compensate for that when compositing.
 Midjourney image aligned over the original background. Notice how the walls in the generated image are darker and less orange than the original background (on the right). This needs to be compensated for in Photoshop.
And we're done! The last step is to bring all of these aligned images into Zoom.
Then, we replace our background using the "Virtual Background" feature, and see which tool gives us the most natural looking images.
Here's all the screen captures using our images as virtual backgrounds! Use the lateral arrows to browse.
Which one you like the most?


This is my take: In terms of quality, Midjourney was a clear winner. It generated clean, beautiful looking images. However, Photoshop proved to be more intuitive, easier to use and way more customizable than the other tools. This makes it the best one to integrate into our creative workflows.
While this is the case for today, these tools are still evolving quickly - I'm excited to see where they take us and to keep experimenting!
I hope this breakdown gives you ideas for using AI tools in a creative way, and inspires you to try them out for yourself. Let me know in the comments if you have any questions!
Key Takeaways
-
Inpainting is a technique to modify parts of an image, either with a scientific or creative goal.
-
RunwayML is easy to use but lacks quality and reliability.
-
Midjourney generates the highest quality and most realistic results.
-
Photoshop combines AI generation with manual editing for maximum control.
-
It's important to match the lighting direction and perspective when compositing the AI backgrounds.
-
This is still an emerging technology - expect rapid improvements ahead.
Try It Yourself
Want to give your Zoom background an instant upgrade? Here are some tips to guide your own AI experiments:
-
Capture a simple backdrop image without distracting objects
-
Start with plain prompts and iterate until you get something appealing
-
Focus on prompts that match the context, lighting and angle
-
Don't be afraid to manually tweak your favorites in editing software
-
Composite the final image carefully for a seamless integration
-
Have fun and let your creativity run wild! The possibilities are endless
Generative AI is an exciting new frontier. With some practice, you can create virtual spaces that look convincingly real while adding some personality and flair.
Whether it's creating a Zoom background or some ideas to redecorate your room, I encourage you to give it a shot!
Do you have a favorite AI image tool? Let me know!
Comments